Team associated nomad db - 8
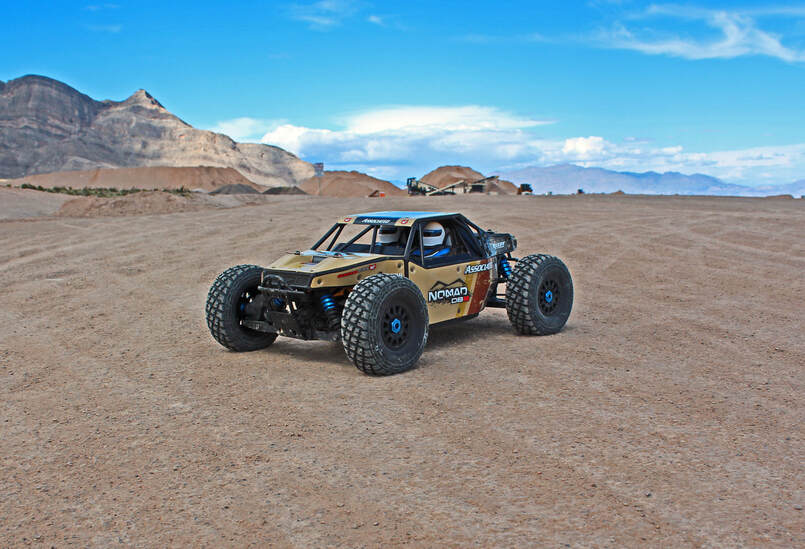 Nomad DB-8 Desert Racing Machine
As the 1/8th scale Nomad Desert Buggy (DB-8) came coasting into the pits after draining the last battery pack remaining, I felt at that point there really wasn’t anything left for me to consider about this desert buggy.
It had been a long seven-month testing schedule comprised of nearly 100 different testing sessions and almost 300 battery packs through the now well-worn desert buggy.
While placing the Nomad DB-8 on the tailgate of the truck and unclipping the body, I could feel the heat radiating from the entire vehicle. It was another hot 95 degree summer morning at our outdoor desert racing course, and the battery felt like a Hot Pocket as I unhooked it from the connector. I powered up one of the small portable fans and perched it on the rear bumper, blowing air across the motor and ESC.
Worn, scratched, and running on its second set of tires, I felt the Nomad had shown every bit of performance it was capable of. That final battery pack brought an end to our testing schedule; this desert buggy held no more secrets. I admired the Nomad and it had come to hold the “top spot” in my RC collection.
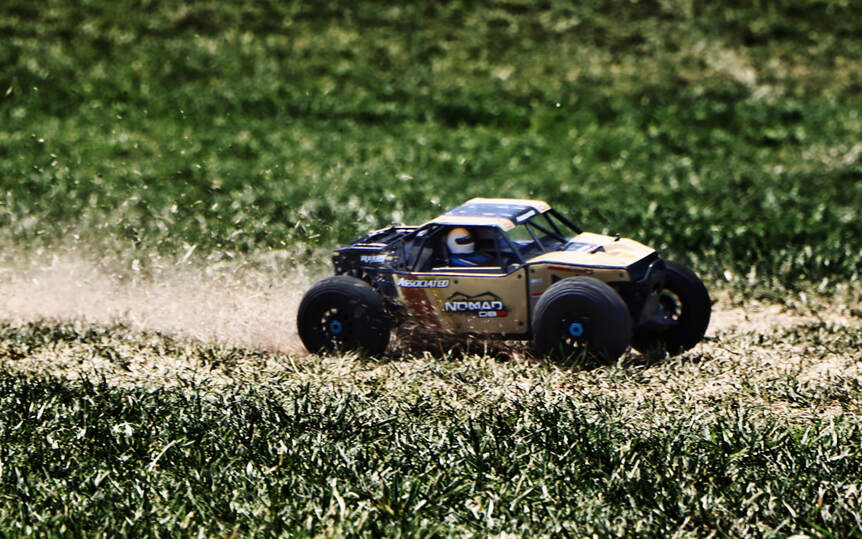 Nomad DB-8 ripping through the short grass.
For seven months I pushed the Nomad relentlessly over a myriad of terrains, with the testing schedule kicking off at the tail end of our mild winter and coming to a close during record breaking summer temperatures.
The following article is long and detailed look at the Nomad DB-8 from Team Associated.
It’s my hope that the following information will leave you with a complete and solid understanding of what the Nomad has to offer, clearly defining its strengths and its weaknesses.
But before we can talk about what it can do, let’s talk about what it is.
What is the Nomad DB-8?
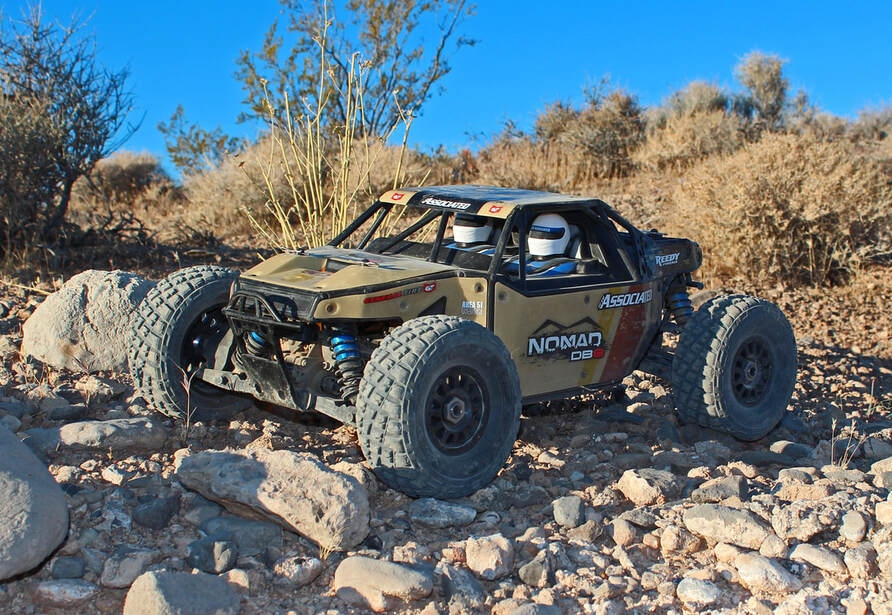 Nomad DB-8's Natural Environment
Released in June of 2017, the Nomad DB-8 is a ready-to-run ( RTR ) 1/8th scale, four-wheel drive off-road desert buggy from Team Associated.
Based on a blend of parts from the RC8.2 Buggy and Truggy line of vehicles, the Nomad features a long-travel independent suspension, aluminum chassis, unique body and roll cage, and large off-road tires.
Designed to run 4s lipo batteries, the Nomad is a fast and robust desert machine.
To handle the off-road rocks and bumps, the Nomad uses aluminum 16mm coil-over shocks which come with spacers (pre-load inserts) to adjust ride height. The open-wheel design allows for the use of large off-road tires and helps keep debris out from the inside of the buggy.
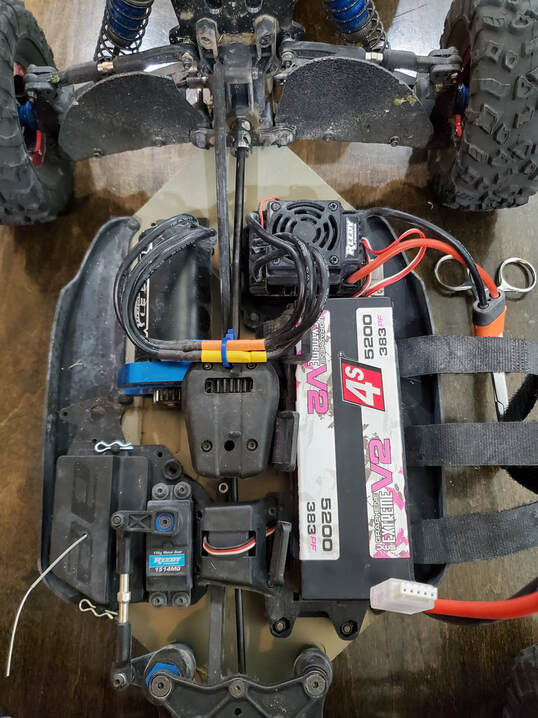
The Nomad’s wide aluminum chassis features an organized and open layout with the major electrical components evenly spaced for balance and accessibility. Unlike many brands which shoehorn-in the components, the Nomad’s wide 1/8th scale chassis places the servo and motor on the right side of the drivetrain and the battery and ESC on the left side. Wisely, the ESC is placed behind the battery at the rear of the chassis, preventing it from filling with dirt and debris kicked up by the front tires.
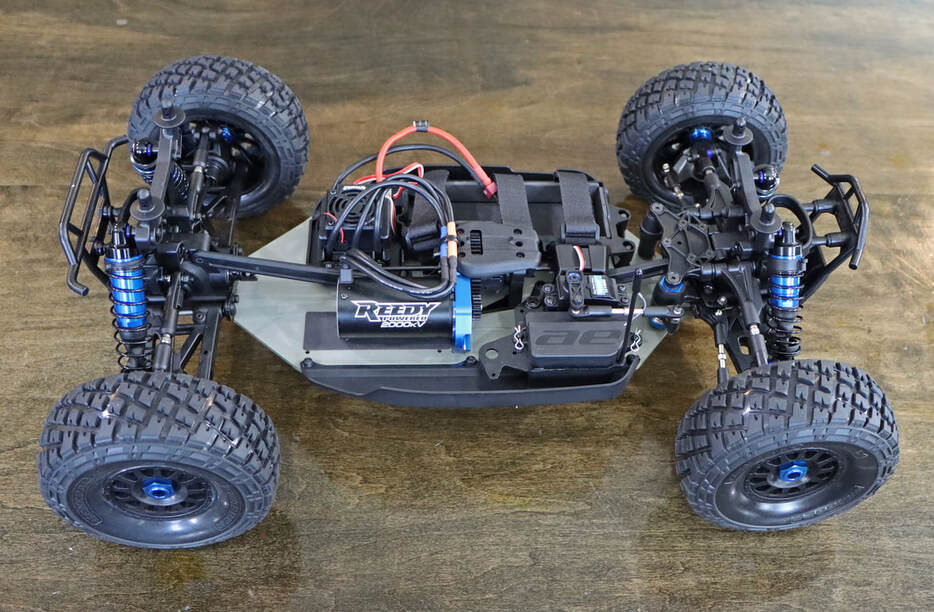 Nomad DB-8's excellent chassis layout.
This smart layout leaves plenty of room around the motor and ESC for passive cooling, as well as making pinion changes and differential servicing easy.
Another benefit to this open layout is that you can visually check the driveshaft and steering linkage conditions, easily spotting any damage or wear to the drivetrain.
With the open space inside the chassis, it’s also less likely to have pieces of gravel or rock to become wedged into a bad spot and cause damage.
Most rocks and debris kicked up into the chassis tend to vibrate to the rear and fall out the back or drop down through the clearance hole underneath the spur gear. Anything stuck in the chassis is easy to spot and remove.
The front and rear A-arms are massive, steering linkage robust, and the adjustable camber links are solidly built. You can see the RC8.2 racing buggy pedigree in the Nomad with many of the parts being the same between the two buggies. While not as radical in tuning options as a modern racing buggy, there are still plenty of adjustments for suspension setup.
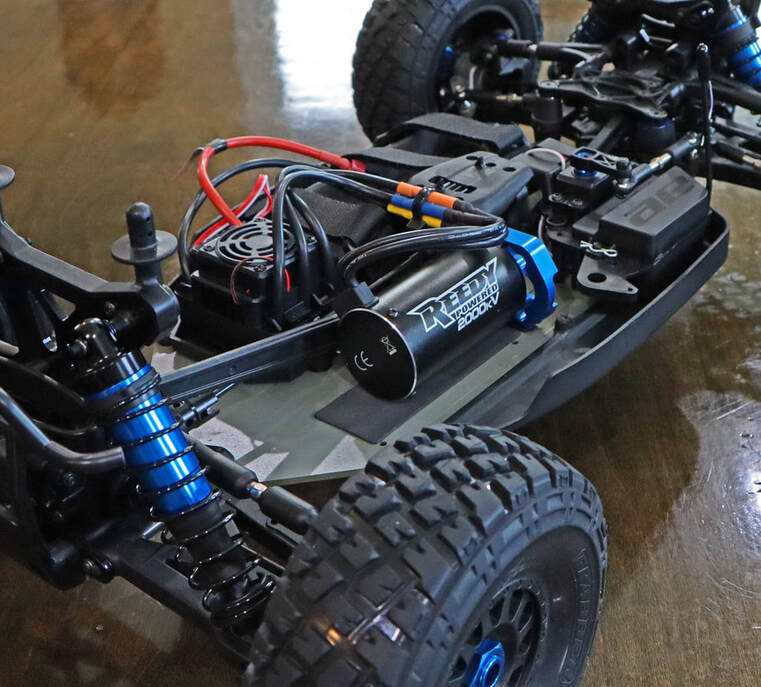 Nomad DB-8 Details
Transferring power from the 2000 kV Reedy motor are three easily accessible metal-geared differential housing. The main driveshafts coming off the center differential are standard dog bones with phased 3 x 12mm pins.
The rear driveshafts coming from the differential to the hubs are of the same design, but the front driveshafts turning the wheels use a dog bone and CVA combination.
The front and rear differentials use a 46/10 spiral cut gear and pinion, but at some point the replacement became a 46/10 straight cut gear and pinion. The center differential uses a 46 tooth plastic spur gear. The manual states that 20k differential oil is used in all three differentials.
The plastic roll cage is well constructed and features a series of body panels with colored stickers and graphics. Two drivers are in the cockpit and have some detail to their helmets and instrument panels. Securing the body and cage to the chassis are four large R-clips.
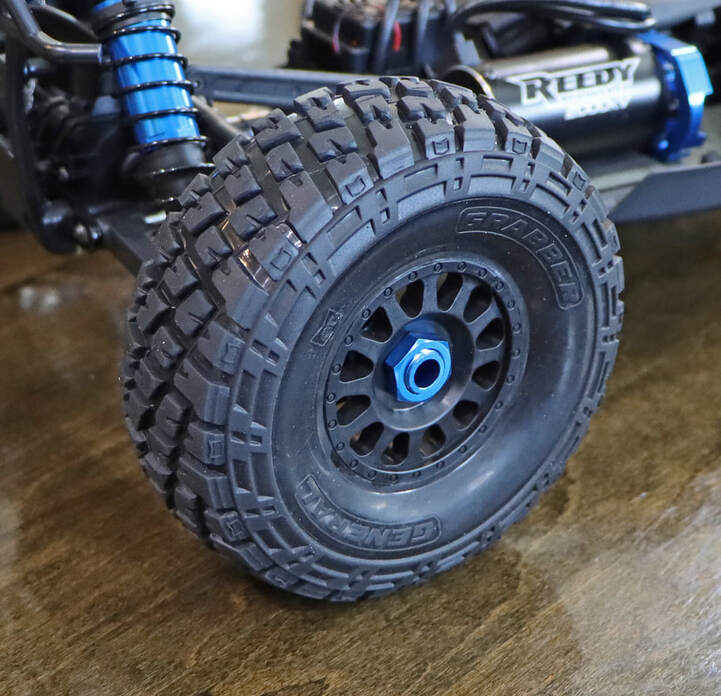 General Tire's Grabber Off-Road Buggy Tire
Planting the Nomad to the ground is a set of soft General Tire (GT) Grabber tires mounted on 2.2 / 3.0” plastic wheels. The tread pattern is scale in appearance, looking to be a mildly aggressive off-road type, but smooth enough to run at high speed.
The cleats are wide and offer a good contact patch with the ground. Looking closer at the cleats, you can see that they are slightly rounded on the edges with a finishing bead. Running down the sides of the tires are a blended series of cleats, beveled to transition smoothly into the tire’s sidewall.
It’s interesting to note that General Tire’s license for RC tires seems to be exclusive with Associated Electronics. There are no other RC companies that I’m aware of using the General Tire product, and only a few tires in production for Associated Electronics.
Inside the tire is a soft, single-stage foam suitable for most off-road conditions. After inspecting all four tires, I did not find any flaws in the tire mounting glue.
Like many 1/8th scale buggies, the plastic wheel uses a 17mm hex and 12.5mm pass-through hole.
There is also a conservative 8mm positive offset to the wheel. Standing 138mm tall and 52mm wide, the wheel and tire combination is similar to a truggy tire in height, thus lifting the chassis bottom higher off the ground than would a traditional 1/8th scale buggy tire.
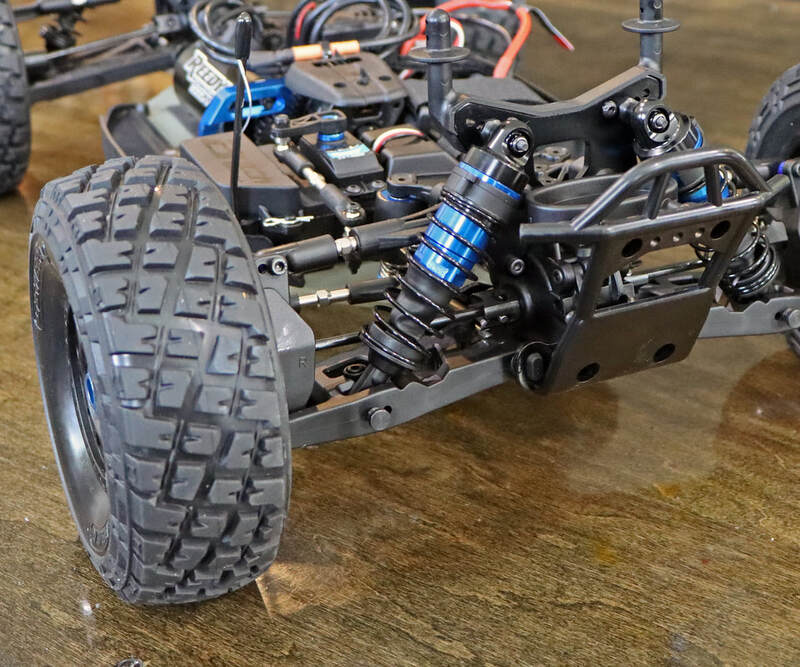 Nomad's robust suspension setup from the RC8.2 racing buggy line.
Unlike wide truggy wheels, the Nomad uses a much narrower wheel and tire setup. Combined with the extended wheel hub, this creates a wide wheel base with plenty of steering travel for tight corners on technical terrain, but a lower rotational mass to overcome when accelerating.
The narrower wheel and 8mm positive offset moved the center contact patch inside the hub, giving a crisp feel to the handling and minimal scrubbing affect in tight corners.
Powering the Nomad is a Reedy 1515-SL 2000 kV brushless motor and SC1000-BL 1:8 ESC. This is a nice setup for any RTR and provides snappy acceleration on 4s with the OEM 15 tooth Mod 1 pinion gear. The power delivery is smooth for a non-sensored motor.
Keeping the Nomad pointed in the right direction is a Reedy 1514 MG digital servo with a 25 tooth spline and 15.0 kg-cm on 7.4 volts. It’s nothing spectacular, a bit on the slow side, but the mounting is solid and offers plenty of power to steer the wheels.
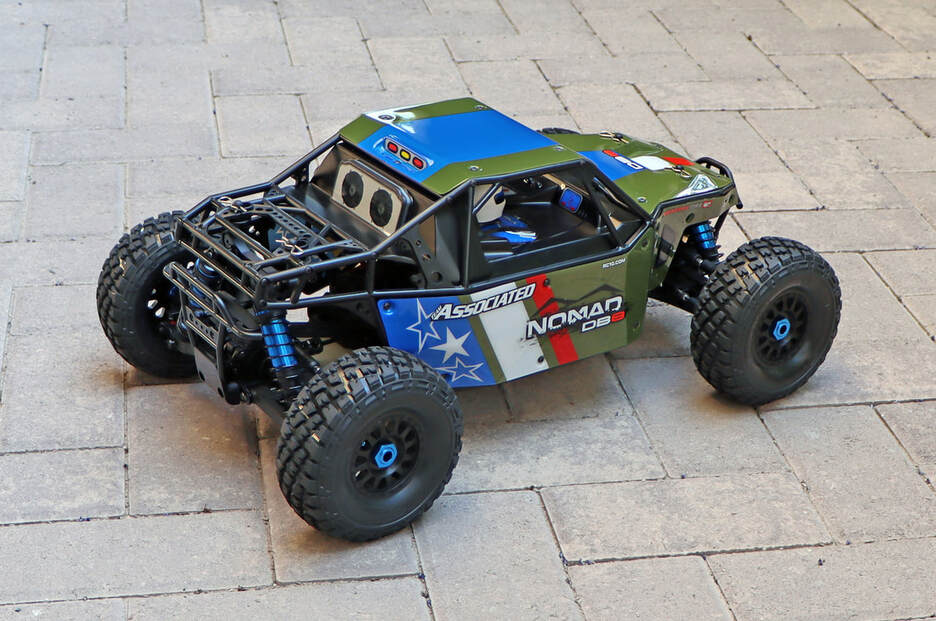 Nomad DB-8 Green Color Scheme
There are two color options for the Nomad; a desert tan scheme and a dark green scheme.
The green shows off bolder colors, but I think the desert tan matches better with the black of the wheels and tires.
The Nomad comes standard with a XP-120 transmitter, but there is also a package version which includes a 4s lipo battery and charger.
The Nomad alone retails around $500 and the package version with charger and lipo battery is around $600.
Like most RTR’s, it comes fully assembled and ready to roll. In the box with the Nomad are a few basic tools, shock body spacers to adjust ride height, an excellent instruction manual, and transmitter. The ESC comes wired for T-Plug battery connectors. I use IC5 for all of my batteries, so right away I clipped the battery connector and soldered on a new IC5 plug.
What is the Nomad’s Role?
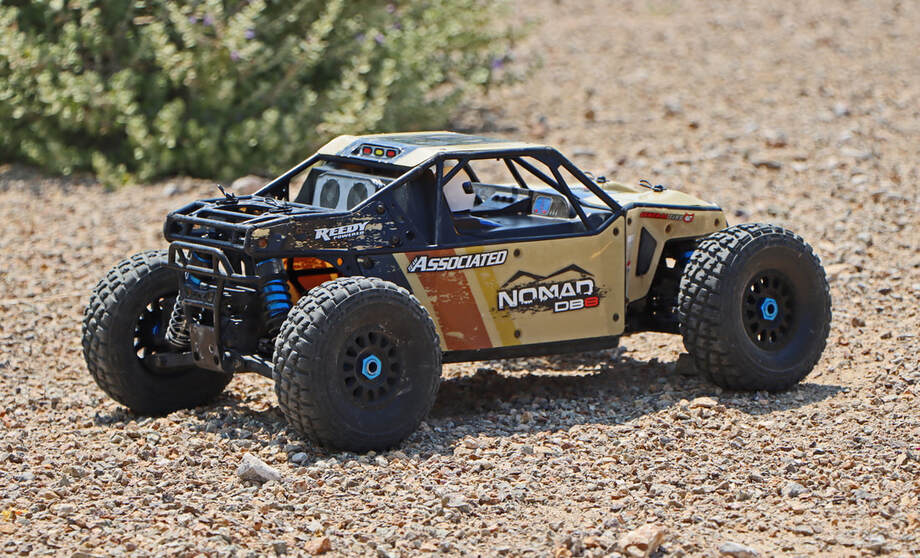 Nomad DB-8 is perfectly suited for desert conditions.
The Nomad, like most desert buggies, is one of those platforms which does just about everything pretty well, but it’s not a specialist in any particular field.
I’ve always felt that desert buggies were an under represented section of the market, but there are some understandable reasons for this situation.
To start, outside of the unfortunately small but interesting niche of rock racing, there are no real competitive racing events for desert buggies.
Most modern desert buggies have some design elements derived from U4RC Rock Racing, but they are not as purely focused on rock racing such as the Losi Rock Rey or Axial Bomber. Unlike the solid rear axles found on the aforementioned platforms, the Nomad’s fully independent suspension is from the 1/8th scale buggy racing side, giving it excellent stability and control at higher speeds.
Unfortunately this comes at a cost on large rock and slower technical terrain. While it does sit higher than a 1/8th scale track buggy, it does not have the ample amount of ground clearance a dedicated rock racer. Smashing thought large technical rock, the Nomad’s chassis is going to take a beating.
During its initial release, many drivers looked to use the Nomad for rock racing, but the wide chassis and shorter suspension travel (when compared to a solid-rear axle platform) didn’t perform as well on the large rockier sections of the tracks. Drivers were getting high-centered in some of the more tricky rock sections, making for slower lap times.
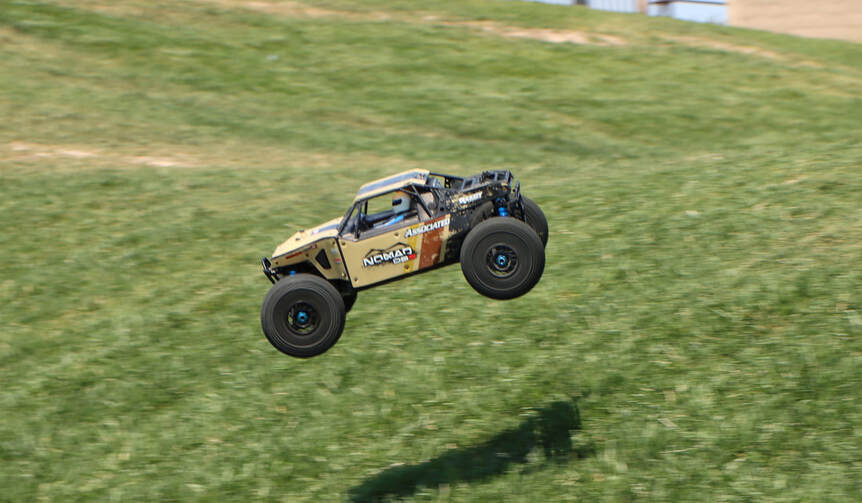 Nomad DB-8 getting some air at the local park.
Keep in mind that while the Nomad uses 17mm hex hubs like most 1/8 buggies, popular wheels like Vanquish 2.2 wheels are designed for 12mm hubs and will not work on the Nomad.
Unless you’re willing to spend nearly $250 for custom aluminum beadlock wheels with 17mm hubs from a company like Motoworx, you’re stuck running plastic wheels and glued tires. This is unfortunately because there are some excellent U4 racing tires out there on the market.
That said, out in open desert spaces, the Nomad easily devours dedicated rock racers with superior handling and a solid top-end speed of approximately 40 mph with the 15 tooth pinion gear. In anything but the chunkiest of technical terrain, the Nomad is going to have the advantage.
On the other side of the spectrum, the Nomad is too heavy and slow to keep up with any dedicated 1/8th scale track buggy. The suspension would need to be completely reworked and the body changed, and by then you might just as well get a proper 1/8th scale track buggy. Thus, you won’t see a Nomad on the track during the race, rules aside, in that it just wouldn’t be very much fun bringing up the rear every race.
I also do not consider the Nomad to be a true basher, like an ARRMA Kraton or Typhon. That’s not to say the Nomad couldn’t handle some pretty rough treatment, but it’s almost too composed and sedate for bashing. It doesn’t deliver the crazy level of speed common with bashers, nor does it feature demolition-derby styled front and rear bumpers. Some drivers comment that it jumps a bit nose heavy, making it unwieldy on ramp style jumps or at BMX parks.
It’s my opinion that the Nomad exists in a sweet spot right between a 1/8th scale racing buggy and a U4 Rock Racer, representing a very fine blend of those two racing elements. To speak to the Nomad’s versatility, little more is needed than a few different tire and pinion gear options to handle nearly any terrain you would want to drive in. The Nomad shines on common terrain; soccer fields, dirt lots, community parks, open desert spaces, and construction sites.
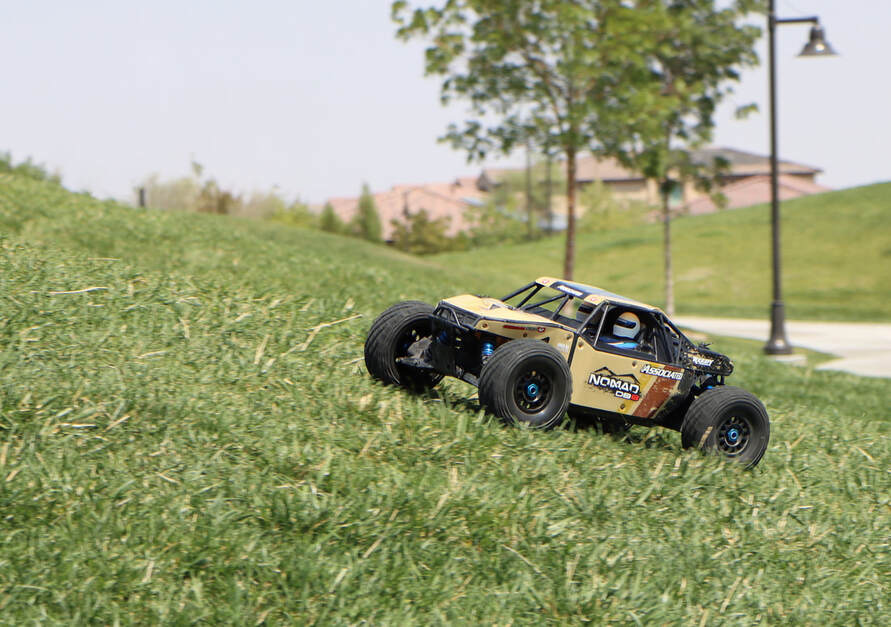 Nomad DB-8 making short work of this grassy hill.
This allows the Nomad owner to find a suitable driving area near their home, and accessibility is an important part of the purchasing equation. In my city, there is only one true racing track about an hour drive from my house and no U4 Rock Racing to speak of, but literally hundreds of enjoyable areas within a 30 minute drive which are perfect for the Nomad.
Local parks tend to offer some of the most driving fun to be had with these vehicles and many communities have great parks to pick from. A small stack of plastic cones, and just about any open space can become a temporary race track. The less groomed the better. I’m partial to the worn-out soccer fields with their lumpy, dead grass which create glorious rooster tails of debris and dirt fanning out the back of the Nomad during full-speed runs.
Construction sites are worth checking out for a weekend morning session, just as long as you walk the area before you start speeding around. Aside from obvious dangers such as open trenches or exposed rebar, you need to keep an eye out for large rocks hidden in the fill dirt most construction lots are covered in. Plowing into a large hidden rock at full speed will bring just about any driving session to an abrupt end.
Considering this, the Nomad can fill the role of a “run anywhere” off road buggy in a person’s RC collection. Sometimes keeping things simple is the best way to have fun.
First Run
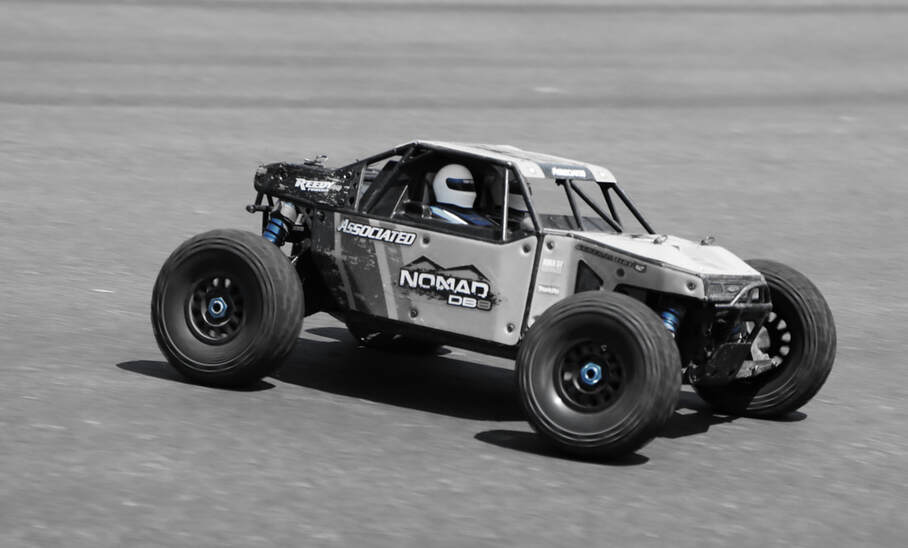 A little body roll from the Nomad DB-8.
After checking the 17mm wheel nuts and installing a charged 4s lipo battery, I headed out to the street for a quick test run and transmitter adjustment. Most RTR’s need a little adjustment to the steering for the vehicle to track straight.
Buzzing along the street and making a few low speed passes to adjust the steering on the transmitter, I gave it a bit more power to get a feel for the corning and acceleration.
Running around on the street out front, the Nomad was smooth and composed. The GT Grabber tires are soft and lean over a good amount when diving into the corners, lifting the inside wheel at the apex of the turn. Their rounded edge cleats and tight pattern give them a predictable feel on the asphalt.
This particular Nomad has a bit of positive camber in the rear wheels, so a little wrenching of the turnbuckles and the angle was adjusted to 2.0 degree negative camber. A few more laps around the street and the rear of the car felt more settled in the corners. The front was set almost neutral, so I added in 1.5 degrees of negative camber. I felt this would be a good starting point for testing.
The next thing to check was the shock fluid levels. Looking over the shocks, all four were properly filled to the top and was appeared to be a silicone oil in the 30 to 40 cst range. I wanted to specifically set up the shocks with TLR 45 cst oil in the front and 35 cst in the rear, and bleed them to have zero rebound. After draining the shocks and putting a bit of Noleen o-ring grease on the seals, I filled the shocks and worked the pistons to release any trapped air. The shocks use a bladder inside the shock cap, with two small weep holes on the side. This allows excess fluid to drain out when you tighten the cap after filling. I wouldn’t call this a venting hole because they are sitting on top of the thread form of the shock body and not further up behind the bladder.
A few more minutes to get the caps on and rebound set, and they were good to go.
I had kicked around the idea of pulling the three differentials and checking these over, but I opted to wait and inspect them after I got a number of testing sessions done. One of the aspects to a RTR is that indeed it’s actually ready to run. People shouldn’t need to pull differentials before their first outing with a new vehicle, yet I know it’s a common practice. For the time being, the Nomad’s differentials will be run “as is” from the factory.
Checking the rest of the Nomad over, everything else looked good and tight, and we were ready to go. The next morning would start the first testing session on grass, so batteries were charged and the equipment packed.
A Note on Photos
 Custom rock guards installed on the rear A-arms.
Before we get into the testing results, I wanted to make a quick note about some of the details you will see in the photos. Unlike most reviews were the vehicle is run once or twice and then a “verdict” is made, I’ve spent over 200 hours behind the controls of the Nomad, evaluating every aspect of the buggy.
Like any driver, I made small adjustments here and there to help the review along, such as rock guards, while others changes were done to get extra value out of testing runs by evaluating an aftermarket part to substitute an OEM part. The following text is a short explanation of these changes.
The first item of note are the rock guards I made and added to the Nomad. After a few sessions in the medium rock and gravel, there was some wear starting to show on the rear suspension arms. The shock springs were also gradually losing their paint, and small pieces of rock were getting lodged in between the hinge pins and rear differential outdrives. Rather than tracking down a set of RC8.2 mud guards, I cut a set out of 1.5mm plastic sheeting and attached them to the rear lower suspension arms. These greatly reduced the amount of wear on the lower a-arms and also reduced the number of rocks working their way into the rear suspension. You will see these rock guards in some of the photos in this review.
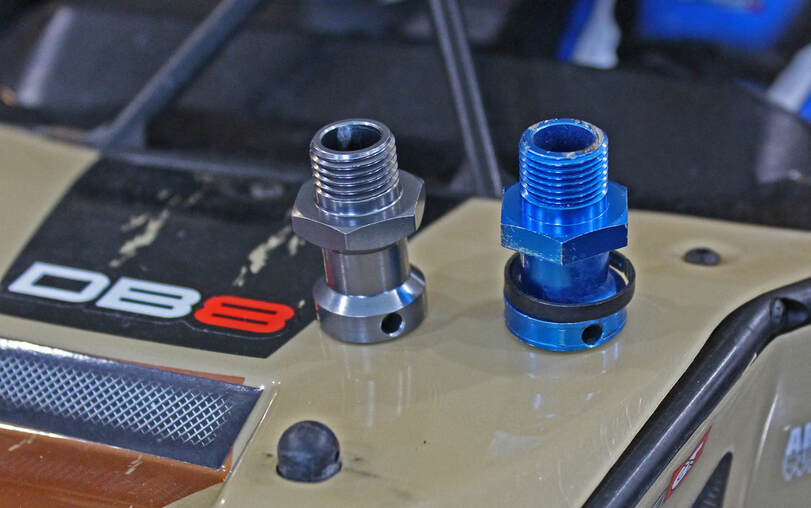 Aftermarket Hub (l) Compared to OEM Hub (r)
The next change are the use of aftermarket hubs on the Nomad during testing. While the Nomad evaluation was underway, I identified some spare parts which are hard to find, the extended hubs being one of them, but I was able to track down a few aftermarket options for the Nomad.
Knowing that I was going to be spending a lot of time testing the Nomad on different terrain, I decided to install these aftermarket hubs to see how they would hold up. These aftermarket hubs are dimensionally the same as the OEM hub, so it was mostly a matter of making sure the aluminum alloy would hold up to the abuse.
During the entire time of testing we experience no issues or problems with these hubs. I would change these back and forth from time to time with the OEM hubs, looking for a difference, but I could find none - other than the thread pitch.
For electronics, I changed out the receiver to a Spektrum unit, allowing me to use my DX5 – Pro transmitter. I have my other vehicles mapped to this transmitter, and I like the wider range of adjustments this unit offers.
Other than these items, I kept the Nomad as stock as possible to ensure we were evaluating exactly what the Team Associated RTR product had to offer.
Testing Overview
 Cleaned up after a long day of testing.
Each session for the Nomad started the same with quick visual check chassis, electronics, body, and tires. I plugged in a battery and made a few slow passes to check transmitter function, and then right into testing.
Depending on the temperature outside, I would take breaks every 10 minutes of run time, measuring motor, ESC, and battery temperatures.
If cooling was needed, I would run a series of small fans across the electronics and recheck temperatures after a few minutes. After every battery pack there was a 10 minute cool down break under the fans.
Once a testing session was finished, the Nomad’s body was rinsed off and dried, and the chassis blown out with the compressor and wiped down with a wet rag to remove any remaining dirt or dust. Any rocks or debris remaining were removed with small tools.
Every few weeks the hinge pins and hub bearings were pulled and cleaned. Bearings were cleaned in an ultrasonic cleaner, blown dry, and then re-greased with Timken bearing grease.
After the cleaning process, I closely inspected the Nomad for any damaged parts or loose screws, making repairs or performing additional maintenance when necessary. During testing I did have a few items fail and those are discussed in detail later in this review.
Performance Testing
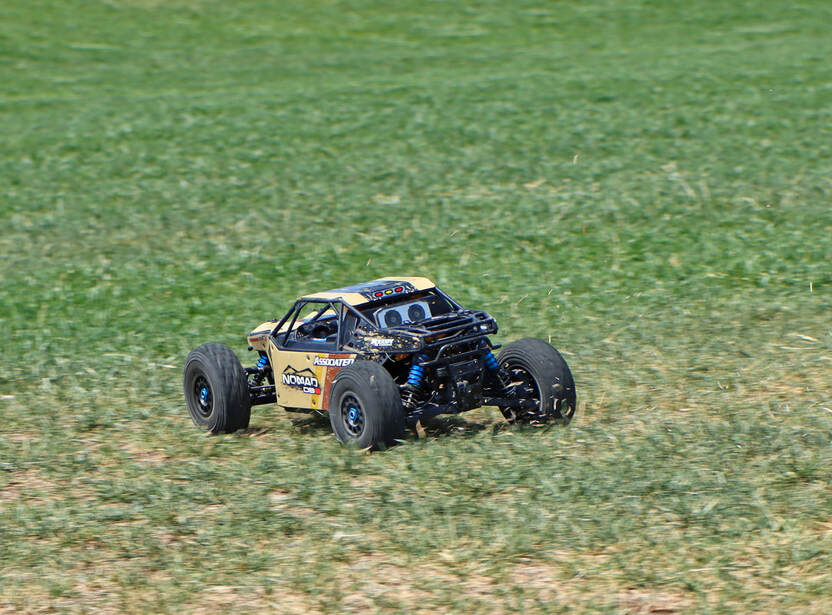 Nomad's GT Grabber tires provide excellent traction on grass.
The primary goal was to test the Nomad out on a number of different surfaces and terrain which I felt were properly suited to the vehicle, with repeated visits to the testing locations to either verify previous results or update the notes.
Bashing or general mayhem was not part of the program, so while the Nomad was run hard, it was run in a reasonable fashion.
There were some instances of rubbing fenders with a few other RC cars while testing on the track, but nothing resembling a demolition derby.
I also avoided BMX style parks or similar jumps which would launch the Nomad into orbit. With that noted, let’s get into the results.
Grass Testing
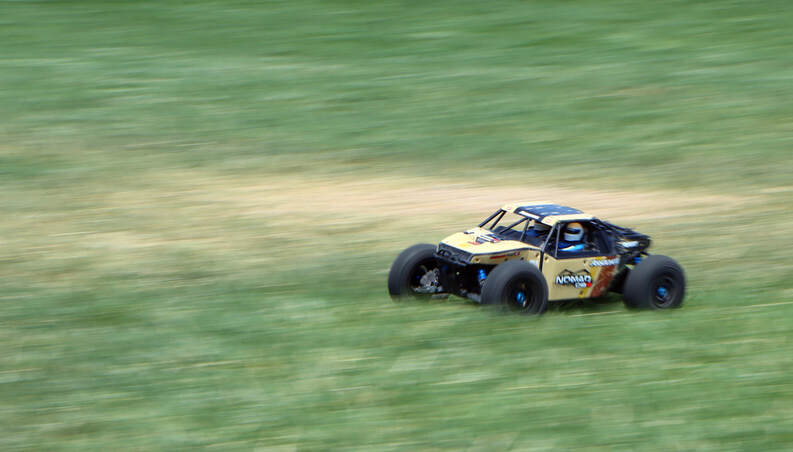 The faster the better with the Nomad DB-8.
With grass being my favorite surface to drive on, I always start testing there for a number of reasons. First is that if the vehicle has a tendency to roll, grass is a bit more forgiving on the body panels and bumpers when the vehicle flips over.
I also feel that grass offers very good traction to test acceleration and braking without causing too much wear on the tires. By the time a few batteries are run through the buggy on grass, I have a pretty good feel for the handling characteristics and tipping points.
With a 4s lipo plugged in and the a quick check to make sure the grass field was clear, I took off on a long straight run to get the morning started. Blasting across one of our park’s well-used grass fields at full speed, the Nomad effortlessly cuts through the lumpy, uneven terrain. The 16mm shocks and suspension travel easily handles the grass surface, giving the Nomad somewhat of a serene look as it races along. There was no twitchiness to the handling, with smooth transitions into the corners and even power delivery from the drivetrain. For a factory suspension setup, the Nomad is very composed.
With the presence of thick, tall grassy areas in the field due to over-watering, I opted to use 8mm pre-load spacers on the shocks in the front and 10mm in the rear in order to raise the ride height. This kept the bottom of the chassis from dragging the top of the grass and overheating the motor.
The factory 15-tooth pinion gearing is setup for bottom-end torque and explosive acceleration, thus resulting in virtually no delay in getting up to full speed on the grass. Even when attacking the large sloping grassy hills surrounding the park, the Nomad maintained its speed.
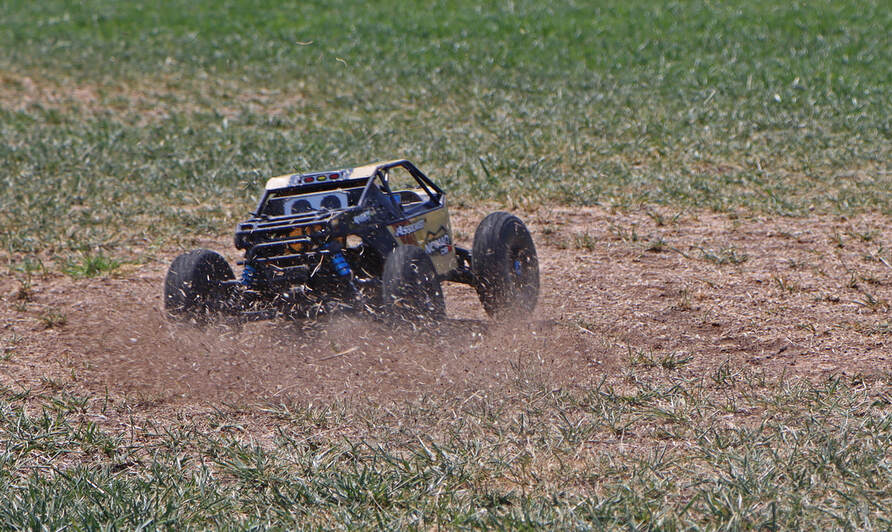 Nomad DB-8 hooking a tight corner.
The GT Grabber’s soft and flexible design provided solid traction on the grass, handling breaking and corners with excellent control.
Under hard acceleration out of the corners, I could feel some tire spin due to the conservative tread pattern and active differential, but the trade-off for smooth cornering was acceptable.
On a few dry spots in the field where the grass was beaten down and overworked, mashing the throttle as I entered these areas would break the tires free and induces some pretty cool rooster tails of dirt. A slight let-up on the throttle, and you’re back in control.
When moving over to some of the freshly mowed soccer fields, the Nomad felt firmly planted to the ground. While fast and nimble, there was a slightly muted sensation to its handling. The best way I can describe the feeling is that everything seems to have a half-second delay to radio input. The little bit of slip the grass gives is just enough to notice, but I was also a little suspicious of the servo being a bit slow.
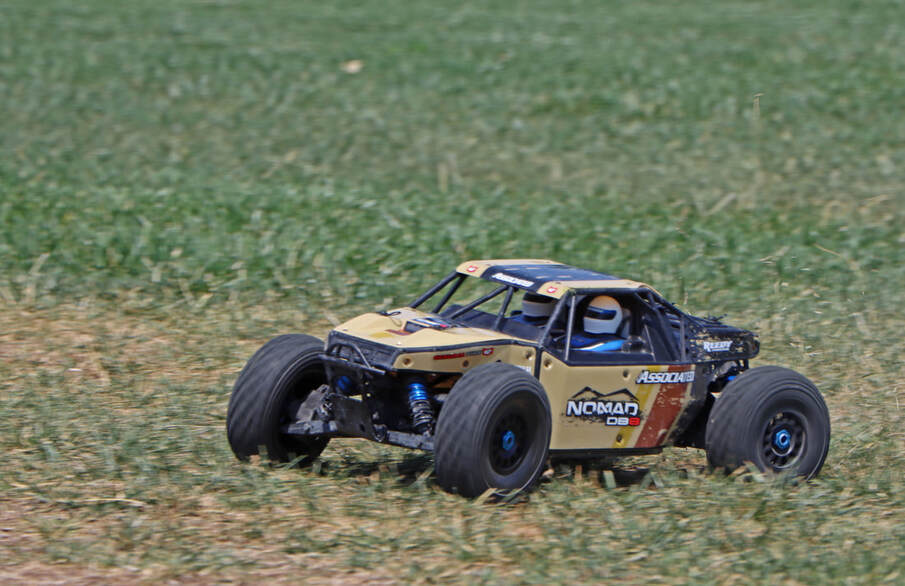 Nomad's 2000 kV Reedy motor is putting down some power.
The real fun on grass is found were the sections are over-used and neglected. The worse the grass conditions, the more enjoyable the Nomad was to drive.
Divots, lumps, dirt patches, and hidden depressions below the surface work the Nomad’s suspension and keep you on your toes.
If there is one thing the Nomad could use more of on this surface, it would be top-end speed. Running the 18 tooth or even 20 tooth pinion gears would be interesting in cooler weather.
Over the entire Nomad review period, I frequently returned to the grass fields in our area, making well over three dozen trips in total. Considering the results from all the different grass fields I ran the Nomad on, I feel this is an easy and fun terrain for anyone to drive.
Video Note: The following video was filmed with the Go Pro Hero 8 on Active Mode, Wide setting, Boost activated. The Go Pro is protected in a clear, waterproof hard case.
Asphalt Testing
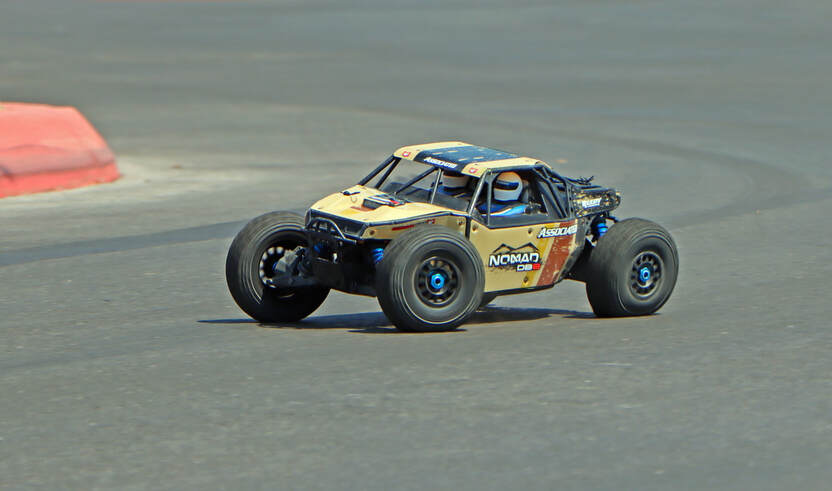 More time on the asphalt.
Starting early one morning, I selected a large open parking lot and set up a small road course with a blend of sweeping corners, straights, and a few hairpin turns.
Initially I had thought to prepare the Nomad by lowering the ride height and use only a 2mm spacer in efforts to help drop the center of gravity, but I decided to save that for later on and just run with the same setting from the grass.
I did make sure the tires were fresh before we hit the track, so they were scrubbed clean of dirt from the last testing session. After a few passes around the track to warm up the tires, it was time to increase the speed.
With the torque from the 2000 kV Reedy motor, it was easy to break the tires free when getting on the throttle.
The GT Grabber tires are soft enough for solid traction, but the tire height off the wheel and soft inner foam allows the tire to fold over when entering the corners at speed. This usually results in a spin out if the corner is wide enough, but on the sharp hairpin turns, it will flip the Nomad over.
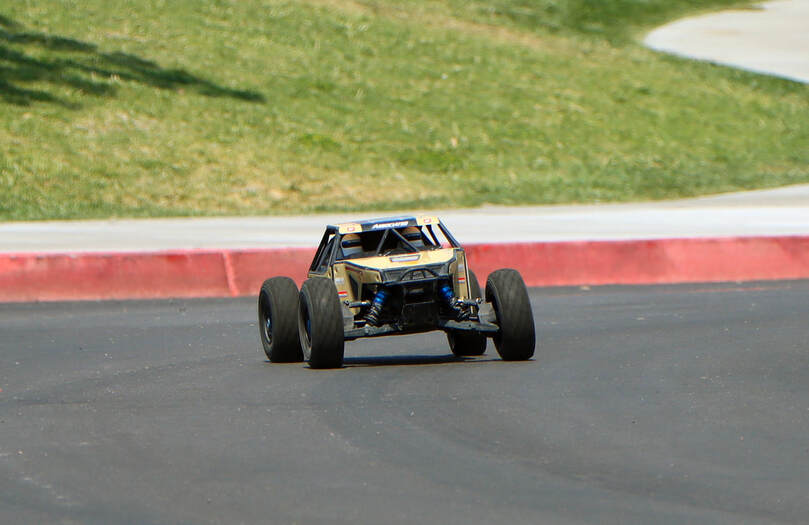 Nomad DB-8's planted straight-line acceleration.
The soft suspension also resulted in a substantial amount of body roll, and between that and the tall, soft tires, you could really feel the weight shift to the outside of the corner with any speed.
The straight-line acceleration was very good with minimal tire spin, and the braking was also solid. Unless you were trying to lock up the tires, the Nomad would quickly come to a stop with a flick on the reverse.
On asphalt, you need to keep a relatively straight line when slowing down abruptly, or the suspension will compress and immediately flip the Nomad over.
Same thing with hard acceleration; any sudden direction change and the tires with the soft suspension will almost immediately flip you over. While the Nomad can run on asphalt, it’s not the ideal surface for the desert buggy.
On smooth, fresh asphalt, the Nomad can be fairly nimble. It’s not going to stick corners like a road car, which shouldn't come as any surprise, but with a little practice you can dive into power slides and have some pretty cool burnouts leaving the corners. Yes this does take some life out of the tires, but the Reedy motor will absolutely spin the tires on demand.
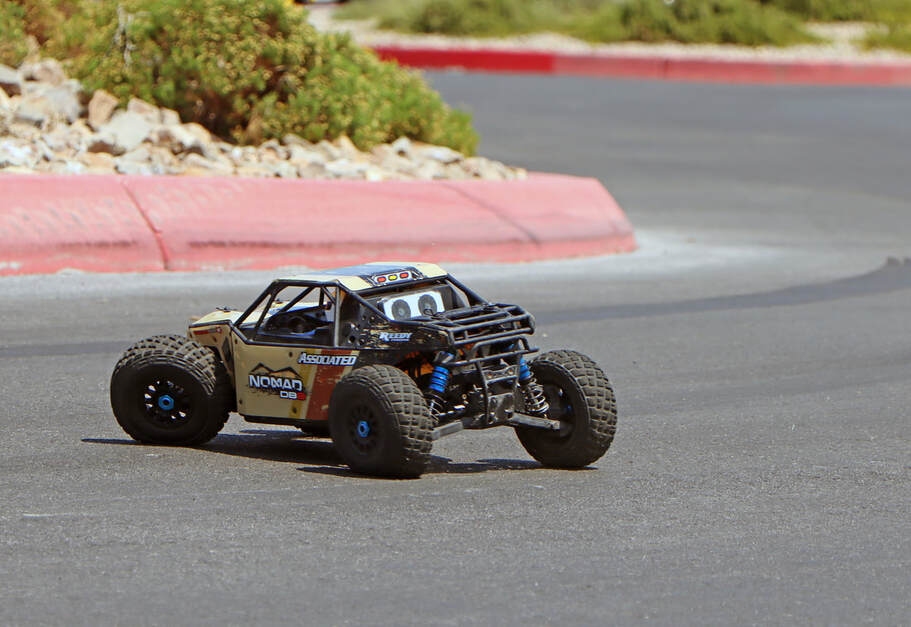 It's impressive that the tires stayed on the wheels after this abuse.
If for some reason you wanted to spend more time on asphalt and run street tires, you can add on the RC8.2 sway bars and this will help plant the outside tire and minimize body roll.
Looking the tires over after a number of laps, they were showing some wear on the edges.
If you plan on running the Nomad on asphalt, I suggest switching out to a different set of tires. The GT Grabbers are just too soft for this surface.
As far as testing surfaces go, asphalt is my least favorite for this platform. I did return to the asphalt to test out a lower ride height setting; 3mm spacer in the front and a 5mm spacer in the rear, and there was some gain to the control in the corners. I was able to push faster into a few of the corners, but often times the rear end would break free and I would need to steer into the slide a bit to prevent spinning out.
When exiting the corners, the Nomad would remain in control even with maximum throttle input, showing just how well the GT tires handled the surface. I could hear them groan in the corners, and I was sure the rubber was quickly being abraded from the tires.
I only spent a few testing sessions out here on the asphalt; the GT Grabbers are good quality tires and not worth ruining. As a side note, I do have a set of Duratrax Badgers, and we did a little testing with those in the middle of this testing program, and they are quite fun on the blacktop.
Sand Testing
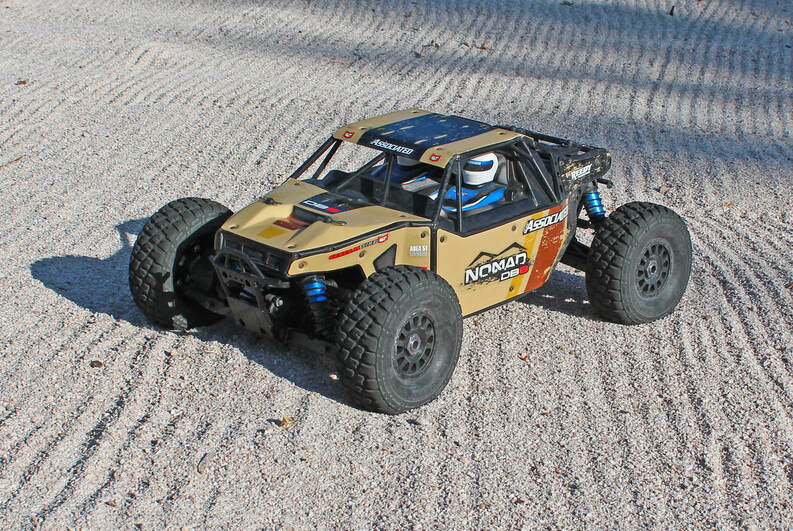 Nomad DB-8 ready for a day in the sand.
In some ways driving a buggy in sand is a bit like you owning a boat versus your best friend owning a boat; it’s better to leave the maintenance to someone else. That said, it makes little sense to evaluate a desert buggy without a brief run in the sand, so I made some room in the maintenance schedule for a complete cleaning and headed out.
Leaving the cones at home and taking a fine leaf rake, I headed over to the volley ball court early one morning and raked the sand smooth. Might as well get the sand in a perfect condition before making a few runs.
As I plugged in the battery, I wondered just how much sand would end up packing into the differentials and electronics.
After snapping a few glamor shots before getting dirty, I made a few low-speed passes in the soft sand. The sand filling the volleyball court is extremely dry from sitting out in the baking sun for the past few months with no rain. Mixed in with the sand was a bit of gravel and fine a powder, for a depth around five inches.
The gravel give the sand just enough body for the tires to bite into, but launching from a dead stop under full power can take a moment before you get moving.
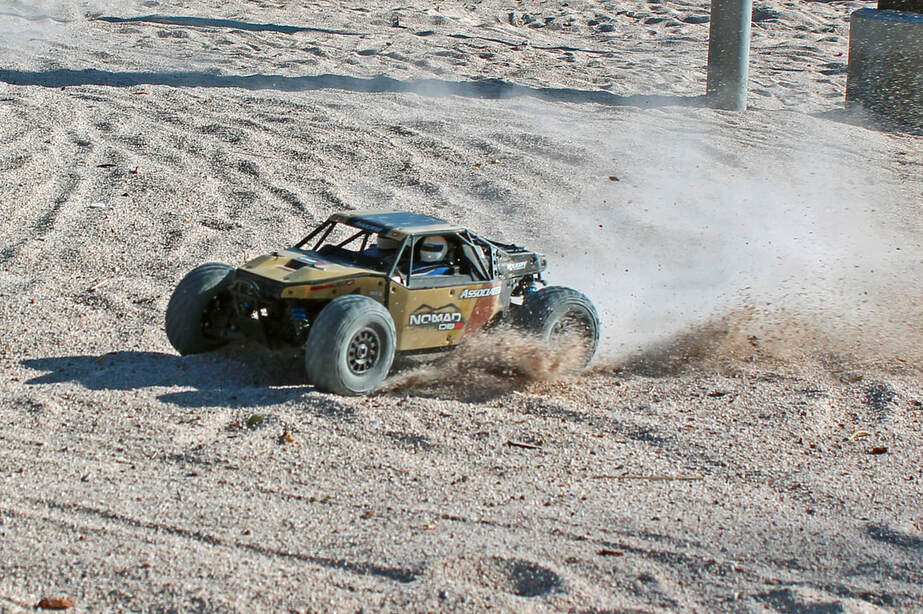 Nomad's GT Grabbers provide solid traction in the loose sand.
Under power, the soft Nomad tires had impressive traction for such a tight tread pattern and narrow footprint. The differential setup didn’t have too much slipping to the unloaded tire.
Attacking the corners at speed, I could feel the power transfer from the differentials as the tires clawed their way through the deep sand.
In a straight line, there was minimal drifting at full power, but unfortunately the volleyball court wasn’t long enough to reach top speed. Thus most of the power runs were shorter than I wanted, but long enough to see that the wide stance and smooth power delivery from the motor resulted in surprisingly nimble performance in the sand.
I think with wider, more aggressive tires and a bump up in the differential fluid, the Nomad could really fly on sand.
Knowing that sand is almost as bad as saltwater for RC vehicles, I worked quickly with the camera while my youngest son, Alex, was behind the wheel. At ten years old, he is a good driver, but will tend to head into corners a bit too hot.
On the sand, if he stayed on the throttle as he made a tight corner, the Nomad would dig in the front outside tire and flip in an instant. The sand offers very little warning before you’re looking and the bottom the chassis as the Nomad flips over onto its roof. When he would enter a corner and come off the throttle completely, the rear end of the Nomad would whip around smoothly. After a few more test runs of this technique, Alex could spin the Nomad to a stop right in front of the video camera.
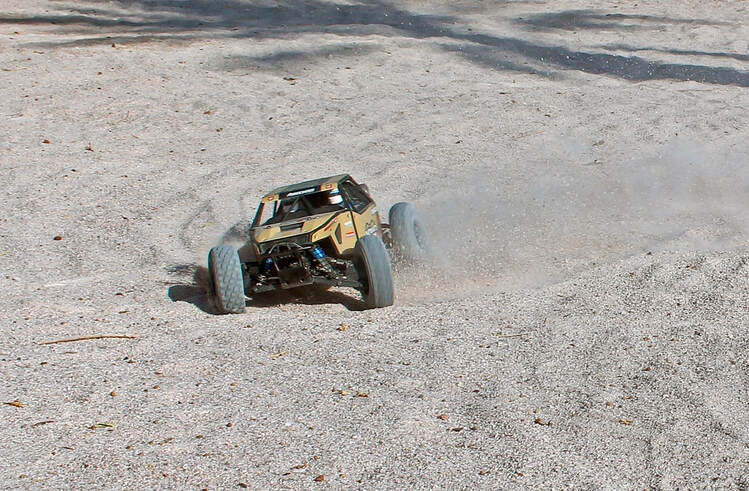 Pushing through the corners during some testing.
Once I had the photos and videos finished up, we raced around the perimeter of the sand court, hitting the small mounds of sand some of the kids had built up the day before. Not surprisingly, the Nomad sailed off the small mounds and stuck landings without missing a beat.
Testing in the sand was enjoyable, and I think some time in the future a trip to the beach is in order for some more driving fun.
Unlike the other surfaces where multiple testing sessions were scheduled, I only did one day in the sand. Heading back home I was able to blow off just about all of the sand from the corners of the Nomad, but I still ended up pulling the entire buggy apart and servicing all three differentials as well as the bearings from the entire drivetrain.
During the servicing of the shocks, I found a good amount of sand built up on the inside of the boots; actually there was sand just about everywhere on the Nomad. A few hours later and we were ready for the next testing session. While the sand is fun to drive on, the following maintenance is considerable. Just something to keep in mind when hitting the sand dunes over the weekend.
Gravel and Small Rock Testing
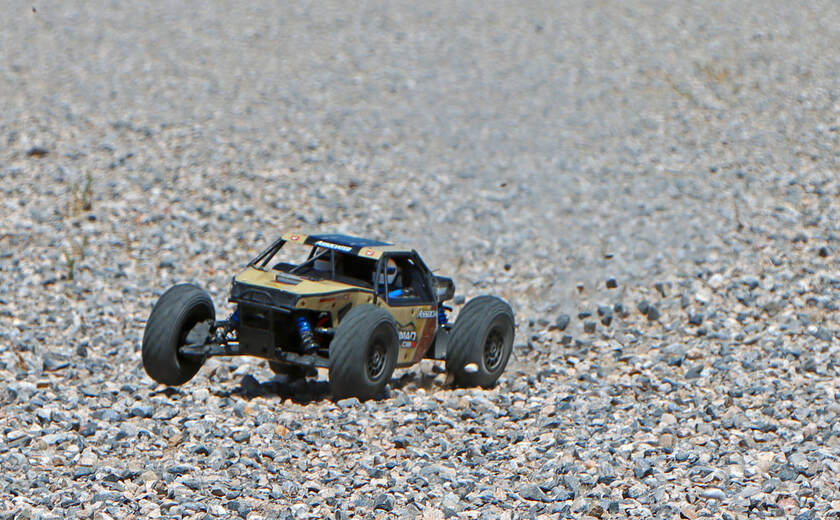
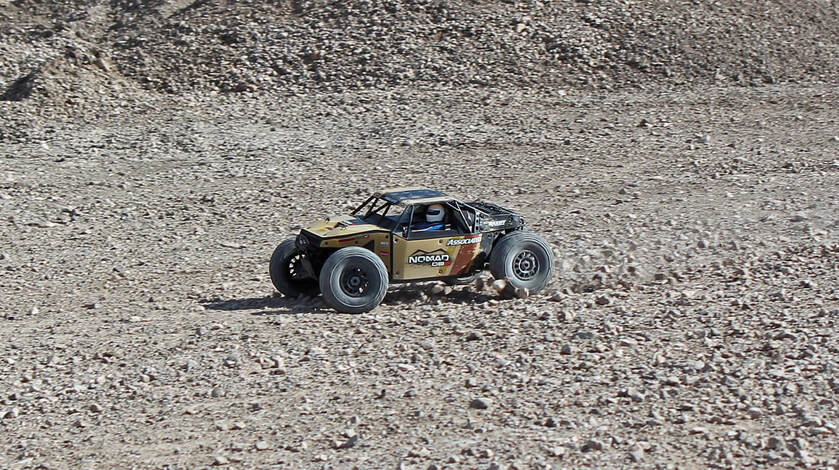 Nomad DB-8 buzzing along the gravel.
Following the same approach with the testing on asphalt, I set up a small course on a large dirt and gravel construction lot, consisting of similar sweeping corners, straights, and hair-pin turns. The surface is loose gravel and small rock covering a hard, sun-baked dirt base. Coming as no surprise, the Nomad simply flies over this surface.
Staying with the shocks running 45/35 weight TLR silicone oil and the OEM springs, I went with a 10mm spacer in the back and 8mm in the front. There are enough larger rocks blended in to the track that anything lower and the Nomad is going to start catching the chassis bottom frequently.
Hooking the corners resulted in gravel-spewing slides and on-power drifts, with plenty of control to pick which line you want on the exit. That said, coming in too hot isn’t going to be solved by any suspension or tire setup; you still have to watch your speed or you’re going to end up in the bushes.
On the straight sections, I could run full power and the Nomad would track the line precisely. When the surface became fine and dusty, the rear end would start to drift out a bit and the tires felt on the edge of breaking free. There is more than enough power to break the tires free at anything short of top speed, and a few session were I was racing other vehicles and I would give it too much throttle trying to pull away. At times I would lose control and the Nomad would slide out, requiring me to either lift or gently feather the brakes to regain control.
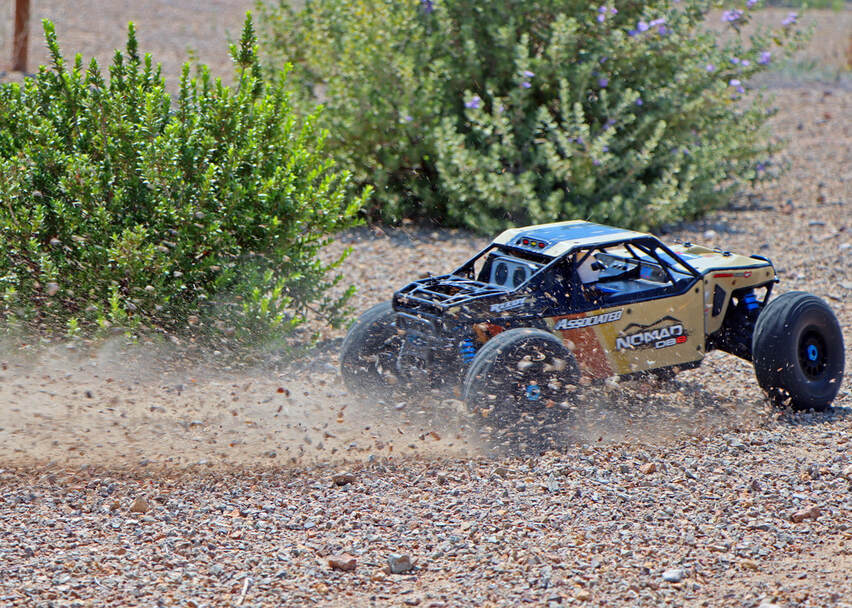 Nomad DB-8 taking off for another gravel sprint.
Like any loose surface, clamping down on the throttle with a 2000 kv motor in a 1/8th buggy is going to break the tires loose.
Developing a feel for just how hard you can push the Nomad and remain in control takes a few minutes to figure out, and can change depending on the specific surface you’re running on.
Often you will read discussion about differential oil setup and how it influences a buggy’s performance, and gravel is one surface where you will really see the difference.
According to the manual, the factory oil setup is 20 / 20 / 20k cst, and with this the Nomad feels in control racing around the track but retains a playful feel to the handling.
The Nomad’s buggy body keeps most of the small rocks from kicking up into the chassis, but after an afternoon on gravel or rock, there are always a few pieces tucked around the drive shafts and electrical components. Because of the spacing between the components, these tend to not result in any damage, but there are the random few which get wedged between the bottom half of the outdrives of the rear differential and lower a-arm pivot pin. Mud guards would keep these away, and I ended up making a set after a few more of these testing sessions.
I was able to run this course multiple times over the period of three days straight, with each session using up four 4s lipo batteries. This usually provided almost three hours of track time per session with a few cooling periods in between.
Bringing each gravel track session to a close, I fired up the air compressor and cleaned off all the dust and rock from the Nomad’s body and chassis. Aside from picking the random bits of gravel out from a few spots in the battery tray, I could not find anything amiss from the hard driving.
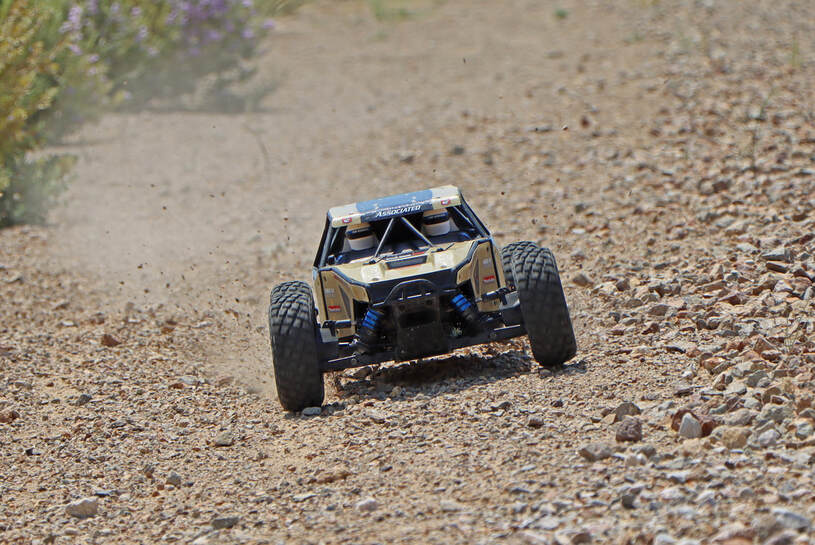 Brake check in 3...2...1....
After the first two sessions on gravel, I decided to pull differentials for a closer look. I wanted to see how much dust and dirt had worked into the front and rear bulkheads. It was also a chance for me to service the differential and look for any wear or fluid issues.
Surprisingly these were relatively clean with just a little brown dust mixed in with the grease around the differential itself, and inside the differential the fluid was a medium grey color.
The differential gears were all in good shape, so I cleaned everything out and refilled them with the same 20 / 20 / 20k cst TLR diff fluid, but I think after testing I will experiment more with differential fluid viscosities and reevaluate the performance.
Back out on the track, the Nomad felt a touch more squirrelly while in the tight corners, but was able to put impressive power down exiting the turns. My guess is that the factory diff fluid is probably different than the TLR fluid I use, and I could see a reduced amount of unloading to the front tires when Nomad was in the choppy edges of the track.
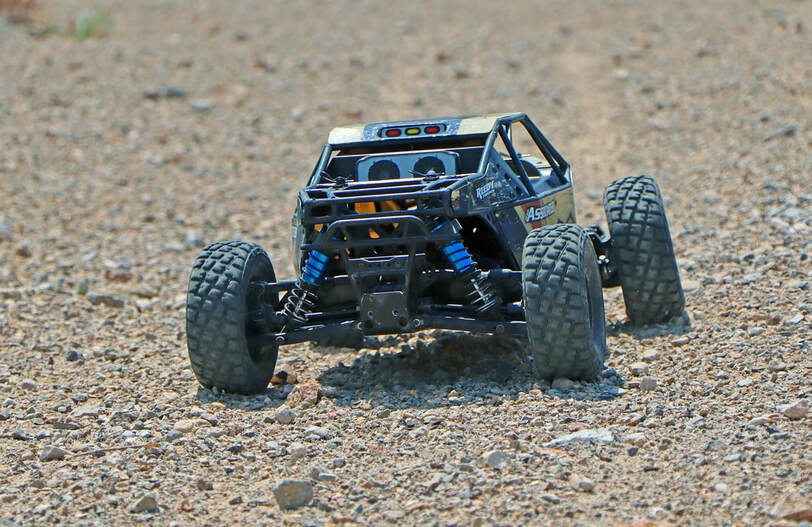 Ready for another speed run.
Unlike the asphalt which causes rapid wear on the tires, I was surprised to see only a minor amount of abrasive wear on the sides of the tire. The glue was still holding up very well and there were no areas of separation of the tire from the wheel.
With the current setup on the Nomad, I continued to run various track courses on the gravel surface with excellent results. Each day the track was set up differently, either to increase the distance of the straight sections, or to include more choppy terrain in the corners. With these changes, the Nomad continued to drive exceedingly well.
I felt on the longer sections, much like the grass, the Nomad could handle a taller pinion gear for more speed. The suspension setup smooths out the rocks and chatter very well, and there is an unusual confidence at speed that the Nomad brings. Unlike some bashers, it’s not searching for a straight line to hold, but rather it holds a line until you make a change.
I do think a rear sway bar would be useful on this surface and something worth considering if can track one down. Along with the sway bar, a set of the Factory Team shock springs and some experimentation with the shock fluid and piston sizes.
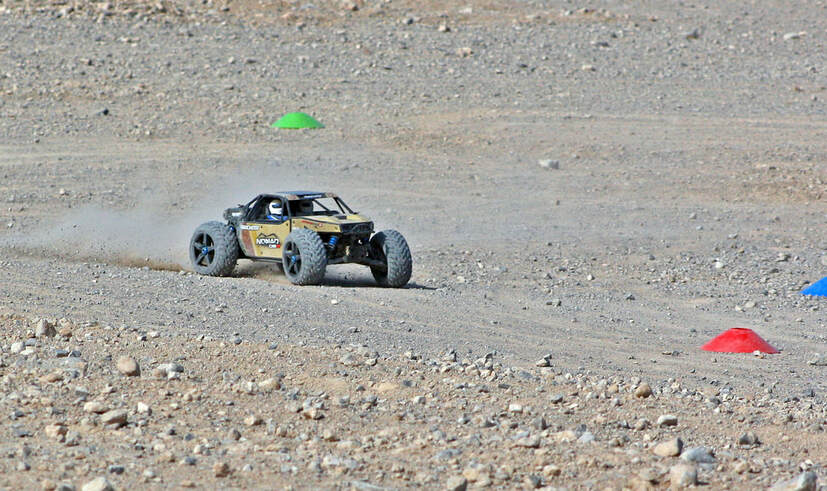 Back on the Duratrax Badgers.
The gravel presents such a fun surface to drive that I continued to revisit this area on weekends for additional track time with the Nomad, even switching back to the Duratrax Badger tires for a few races against a few of the local drivers.
The switch of tires was mostly due to the idea of testing the factory GT tires under “nominal testing conditions” and not racing my friends.
Well, when you’re going up against a few racers, one of them running a Traxxas UDR on 6s, all bets are off and I’m going in for the win, and it’s gonna be ugly for the tires.
With this type of driving, there is always a risk of slashing a tire when you need to push someone out of the way, so the Duratrax Badgers were the choice.
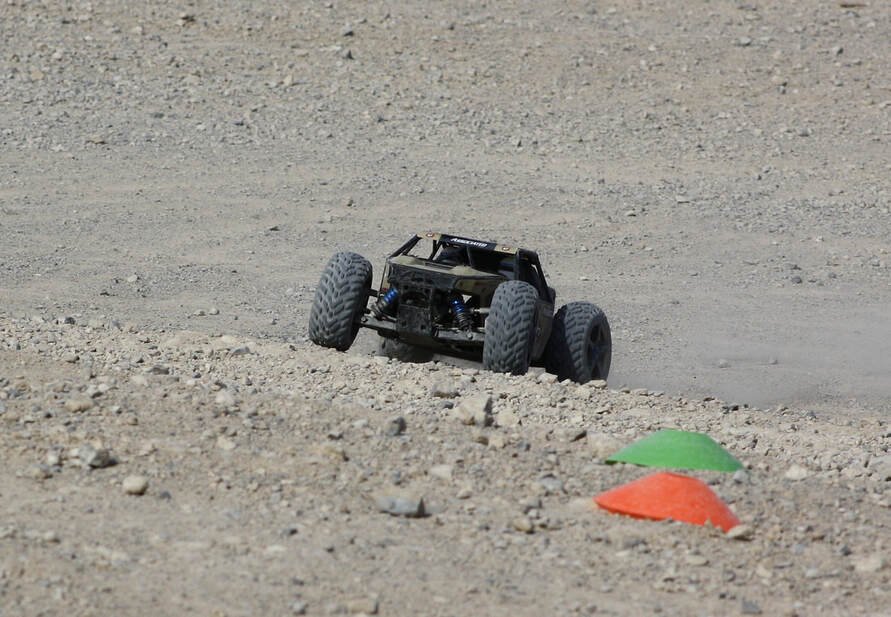 Running down that checkered flag for another win..!
After running a number of heats, I found the Nomad to be very well suited for this style of driving.
If there is one “perfect” terrain for the Nomad, it has to be gravel and small rock.
It simply oozes the racing pedigree from Team Associated, but with a level of robustness to handle going fender to fender on the track.
It feels more like a burly 1/8 track car than a rock racer, and I’m very much looking forward to running against the new Losi Lasernut U4 in the near future.
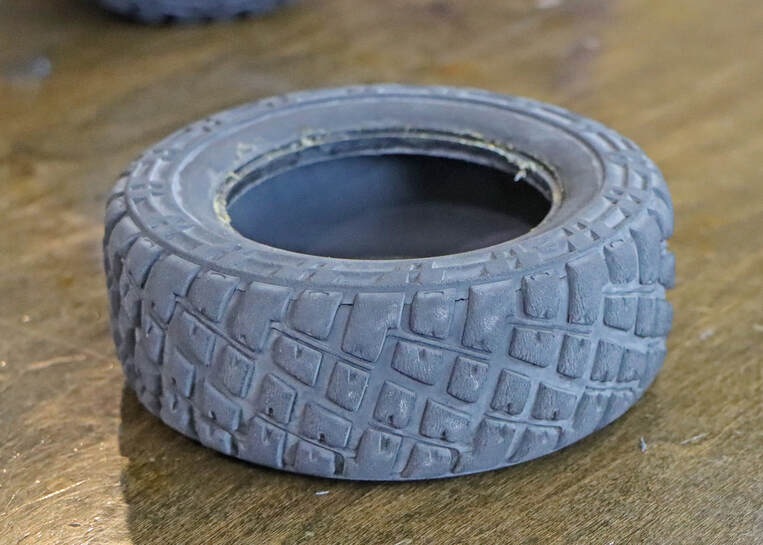 The Grabber tire from General Tire held up very well to the abuse, but they finally wore down.
Weeks later we were back on the track and I was struggling to find traction in some of the looser sections of rock and dirt with the GT tires.
The power slides were quite fun, but I was leaving some acceleration performance on the table due to the GT tires looking for traction.
In between batteries, I was checking the tires over, and I found that not only had I worn holes in-between the cleats on the inside of the tires, but the rear tires felt almost flat. I was suspicions that the tire foams had finally started to fail.
I installed new factory wheels and tires to finish off the day, and there was some improvement in traction, I was still sliding quite a bit. Under normal driving conditions it’s not such an issue, but an upgrade to the tires might help get power better delivered to the ground. I was certain it would help immensely during our weekend races.
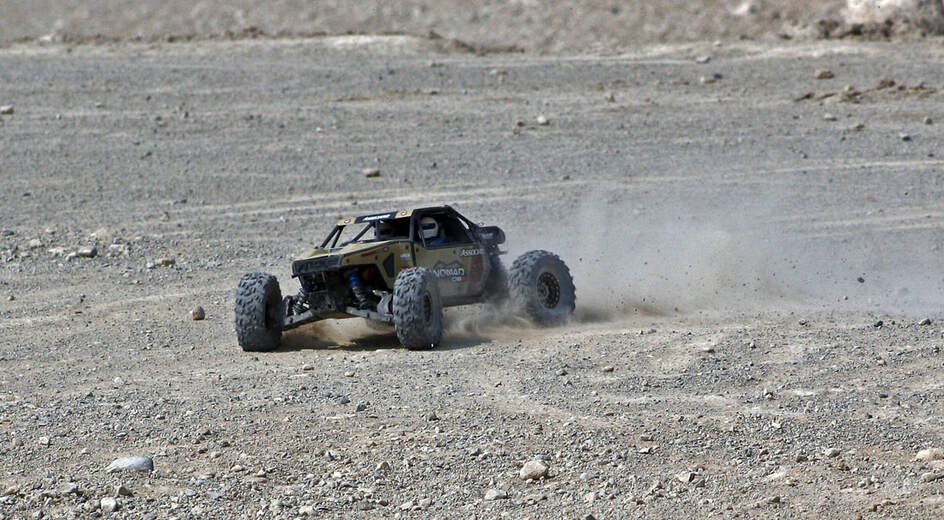 Motoworx aluminum beadlocks with 2.2 tires and single-stage foams.
With that said, I ordered a set of Motoworx aluminum beadlock wheels.
With the a few different colored front rings and a set of 0.200” hub extensions, these were a cool $300 plus shipping.
I had a set of EBay Rock Beast 2.2 tires that were too hard from crawling, so I installed them on the new wheels once they arrived.
Mounting them on the Nomad, the stance grew noticeably wider and I was somewhat concerned about excessive tire scrubbing on the front end. The spacers were needed to clear the hubs, so I had little choice as to how these would fit on the desert buggy. Until a 2.2” / 3.0 beadlock is figured out with a 17mm hub, this is the only real option on the market.
Back out on the track, it was considerable improvement in traction. I made a number of passes around the track, and while I could feel the scrubbing in the front, the corners were so blown out and wide that I didn’t find it to be much of a concern. On a tighter track with high-traction, it could be an issue with the noticeable understeer that I could clearly feel.
To deal with this understeer, I entered the corners a bit slower and then pressed the speed as I approached the apex of the curve. The improved traction at the apex off-set the understeer, and ultimately I felt faster as I exited the corners with these wheels and tires as I did with the OEM GT Grabbers.
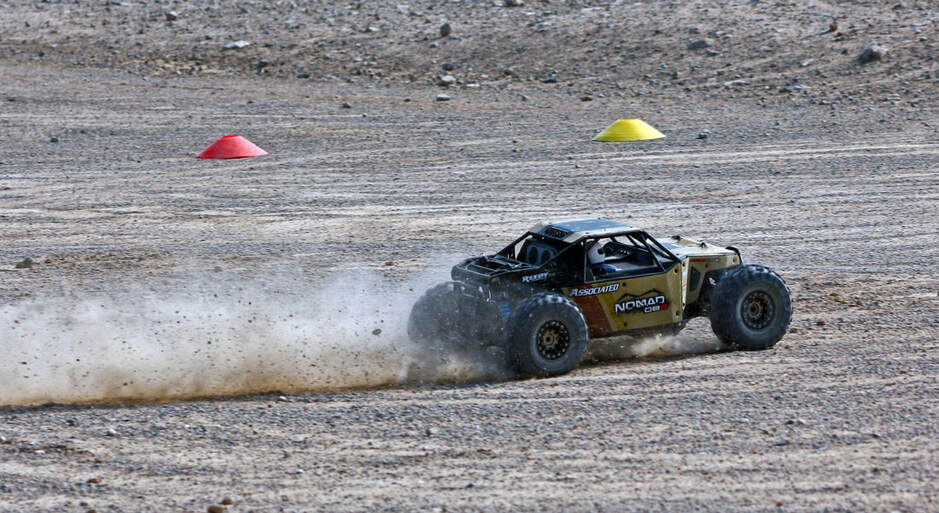 Dropping the pack like a bad habit; these Motoworx wheels are superb.
After running a battery through the Nomad, I had a feel for my lines and speed, so I went back into the pits for a cool down and fresh battery.
The UDR was powered up as the chase vehicle and the Go Pro was fired up.
Rolling out from the pits, I immediately took off and kept it going hard for the next few minutes.
The Nomad was far better at getting power to the track and exiting the corners fast. A light tap on the brakes when I over shot a turn would bring the Nomad back on line quickly without sliding out into the rough.
Running the straight sections between the corners, the Nomad would surge ahead of the UDR chase vehicle with superior traction, and only a slight torque drifting with the car ever so slightly shifting to the left as the rear of the Nomad drifted to the right.
I noticed it a few times where I exited a corner perfectly and had a long, straight shot to the far corner of our track. This straight shot is exiting corner number four and cutting thirty yards diagonally across the track, and the Nomad is under full power for that entire sprint. It is the one area where the UDR can gain ground quickly due to its inherently greater speed, but only if it can find traction.
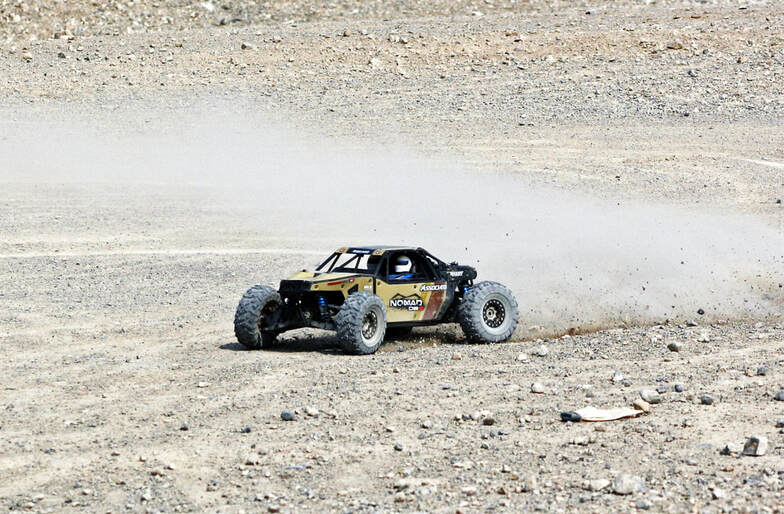
Lap after lap, we pushed the pace faster and faster, diving deep into corner number one after coming off the long straightaway, and with the loose rock, billowing dust, and choppy hard-pack dirt base, things would get interesting.
The Nomad’s suspension was working hard to manage the loose surface, and it did a fantastic job. There was even a point where I was worried the beadlock ring would fail and release the tire, but it never happened.
With the change in performance, overall I was very pleased with the wheel and tire upgrade, and these aluminum wheels will be the wheel of choice for the Nomad after this review is complete.
I will be doing a stand-alone review on the Motoworx wheels later on, but they are quite impressive to say the least. Very expensive, but very nice.
The Nomad continued to improve as I developed a better feel for the new wheels and tires, and after four battery packs, it remained undefeated for the day.
The factory servo was working harder to handle the wider stance and heavier wheels and tires, and really only doing a marginal job for the task, so it's on the short list of things to upgrade on this buggy. These are things to expect when making substantial changes to the buggy.
Video Note: The following video was filmed with the Go Pro Hero 8 on Active Mode, Wide setting, Boost activated. The Go Pro is protected in a clear, waterproof hard case. Do not try this without a hard case protecting the Go Pro.
Large Rock Testing
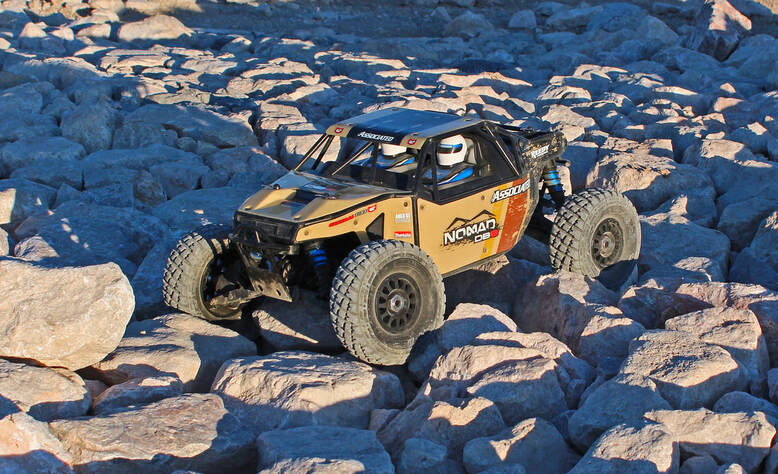 Not the most friendly of surfaces.
If there was a surface which really gave me pause, it’s large rock sections. Often times sections of large rock are part of a U4 Rock Racing course, forcing the drivers to slow down and pick their lines. Of course you can power through them and hope your buggy survives the run.
These rocks tend to be between 3” to 6” in size and have enough weight to them that they don’t bounce out of the way when you knock into them. In fact they tend to remain in place, and it’s the buggy which gets bounced. What makes large rock sections “drivable,” and that is being generous with the term, is when the rocks are properly laid out, they form a tightly packed surface with relatively small gaps in between them.
For the Nomad, I felt the best lines would have the buggy skipping over the tops of the rocks with the suspension doing its best to keep things moving in the right direction. The trick is to go fast enough without getting hung up in the gaps and pockets, but not so fast that you lose your line and plow into one of the rocks sticking up a little tall.
The down side to these large rocks is that they will easily snap lower a-arms, crack plastic wheels, and leave scars on the bottom of the chassis. This isn’t to mention the horrors they give steering linkages. For terrain like this, you will appreciate the tall, soft GT Grabber tires on the Nomad; they help take some of the sharp jolt out of the large rocks.
To keep the bottom of the chassis off the rocks, I selected a single 10mm spacer for the rear and 8mm spacer for the front ( 5mm and 3mm spacers ).
Picking a few areas which had a decent amount of large rock that wasn’t just poured in a loose pile, I selected s few straight runs in hopes of keeping the Nomad going in one general direction. In a race, these rocky sections tend to be rather short and a bit choppy, often being the entrance of a tight corner. I have not seen any long sustained sections of rock, but they may be out there on some track.
Nomad DB-8 Large Rock
Video Notes: Go Pro Hero 8, Slow Motion setting.
|
After two days of this testing on this terrain, I was ready to be done with the large rock surface. The Nomad did well in working its way through some of the section, but frequently I would strike a rock and lift the entire buggy off the ground.
Each time I would continue on until the end of the run, and then work my way back to the pits to check for any broken parts. Amazingly I avoided any noticeable damage to the suspension, wheels, or steering linkages. It still made me cringe every pass over the surface. It’s an interesting and a good challenge for any off-road buggy, but sustained running on large rock is eventually going to beat down any machine. In a few instances, I would get high-centered on a rock in a low-speed corner where there was not enough inertia to simply bounce over the rock. This would slow the Nomad down and I need to snap the steering back and forth to find traction. After two intense days on the large rock, I had seen enough. If you have any large rock on your own race course, the Nomad will be able to handle it to an extent, but this is for sure it is not the Nomad’s ideal surface. |
Medium Rock Testing
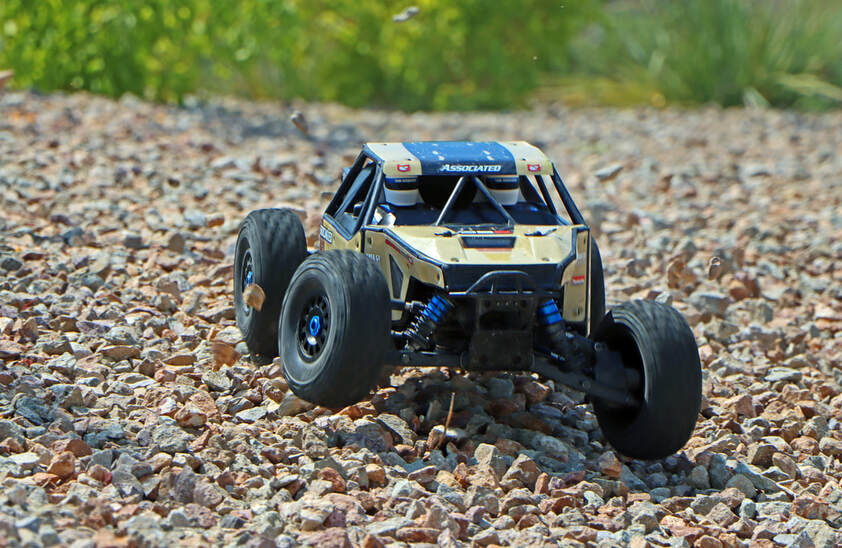 Glamor shot on some fancy medium rock.
To close out the testing sessions, I saved the medium rock course for last. It’s a challenging surface for any off-road machine and a fun surface for the complexity it has to offer. Unlike gravel which consists of a thin layer of tiny bits of rock spread over the surface of hard pack dirt, the medium rock moves and flows like a sheet of ball bearings in unpredictable directions.
Depending on how well the top layer of rock is interlocked with the layers beneath, buggy tires can spin freely one moment, and then suddenly catch traction when the rocks below bind against each other and the hard pack dirt below. This causes abrupt direction changes and traction rolls.
One moment you are moving along “smoothly” at speed, and then as you enter a corner, the buggy will understeer severely until the rocks grab hold again and quickly change the direction of travel. At 40 mph, it’s great fun.
I went back to a large overflow parking lot not too far away from the house, and the surface is about as nasty as it gets. Crushed, broken rock about the size of walnuts lay a few inches deep on coarse-bladed hard-packed dirt parking lot. Basically it’s a field of tire-eating rock laid on concrete; perfect for chewing frames, shredding tires, and pulverizing Go-Pro camera cases. I felt this would be ideal for our final testing sessions with the Nomad. I’ve driven this lot before, and was glad to have installed my rock guards prior to starting these sessions.
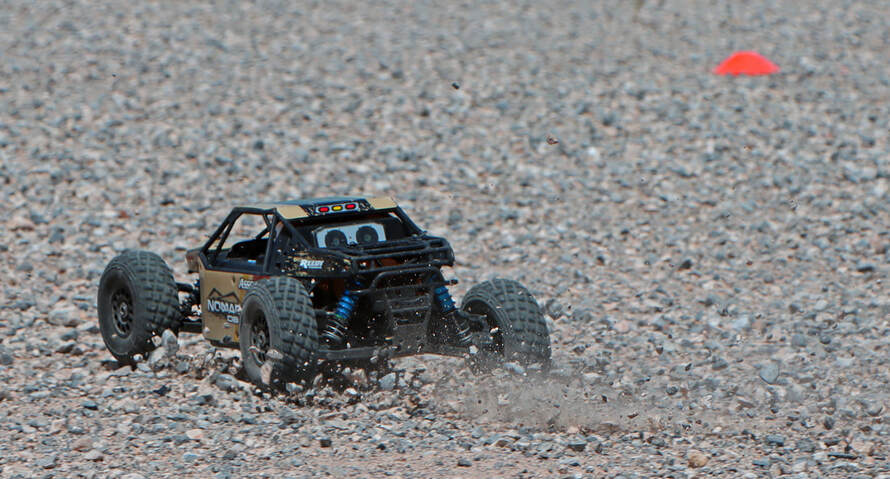 Time to get moving.
Like all the other hot summer days, we started at sunrise with a pile of charged batteries. For this first day of testing, I was able to talk Greg into chasing me around with a Go Pro mounted to the hood of his 1/7 scale Traxxas UDR. I figured the Traxxas UDR with its 2200kv / 6s power and long-travel desert truck suspension would be able to stick on me like glue in this terrain, making for some interesting footage.
With the cones, I laid out a large figure-eight track measuring 50 yards wide measuring for the inside of the opposing corners, and roughly 10 yards wide from the inside edges of the corner edges. The lot itself is massive and there was plenty of room to over-shoot any of the turns. I the middle I set up a small island of blue cones, forcing you to swerve left or right to avoid them and you make your way to the next turn. It’s a fast course with plenty of opportunity to spin out or roll the vehicle.
The OEM GT Grabber wheels and tires were back on the Nomad, and after a few test laps completed, I decided to stay with the suspension setup from the Large Rock testing. This kept the Nomad up off the rock and gave me a little buffer room for the bottom of the chassis to clear any rogue larger stones lurking in the mix.
Even at lower speeds, there was a noticeable understeer into the corners as the rocks continued to roll underneath the tires. To mitigate this, I would gently come off the throttle just before entering the corner and then increase gradually speed as the Nomad’s rear end would come around at the apex of the corner. If I could maintain a slight amount of oversteer in the corner, almost like a mild drift, it was possible to turn the wheels back into the slide and really put the power down. I was relying on the soft sidewalls of the GT tires to give me some side traction in the deeper rock sections.
This would allow the Nomad to continue to build speed and snap back to a specific line once the corner straightened out. If the rocks played in my favor, the Nomad would leap out and allow for a full-power charge to the next opposing corner of the figure-eight course.
Video Note: The following video was filmed with the Go Pro Hero 8 on Active Mode, Wide setting, Boost activated. The Go Pro is protected in a clear, waterproof hard case. Do not attempt without a hard case protecting the Go Pro.!
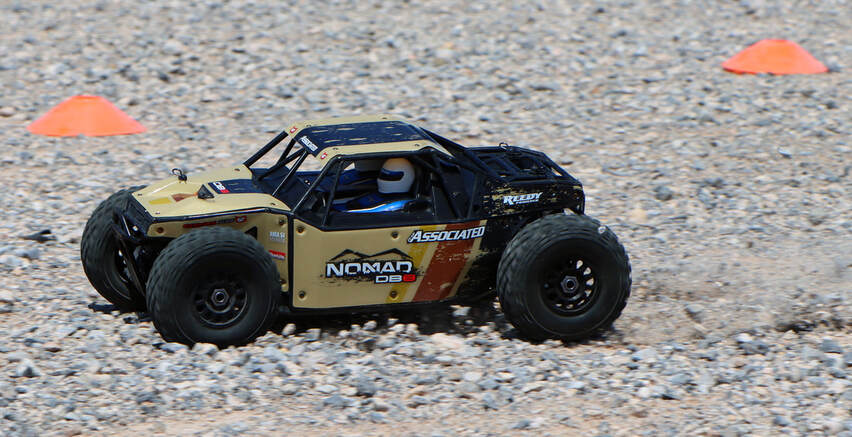 GT Grabber tires working overtime to hold this corner.
During these warmup laps, you could hear the rocks flinging up against the Nomad’s body and see them bouncing off the UDR’s hood, which was incessantly tailgated me during these warmup laps.
I knew Greg was trying to stay close to capture some quality footage, but I was suspicious he was pushing to see if I could shake him lose.
A few more passes and we rolled back into the pits to adjust the camera mount, shake out the loose rocks, install a fresh battery, and start a new video.
With the Go Pro recording, the Nomad and UDR rolled back out onto the track and heading towards the first turn. The moment I was far enough away to not shower the pits with a hail of rock, I put the hammer down and quickly gapped the UDR which was struggling to find traction in an attempt to keep up.
With 50 yards to run between corners, there was ample space to run the Nomad at full speed. There is no question the UDR is a faster, more powerful machine, so I had to nail the corners perfectly and simply drive better so the UDR wasn’t close enough catch me on the straightaways. The factory UDR tires are hard with a tight cleat pattern and marginal in their performance on this loose surface; far inferior to the Nomad’s GT Grabber tires soft grip.
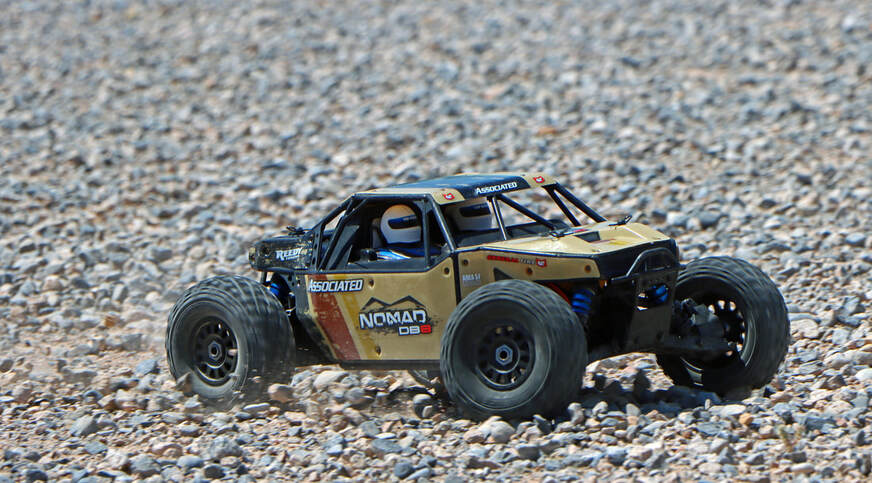 Nomad DB-8 setting up another turn.
The first few laps were a little hectic with both Greg and I blowing through the corners and spinning out due to excessive speed. Once we got out wits about us, the driving became intense and with the Nomad staying just a few steps ahead of the UDR.
The Nomad’s independent suspension absorbed the shifting surface and the GT Grabber tires fought for traction and control while being pushed to their absolute limits. Tires would balloon on the straights and groan while creating a wave of rock as the Nomad would dig into the corners; it was great fun.
Exiting the corners and mashing down hard on the throttle, the Nomad would leap out ahead of the UDR for just a few moments, but that 6s machine would come roaring up behind before we reached the next corner. The best move was to stay tight into the corner if I could and force the UDR to the outside, hugging the inside line as best as possible, trying to bleed off just enough speed to prevent traction rolling but remain fast enough to stay ahead.
If the Nomad came too hot into the corner, I would swing wide while coming off the throttle and allow the UDR to slip underneath, then stab at the brakes just for a second, tilt the front wheels to induce a tight slide and then ramp up the throttle, heading out low and fast from the corner. The solid axle of the UDR could not make the adjustments fast enough, forcing the UDR to either shoot wide at the apex of the corner or traction roll. If the UDR held on, it was fishtailing so wildly that Greg needed to bring it to a near stop to regain control. By then the Nomad was already across the course and into the next corner.
Lap after lap the pressure of the race and the stunning performance of the Nomad was tremendous.
Pushing the buggy hard, it will respond. I felt there was a missing element of finesse that a true 1/8 track buggy would have to offer, but the Nomad's toughness to handle fender to fender impacts with a 1/7 scale desert truck and still hold its line was worth the trade-off. Even though the Nomad is an open-wheel buggy, there is a bit of SCT rough and tumble in its blood.
Video Note: The following video was filmed with the Go Pro Hero 8 on Active Mode, Wide setting, Boost activated. The Go Pro is protected in a clear, waterproof hard case. Do not attempt without a hard case.!
|
|
|
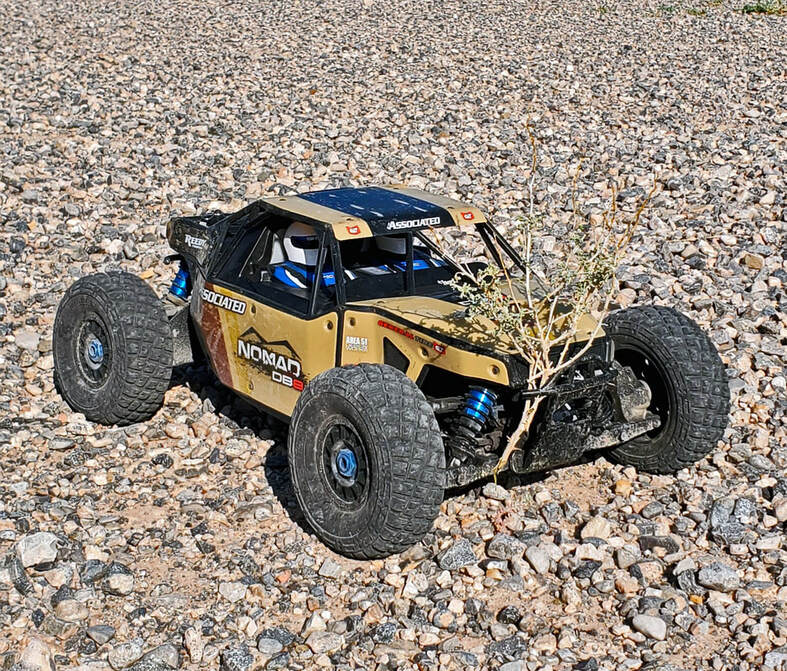 Tumbleweed getting in on the racing action.
That day was one of the most fun and enjoyable sessions I had experienced for the entire testing program with the Nomad, and I feel that after months of driving this desert buggy, I had somehow finally connected with this machine.
I don’t think you can actually know a vehicle in a few drives, or even a few weeks of driving. I believe it take hours and hours of dedicated time on many different surfaces to develop a firm understanding of any vehicle, and then to ultimately assess the true merits and weaknesses on it’s ideal surface.
For the Nomad, this is surface truly where it shines; loose, choppy, flowing gravel and rock over hard-packed soil. Throw a few shovels of dirt and some sand into the mix, and you have the exact recipe for fun; the Nomad is truly a desert racing machine.
The morning finished up with plenty more laps, some good laughs, and some great film. For what I had expected to be just another day of testing, the pressure element of the UDR and the desire to battle against that formidable platform seemed to magically bring the entire project into focus. All that remained was transferring pages of track-side notes to the computer and some introspection as to how I actually felt about the Nomad. Without the burden of a single sponsor involved in this website, I can truly and honestly share my opinion without fear of upsetting the apple cart.
Back at the shop, and cleaning and inspection showed a few rocks stuck in various places but no actual damage to the Nomad. A close look at the tires, and the new set were holding up very well. There were a few new scratches in the chassis, and some rub marks on the body panels from colliding with the UDR, but nothing of concern. The rock guards I had made were already showing serious signs of wear, so these were replaced.
Testing Conclusion
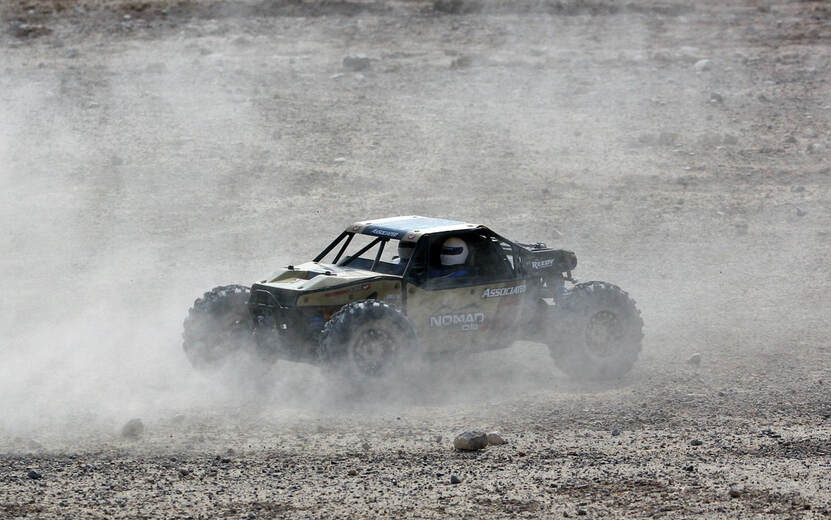
Bringing the testing to an end, the Nomad was in reasonably decent shape considering the abuse it had to endure. Looking over my notes, the Nomad saw 93 testing sessions in total, with nearly 250 battery packs used. Some days we would be out there for half a day, running hard in the cooler weather. As spring became summer, the sessions were shorter with some only consisting of a few battery packs consumed during the cool mornings.
The driveshaft pins were showing some wear and the original tires wore our near the end of this testing program. The front shock springs were fatigued and I need a 10mm spacer in the front to keep the nose off the ground; they needed replacement.
The chassis was still holding strong, but there were some nasty scratches along the bottom, and the rear A-Arms were looking a bit chewed. There was a crack in the plastic molding of the cockpit for the drivers, and some good scuff marks on the body from rolling on the gravel.
During all of the testing, I did experience a few failures. First was shearing off the rear chassis brace mounting screw and breaking the chassis brace when landing hard off a dirt pile at a construction site. I was trying to ride up the side of a large pile to see if I could incorporate this into a track, and I ended up too wide in the turn at the top and launched of the side, landing square on the rear bumper. The chassis flexed and the screw was cleanly cut in half. The ESC came loose from the double-sided tape, and a small chunk torn out from the roof panel. I was able to track down a replacement chassis brace on-line, so the Nomad was down for only a few days waiting for parts.
For the second big crash, I plowed into a tree at full speed, knocking the front left a-arm off the bulkhead. After an hour of searching around in the grass, I found the lower steel pivot pin about ten feet away from the crash site, virtually unscathed. With all the parts in hand, I checked the rest of the Nomad over and reassembled the front left side. Still I could not find any damage to the front of the vehicle, and only a small adjustment of the steering turnbuckle was necessary. The steel B-plate of the a-arm mount did leave a ding in the chassis slot it sits in.
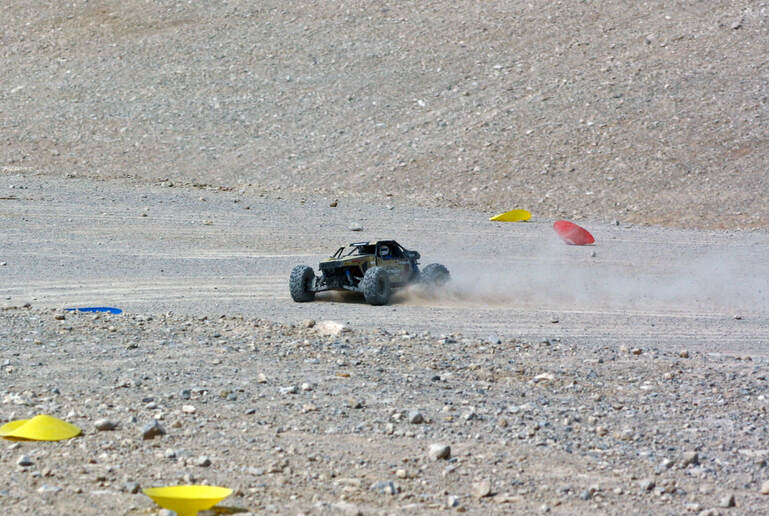 You can push the Nomad DB-8 hard on the track.
During the gravel testing, I caught the edge of a large rock pile, sending the Nomad up into the air and down hard on the front right wheel. This landing must have snapped the servo saver a little too hard, and the servo no longer would turn to the right. I ended up replacing it with the exact same servo and have not experienced any mechanical problems with that replacement unit ( other than it being slow).
Finally near the end up testing, I was back out in a construction lot racing around on the hard-packed gravel and ended up slamming into a half-buried rock. I hit this one at full-speed, and it launched the Nomad up into the air. While the Nomad was cartwheeling to a stop, I was thinking it’s good that the GoPro camera was safe in a hard protective case. Turning the Nomad back over, I couldn’t find any damage, but it did knock the ESC loose again, and somehow knocked the receive box lid off, snapping the edges of the lid where the small r-clips hold it down. I ordered a replacement lid for the repair.
Other than replacing the tape on the bottom of the ESC, and installing a new set of wheels and tires, the Nomad remained in great shape for the entire duration of the testing.
Out of curiosity, I removed the tires from their wheels which I had replaced from the rear, and the foams inside were in pretty bad shape. Considering how much abuse these took during testing, I feel the GT Grabber tire and the foam are actually quite good. You can purchase these in pairs for under $30 on-line, and that’s a pretty good deal.
Video Note: The following video was filmed with the Go Pro Hero 8 on Active Mode, Wide setting, Boost activated. The Go Pro is protected in a clear, waterproof hard case.
Further thoughts on the Nomad db-8
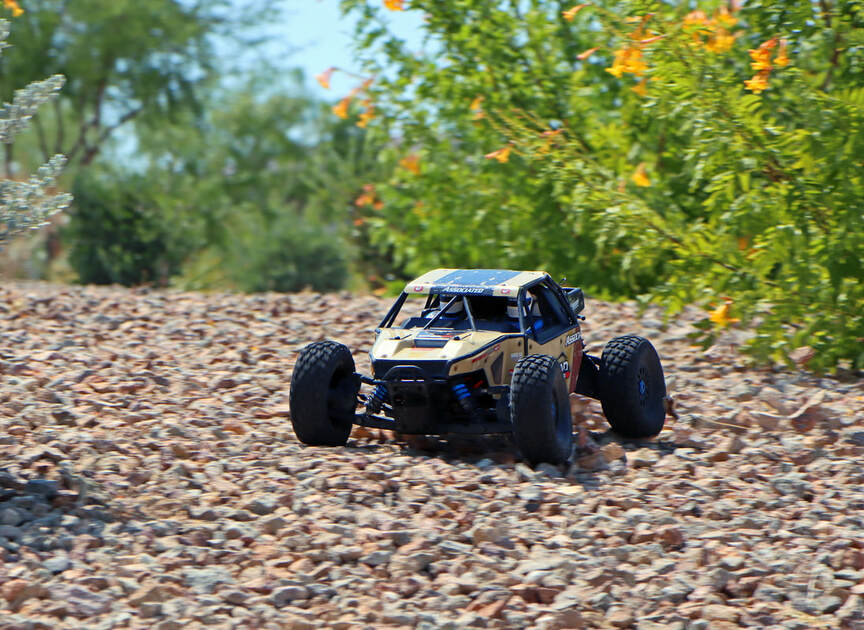 Drifting through packed rock is a bit tricky.
The Nomad is a superb machine, deftly blending the qualities and traits of 1/8th scale racing buggies and U4 Rock Racers into a visually appealing and nimble package.
The fit and finish of the buggy is very good with a smart chassis layout and robust construction. Any RC enthusiast looking for a vehicle which will handle a wide range off-road terrain, the Nomad is a great choice.
The Nomad is also one of the very few RTR platforms which need virtually no modifications or aftermarket parts to realize excellent performance.
The presence of high-quality parts and design is reflected in the higher-than-average retail price for an RTR, but in my opinion it is money well spent. Other than changing the battery connection to IC5, there was really nothing else I felt necessary to upgrade. If you can make a set of rock guards, or track some down from the RC8.2 line of buggies, they would be a benefit for sure in rocky terrain.
Always being suspicious of OEM shocks on RTR vehicles, I had gone as far as purchasing a set of the Factory Team shocks thinking I would need to swap out the OEM shocks at some point, but after seven months of driving, I have yet to feel the need for installing the Factory Team set.
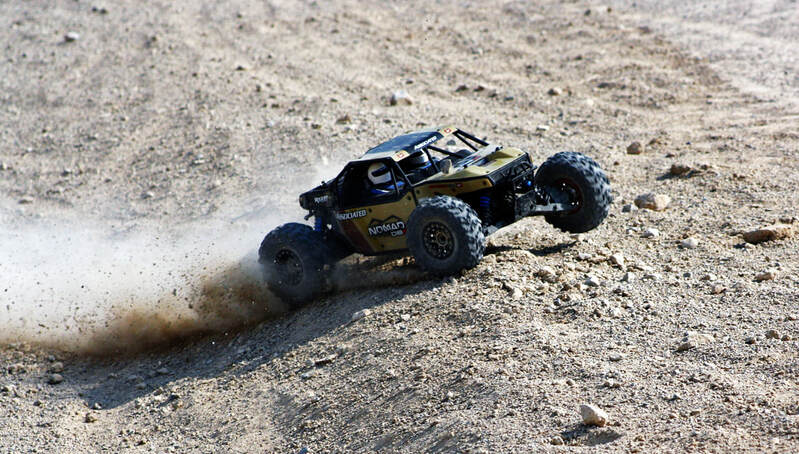 Nomad DB-8 ripping across the back half of our desert track.
One thing I did encounter was an excessive amount of thread-locking fluid in a few key areas. During routine maintenance, getting the center driveline inputs off the differential pinion gears was a real pain.
Same with the pinion gear on the motor; excessive thread-locking fluid. This is a common issue with many RTR’s, so while frustrating, it was not something completely unexpected.
Overall, for the price I paid to acquire the Nomad, I’m very pleased with the product. Its versatility and performance make it an enjoyable buggy to drive, and I hope that more people look into trying out a desert buggy of some kind and possibly adding one into their own collection.
At this point in the review, you the reader, have a few options. The first options is that if you’re just here to learn a bit more about the Nomad, but not interested in actually purchasing one, you can stop reading now. I do hope you’ve enjoyed what most will consider an excessive amount detail, but quite frankly I’m tired of reading short, lazy, cut-n-paste reviews. I sincerely thank you for sticking with it up to this point.
If by chance you has some extra coin burning a hole in your pocket, and the Nomad is on your radar, then I highly suggest continuing on with this review before you part ways with your money.
Other Half of the Story
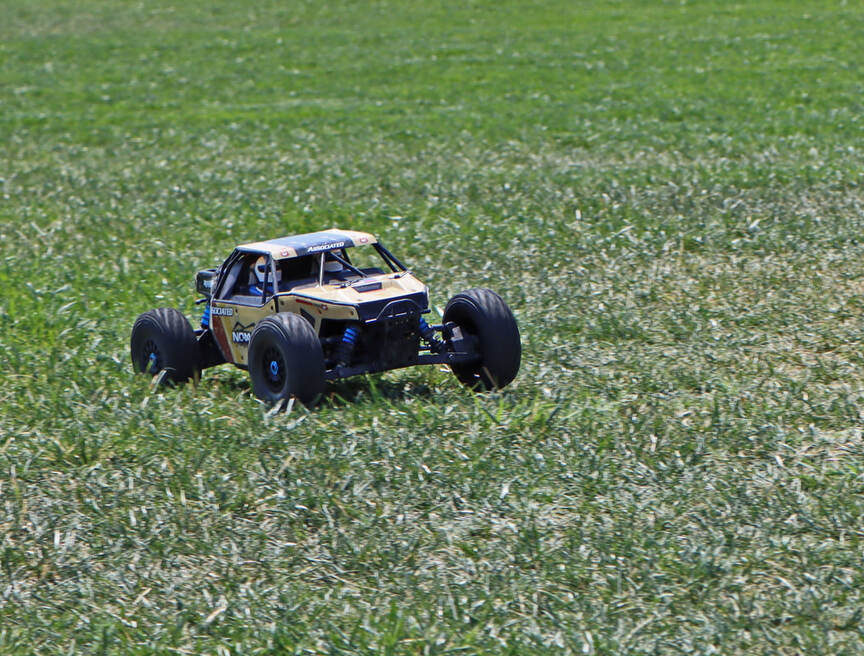 Nomad zipping across the grass at our local park.
While working on this review, I became curious as to what more I could learn about the Nomad in terms of its history, parts, and optional upgrades.
One of my main questions focused on the origins of the Nomad; was it a platform created just to use up old inventory from the RC8.2 line, or seen as a completely independent vehicle developed from the ground up? Since its release in 2017, why has Team Associated not created one out of the RC8.3 line of buggies and truggies?
Some of that reason could be market interest fluctuations in that at the time of this writing, a few manufacturers have commented that truggies sales are dropping. Desert buggies could be in this same situation, but Losi seems to be doing quite well with their DB Pro desert buggy and they just released their new U4 Rock Racer; the Lasernut.
As a logical first step for research, I started looking around on the Team Associated website and found the Nomad DB-8 listing. On the Nomad page, you will find some good general information about the buggy, as well as a few optional parts. The photo work is quite good, but I didn’t really care for the official video they have linked. I must admit at this point that I have not actually watched the entire video; I can’t get past the first two minutes.
After reviewing all the listed information about the Nomad and a few optional upgrades, I clicked on the spare parts tab and began looking for items to add to my shopping cart. As a standard practice, I like to have a good number of spare parts on hand and ready to go in the event something breaks. So while I was able to order a few parts directly from their website, many items were back-ordered or listed as discontinued.
I found this a little concerning, so I headed out on the internet and searched other vendors for a few of the back-ordered parts, but again they were not available for purchase. Items like hubs, body mounts, and center driveshafts were non-existent.
EBay turned out to be the most reliable source of parts, but key items which can be damaged or worn over time were not offered for sale, such as differential pinion gears.
With the Nomad being a blend of two prior and well established platforms from Team Associated, this didn’t make much sense. There should be a mountain of spare parts readily available for purchase; but there is no such inventory.
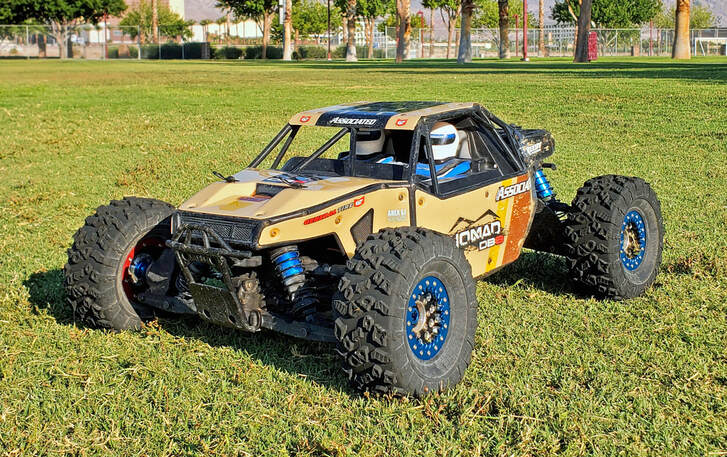 Nomad DB-8 with Motoworx beadlock aluminum wheels.
I reached out to their service department, and while they were able to suggest some brick and mortar stores to check with, there were more than a few items which they were also waiting on.
Now before we keep digging into this situation, the bulk of this review started in March of 2020, right at the start of the Covid-19 pandemic.
Supply chains from China were being severely hampered by raw material shortages and minimal man power. It’s important to note this because many of these companies have most of their parts or even entire product lines manufactured in China, and what was a solid production schedule for parts and vehicles before Covid-19, virtually fell apart in little more than a few weeks.
Many of these companies are adjusting their plans daily during this pandemic, doing the best they can in an impossible situation.
That said, the parts situation and shortage for the Nomad existed before the pandemic, so we can’t point to that as the single cause. Keep in mind that the Nomad was released in 2017, and there was already talk of questionable support on various internet forums as soon as the middle of 2019.
We can’t forget that Team Associated’s own website places “Limited Edition” in the very title of the Nomad; Limited Edition Nomad DB8 Ready-To-Run. It’s right there as plain as day, and probably a good indication of their plans with the Nomad.
There is a key piece of information to keep in mind here; the Nomad is based off of two discontinued models, that being the RC8.2 variants. These discontinued models do not share interchangeable parts with the current Team Associated RC8.3 platforms, and it could be reasonably imagined as to how Team Associated may not have a strong desire for continued production of parts for discontinued models. Most likely their production focus is oriented more towards supporting their current vehicle lineup.
As a general rule in manufacturing, once a product is discontinued, there is some attempt to offer parts support for the next three to five years. What’s interesting is that when that clock starts is often well before the last of the products are even finished on the assembly line.
Along with that, five years is the “best case” situation, when in reality most companies will offer about two years of product support. At that point, what remains on dealer shelves is end of it; time to move on to the next project.
This is not a big deal for screws, nuts, or any other standardized items, but specific items like driveshafts, chassis, extended hubs, bulkheads, differentials, and suspension components; replacing things that break in a crash can be a real problem.
I went back to the Team Associated website and started going through the Nomad’s manual, page by page searching by part numbers, looking to check availability. Aside from the number of parts that showed back-ordered or discontinued, there were a handful of items listed as discontinued with a new replacement part.
Following the link to the replacement part, once I looked at the photo, I could see that the replacement was not the same. The part which had my attention were the extended hubs on the Nomad. The replacement part is not extended, but a standard length hub; it won’t work. I would have ordered the replacement part just to be absolutely certain, but that too was also back-ordered.
Another oddity about the Nomad are the main driveshafts; the Nomad uses longer shafts than found in any of the RC8.2 platforms. I reached back out to Team Associated, and they couldn’t help me on that one either; this was one of those items they just didn’t have an answer for.
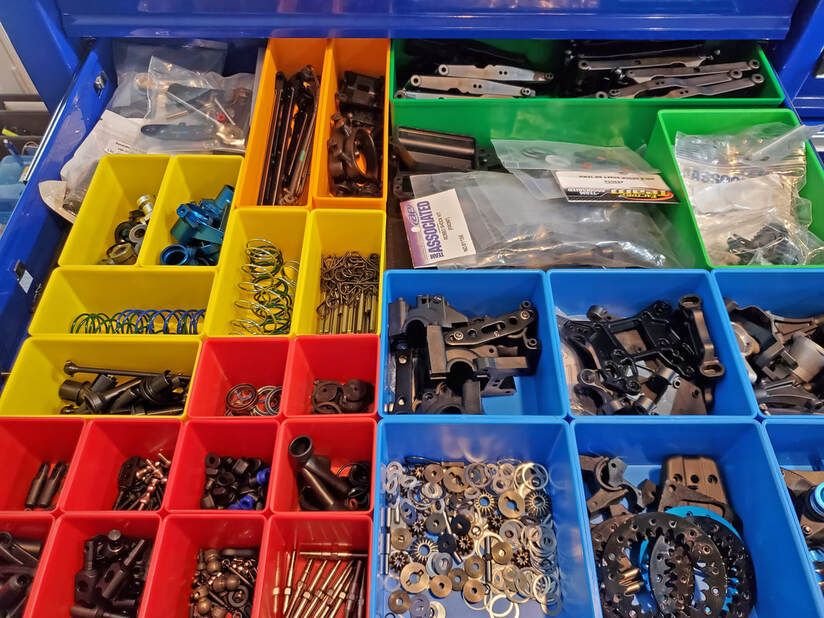 Nomad parts on hand; the hunt never stops.
At this point you’re probably thinking that I should just drop the issue and cut my losses, drive it until a critical part breaks, and then part it out on EBay to recover some of my investment.
That would probably be the smart move, so of course I did the exact opposite. I made it a personal goal to research the Nomad as much as possible and amass a deep inventory of spare parts, just short of purchasing a second unit (which I eventually did).
Knowing that the spare parts were going to be an issue with Nomad, I still had not make any progress on the history or future plans. I fired off a number of emails to just about anybody remotely associated with the company.
While the service guys were helpful, they could only tell me so much. I even went as far as to send the service department an email to forward to the right person(s) with a few basic questions, but nothing was ever answered. Setting aside the black hole of unanswered emails, I spent considerable time searching around on the net to find more information about the history of the buggy, and what I found was not so great.
For starters, there are virtually no in-depth sources of information on this vehicle. I did touch base with a few former owners of Nomads, and while they liked the buggy, ultimately the Nomads were sold off.
One person commented about the lack of spare parts support, especially concerned about differential pinions being impossible to locate. A few of the other owners just didn’t find the Nomad exciting enough to bash with. Again, this obsession of launching RC platforms off of jumps just to see how far they can fly before plowing into the ground still confounds me. I guess destroying a RC car just to make repairs or a video is part of the hobby for some people.
I also reached out to a few people on social media who have some connections with Team Associated, and once I mentioned that detailed questions about the Nomad were to be the topic; crickets. Amazing.
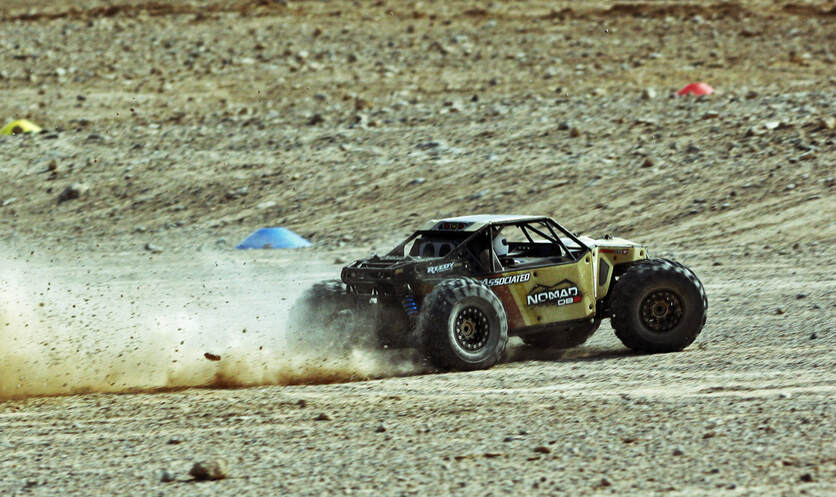 Nomad DB-8 making it look easy on the track.
It’s hard to write about the history of a product and learn about the team of individuals behind some of the development decisions for the Nomad when you can’t get anybody to talk.
This is a shame because if nothing else, I wanted to commend the person(s) who brought the Nomad into existence. It really is an excellent vehicle.
Taking into account the information presented here, and comparing that to the trace bits of information on the internet, I believe the Nomad’s life cycle is nearly complete and on the verge of becoming little more than a small historical footnote for the company.
Where to From Here
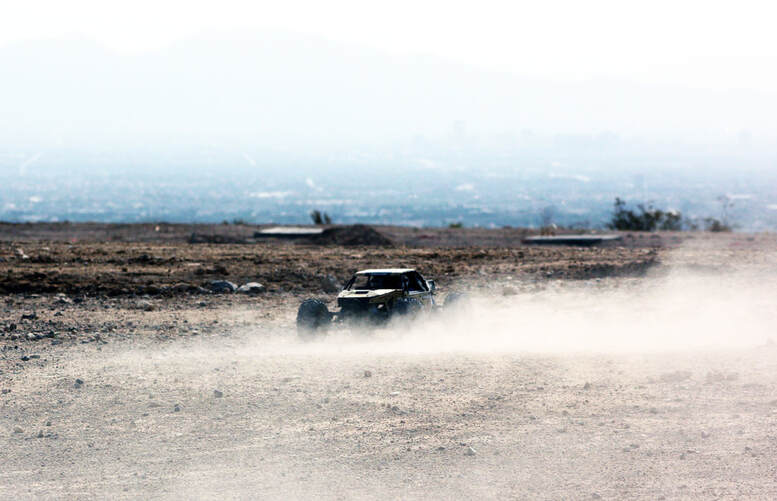 Nomad DB-8's future remains a mystery.
The Nomad is not just a good machine, it’s a fantastic desert buggy and arguably one of the finest 1/8th scale off-road platforms built to date.
If nothing else sticks with you about the Nomad, know that the performance is excellent and the chassis layout is about as good as it gets. You can take that statement, like the rest of this website for what it’s worth, but in my opinion, the Nomad DB-8 is right there with sliced bread.
The problem is that with parts support questionable, this needs to be more than just a random purchase for the RC enthusiast. As much as I adore the Nomad, I can’t recommend purchasing this desert buggy, and I for sure do not consider it to be a beginner’s vehicle.
Another frustrating aspect about the Nomad is that it entices you to want to build and tune the buggy. Ripping across the grass fields, I couldn’t help but think a new motor and 6s lipo battery would really make this buggy sing. The layout has ample room to accommodate the larger battery and pretty much any motor size you could want. Slap some nice aluminum beadlock wheels on the buggy, and you’d have a remarkably powerful and responsive machine. That is until you broke a critical part that’s no longer made.
As much as I want to fix up a second Nomad, I struggle with the idea of throwing money at what is most likely a dead end.
Unless you’re willing to actively stockpile a decent number of spare parts, there’s always the chance that some critical part will break, and you might find yourself in a situation where the part you need is no longer made and nearly impossible to find. Even as robust as it the Nomad is, maintaining and repairing RC cars is just part of the game.
As part of this website, I will be adding in more detailed information about spare parts for the Nomad, such as which items to get right away, and which can be sourced from other platforms. In addition to the recommendations, I will be testing out each part to make sure they work properly. That text is in the works now, and there are already a few items listed on the webpage.
All of that said, if you’re willing to take the chance and have a bit of savvy in tracking down hard to find items, or even figuring out which parts from other manufactures might work on the Nomad, then you’ll be rewarded with an excellent and most enjoyable desert buggy. After 200 hours of drive time, I have yet to regret this purchase.
Update News: The Nomad DB-8 has officially been discontinued by Team Associated. I can only hope they release an updated version some time in the near future.
Author’s Note
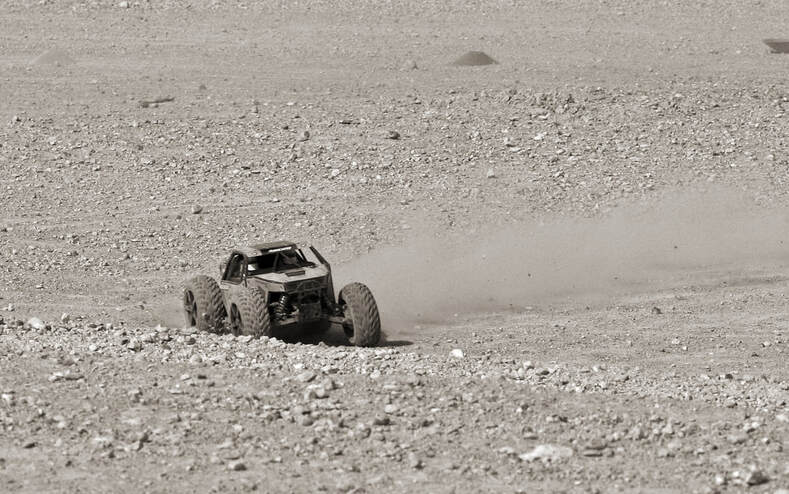 Nomad DB-8 squeezing the last bit of performance from the Duratrax Badger tires.
First and more important, thank you for reading this far. I’m sure it was much more than you planned on reading, and I greatly appreciate your time.
Ultimately this information is for you, and I hope it was of some use.
Writing this review took far longer than anticipated, and much of that was due to an ever expanding scope of this project.
The more I drove the Nomad during testing, the more I enjoyed it. After a month of testing, I decided this Nomad would have a permanent home in my RC collection, so even at the time of this publishing I still continue to add Nomad parts to my collection in order to keep this machine up and running as long as possible.
I have also added two more Nomads, new in box, to the collection. Team Associated had a “refurbished” sale on the Nomad for $299, and you just can’t pass that up. When they arrived, these were actually new in box – never run. My guess is that they were dealer returns or something to that effect.
I’m disappointed that I couldn’t make any headway with Team Associated, but if I do get the chance to speak with someone on the inside who can help fill in some of my questions, I will update this review and note the new sections.
Specifications
Team Associated Nomad DB-8 Desert Buggy # 80941
For additional technical information, please check the Owner's Manual for the Nomad in the PDF file below.
- Scale: 1/8th
- Length: 19.8” / 505mm
- Weight ( without battery ): 8lbs, 10 oz
- Wheel Base: 15” / 381mm
- Track Width: 11.25” / 285mm
- Drive: 4-Wheel drive with front / center / rear geared differentials.
- Suspension: Fully independent suspension with 16mm coil-over shocks
- Wheel: 2.2” / 3.0” wheel with 17mm hex drive and 8mm positive offset
- Tire: General Tire Grabber – Non-directional with single-stage soft foam insert.
- Motor: 1515-SL (non-sensored) 2000 kv Reedy
- ESC: SC1000 BL Reedy
- Battery Requirement: 4s lipo ( not included )
- MSRP: $799 ( MAP $520 )
For additional technical information, please check the Owner's Manual for the Nomad in the PDF file below.
Last Update: 10/13/2020
|
Nomad DB-8 Manual
The user's manual for the Nomad DB-8 is a very well developed product, showing impressive attention to detail and effort. The hard copy version is provided with the RTR kit, and I keep that handy on the work bench. That said, it's good to have an electronic backup. If you don't have this on your computer, down load it from here or from the main Team Associated website. Either way, get it saved on your computer. | ||||||