Team Ottsix Racing - USD Sticky 2.2
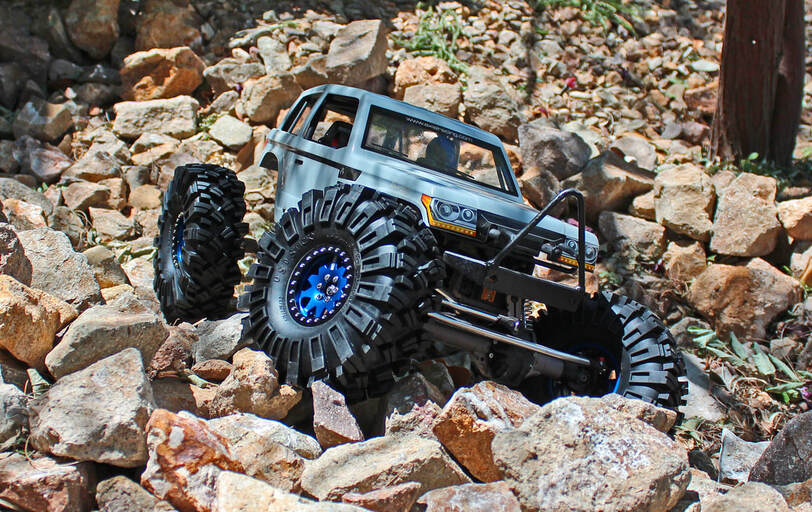 USDs looking pretty before testing begins.
Team Ottsix Racing is well known for high-quality RC tires and accessories, so when the company announced their new 2.2” USD Sticky crawling tire, I promptly added my name to the waiting list.
I was pleased to see a new 2.2” tire on the market, especially since it seems that the 1.5" and 1.9" scaler tires are dominating most aspects of the crawling community.
In the world of 2.2” tires, there are two distinct selling points; looks and performance. As much as we want to focus on the performance side, if the tire looks really cool, we’ll buy it, and the new USD Sticky tire looks really cool.
In terms of actual performance, the 2.2” market is less constrained by needing to look exactly like their 1:1 counterparts, and tend to lean a bit more towards all-out performance by using a wider range of tread patterns and tire dimensions which are not found on full-size crawlers. What’s surprising here is that Ottsix actually achieved both the scaler look and what appears to be a very solid performance tire.
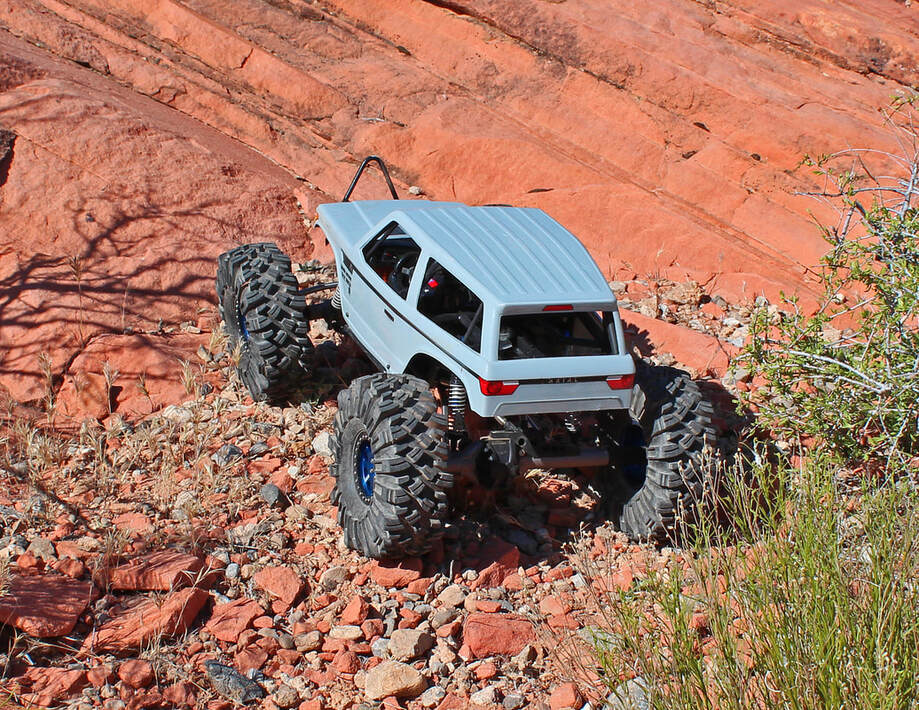 USD Sticky tires ready for some elevation.
Ottsix’s USD Sticky tire is a very close reproduction of the 1:1 version from Kryptonite Kustoms, located in Bossier City, Louisiana.
This company is well known for their off-road custom products and radical full-sized rock crawlers. The USD Sticky tire in its full-size version is a staggering brute of a tire.
The largest size offered, measuring 46” tall, weighs in at 185 lbs. and retails for nearly $1000 per tire.
Designed to claw its way up monster rocks, bulging tree roots, small import sedans, and virtually any mountain side, the 1:1 USD Sticky tire is tough and capable of harnessing the immense power these trucks can produce and putting it to use on the competition trails.
Along with the need for technical rock crawling ability, these tires also swim their way through deep mud and sand with equal ease, making them the unlimited tire of choice for many drivers.
The 2.2” crawler version of the USD Sticky is virtually an identical copy, taking the same aggressive pattern and scaling it down for our RC needs.
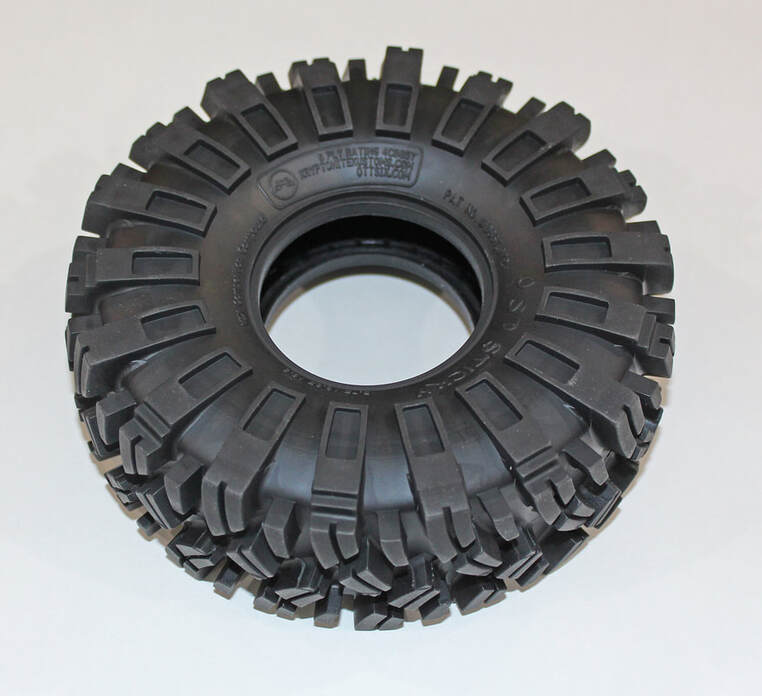 Excellent attention to detail on the USD Sticky.
The most striking feature about the USD Sticky tires are their massive side cleats.
Starting out as towers on top outside edge of the tire, they transition through a series of steps to wrap around the side of the tire in the form of large rectangular slabs.
Each side rectangular cleat has the negative relief in the middle, adding even more surface area for traction. In between each large side cleat is an additional shorter cleat.
Running down the middle of the tire are a set of wedge-shaped cleats with a partial thickness siping bisecting each cleat. Siping is also found on the larger side cleats, adding in an element of flex.
With this tread pattern, you not only have enormous traction from main wedge cleats running down the middle of the tire, but also from the sides. In wet, sticky situations, these large side cleats act like miniature paddles to help push the truck forward.
On large rocks, these side cleats will grab hold and offer some traction for the truck to work its way over the rock, resulting in traction from not only the top of the tire, but the inside and outside edges of the tire. The results is having three distinct mechanical surfaces on each tire to help gain traction.
There are two different tire compounds offered for the USD Sticky; Red compound which is their ultra-soft crawling and trail tire, and the Green compound which is a tougher, more abrasion resistant material suited for higher-speed applications. For my order, I selected the Red compound.
A few weeks after placing my order, the brown truck arrived and dropped off a new set of USD Sticky tires. Looking the cleats over, it immediately became clear that this tire will absolutely test the Wraith’s drivetrain strength and the motor’s torque.
The soft, widely spaced cleats looked like they would grip just about any surface and have very little slippage. Even in its 2.2” scale forum, the USD Sticky is a massive tire.
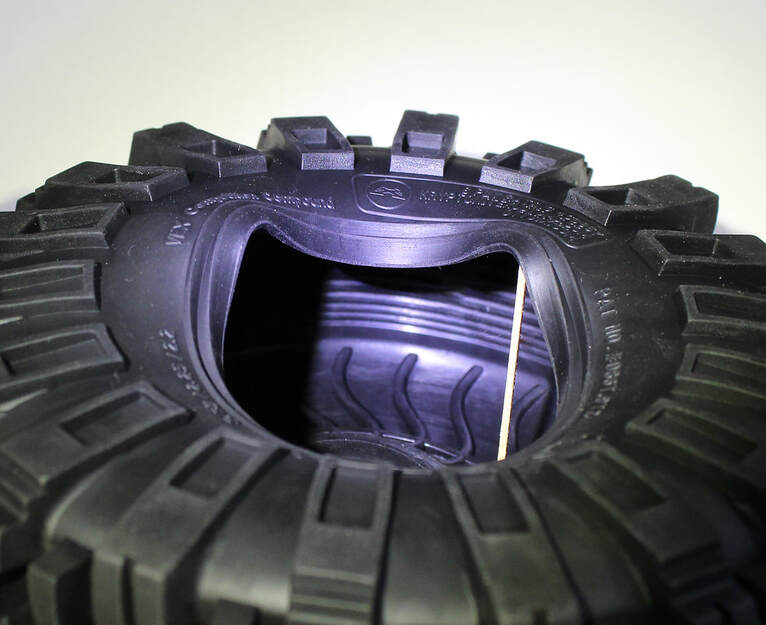 A look inside the USD Sticky.
After weighing each tire and taking the average, the 2.2” USD Sticky tires are a hefty 7.76 ounces (220 grams) each. With no load on the tire, my measures were 6.0” (152.4mm) tall and 2.3” (58.5mm) wide at the top.
The inside of the tire is both ribbed down the middle and also features side-wall ribbing for additional support. These details will help keep the tire foam in place and offer sidewall support for the tall tire.
This appears to be a directional tread pattern with the points of the cleats facing forward, but since these are not destine for high-speed track racing, it probably doesn’t matter which way you mount them.
The cleats are also exceedingly tall, so hydroplaning is not going to be a factor either, thus negating any potential issues of running these backwards in water.
There are no directional arrows molded into the sidewall. For what it’s worth, looking at Kryptonite Kustoms’ website, all of the 1:1 tires are mounted directional.
The level of detail on these tires is peerless; there is no better tire made in terms of manufacturing precision, as well as fit and finish. USD’s should be considered a benchmark of precision tire manufacturing.
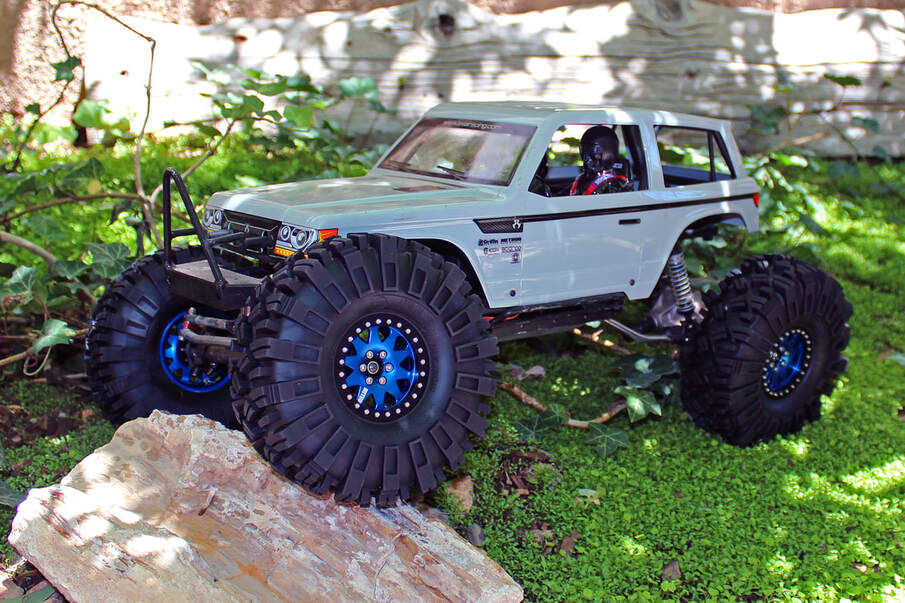 A complete sucker for these Vanquish beadlock wheels.
Tire Setup for Testing
Starting with a quick cleaning, I sprayed the tires with a bit of diluted Simple Green and went after them with a soft tooth brush.
They were fairly clean upon arrival, so this was more an effort to remove any residual mold release agent off the sidewalls. After a few minutes of scrubbing, I rinsed the tires off and used the air compressor to dry everything out.
With the USD’s clean, I took some general measurements and then made three small venting holes (0.14” / 3.5mm in diameter) in the top of each tire, evenly spaced out around their circumference. Compared to other tires, the USD’s are very firm due to the thick cleats running around the edge of the tire. The internal ribs also add to the tire’s support. The surface feel of the red tire compound is indeed sticky; you could remove lint from your couch with these tires.
For tire foam, I selected a basic single-stage foam for my first number of testing sessions. Tire foams are such a hotly debated topic and so terrain-dependent that I feel each person looking to get the very best performance out of their tire, should experiment with different foams. That said, I didn’t want to bog down into foam testing for the start of this review, but rather select a decent single-stage foams and get out on the trail
I have seen that the larger 2.2” tires can perform well with basic single-stage foams by using their large volume and tire size to help conform to rock surfaces.
The USD Sticky 2.2” tire does not come with foams, but they can be purchased separately from Ottsix. I ended up going with a generic set of soft open-cell foams because of a decent supply of these at the shop in different sizes.
Anyone who as mounted their own tires on beadlock wheels knows that with some tire brands, it can be a real struggle to get them mounted onto the wheels correctly. After mounting nearly 30 sets of tires for the various testing we are currently working on, I can assure you that all tire beads are not the same. To that extent, there is no better tire bead than what is found on this USD Sticky.
Mounting these on a special set of electric-blue Vanquish wheels was unbelievably easy. I’m a sucker for high-quality wheels, and this combination of the USD Sticky tire and Vanquish wheel is a real eye catcher.
When you have a tire this easy to mount, the effort to clean foams or test out different foam types is not nearly as time consuming or frustrating as with other tires.
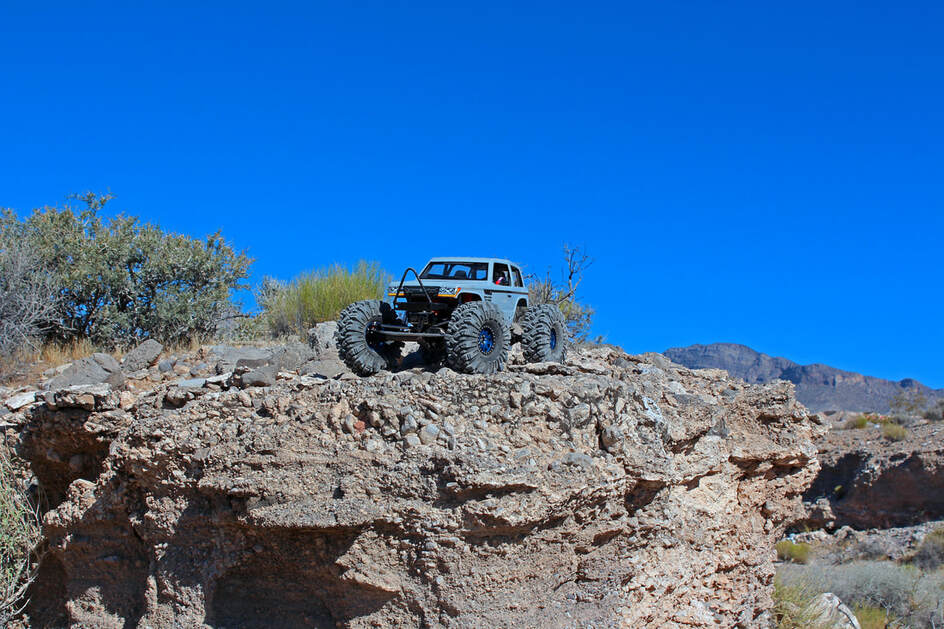 Layers of sediment gradually tuned into desert "concrete." This is now slowly eroding away in this wash.
In the Mojave Desert, most of the hard, sunbaked soil formations are the sedimentary type where much of the rock underfoot is from erosion of the mountains.
Small pieces of rock, gravel, and sand are gradually cemented in place by finer sediment that mixes in through rain water, and with successive layers building upon older layers over time, a kind of concrete is created.
As the erosive process continues to march on, heavy rains and floods etch out washes and canyons through these deposited concrete-like layers of sediment, creating stunning landscapes. After decades of floods, some of these washes in our local area are twenty feet deep and offer some challenging rock crawling areas.
My intention was to start out testing the USD Sticky tires in a number of nearby washes, testing to see how they will hold up to the difficult terrain.
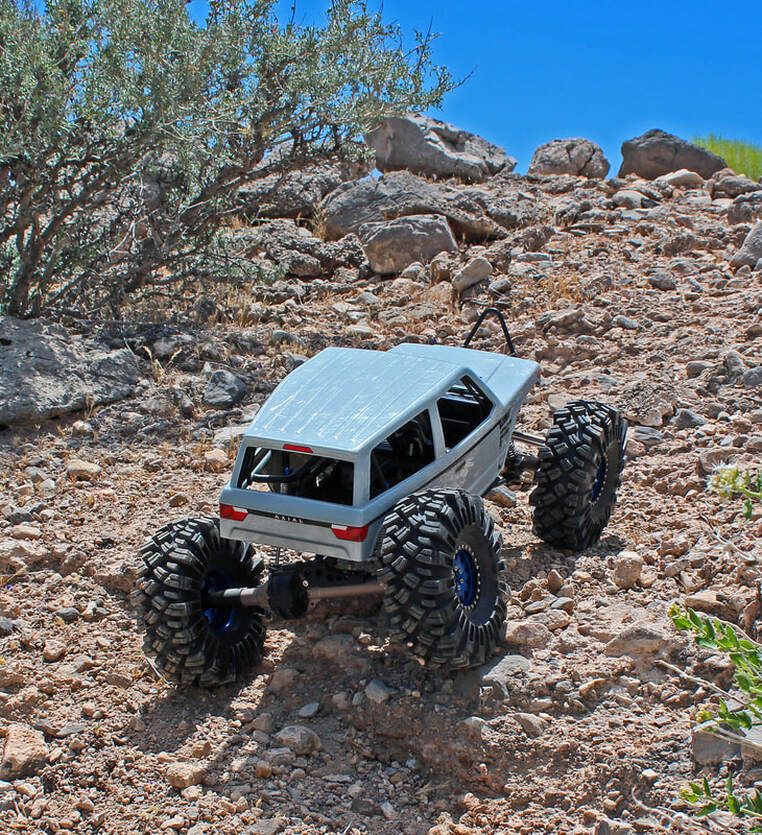 Like climbing a mountain of ball bearings.
Starting out at the bottom of a wash near the base of the mountains, I cruised along the gravel and sand deposits until I found a gentle slope of runoff rocks nestled in-between a few a few larger rocks.
These gentle slopes usually form after a mild rain pushes down the loose rock and dirt from the top edge of the wash’s walls. These slopes don’t last too long; usually a flash flood triggered by heavy rain will come roaring down the middle of the wash and scrub the sides clean, removing these access points.
When you first look at these slopes, they seem easy enough for the crawlers to work their way to the top, but the loose, small pieces of rock and soil are only “sitting” on the slope’s surface, and any pressure will send sheets of this material tumbling down just like an avalanche.
In most spots, this layer of loose rock sitting on the slope’s surface is approximately two to three inches deep. The key is to slowly crawl your way up, limiting wheel spin as much as possible. If you mash down the throttle, you’ll simply sink yourself up to the axles and be forced to reverse with gravity to get out. Running starts don’t count; not only does it destroy the slope to the point of making subsequent attempts nearly impossible, but it almost never works.
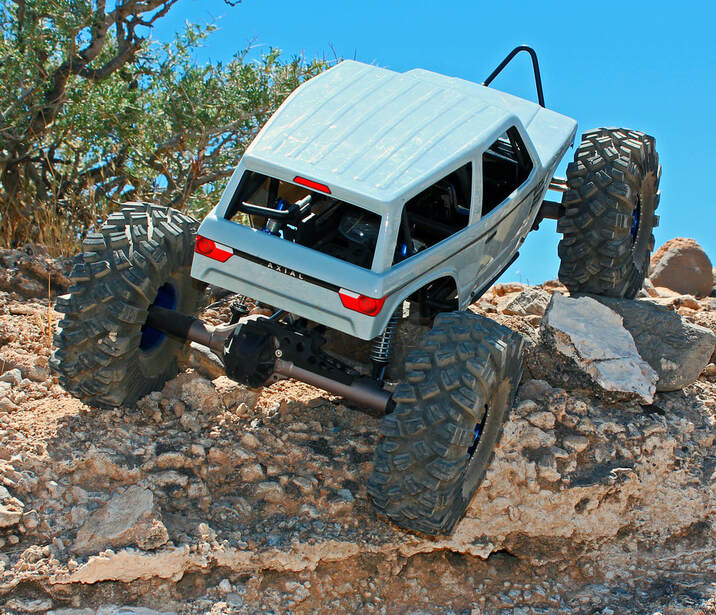
With a nearly straight shot to the top, I eased the Wraith up the right side of the slope, giving me a bit of room to traverse to the left if necessary.
When climbing a steep slope, it’s a good idea to give yourself some room to turn left or right when you start to lose traction to all four tires; this maneuver reduces the angle of the slope by increasing the distance traveled in relation to the elevation gained.
Making my way up the slope, I watched the USD’s closely, and right away their massive cleats dug into the loose rock and held firm on the terrain. As the full weight of the Wraith settled down into the slope, there were a few spots of wheel spinning, but intermixed in with the loose rock were a few larger boulders just underneath the surface, and these provided just enough of a firm surface needed to hook a few of the massive tire cleats to continue moving upwards.
Near the top things became rather steep, so I made a hard right turn into a rock outcropping which looked to be a bit more firm. The smaller loose rocks continued to give me fits as I worked my way over, but again with just a few of the USD cleats hooking up, I was able to keep moving towards the top.
Once I made it to the top, I headed back down the slope and repeated this approach a number of times, selecting different lines to climb, as well as testing out a few which incorporated larger rocks exposed along the way.
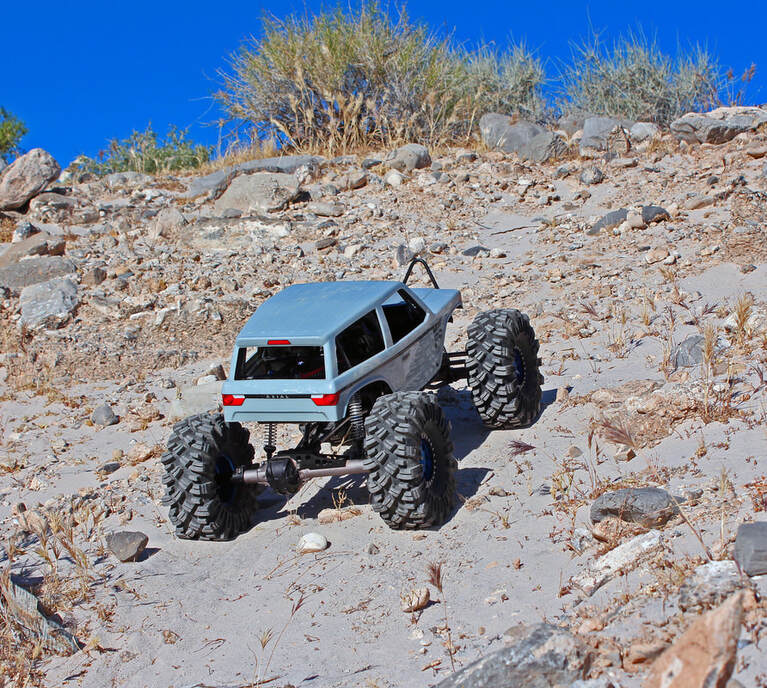
Working in a new area of the wash, I found a slope covered in a fine layer of construction sand which had blown a few weeks earlier.
After studying the possible lines and doing some preliminary crawls up the edges, I was able to climb up this slope better than I had anticipated.
The USD tires were sinking in a bit deeper, but there was enough tire traction to not bog down and maintain forward momentum. In this instance,
I attribute much this success to the large sidewall cleats on the tire. I could see the sand and gravel slowly spinning off the sides of the tire as I worked up this section.
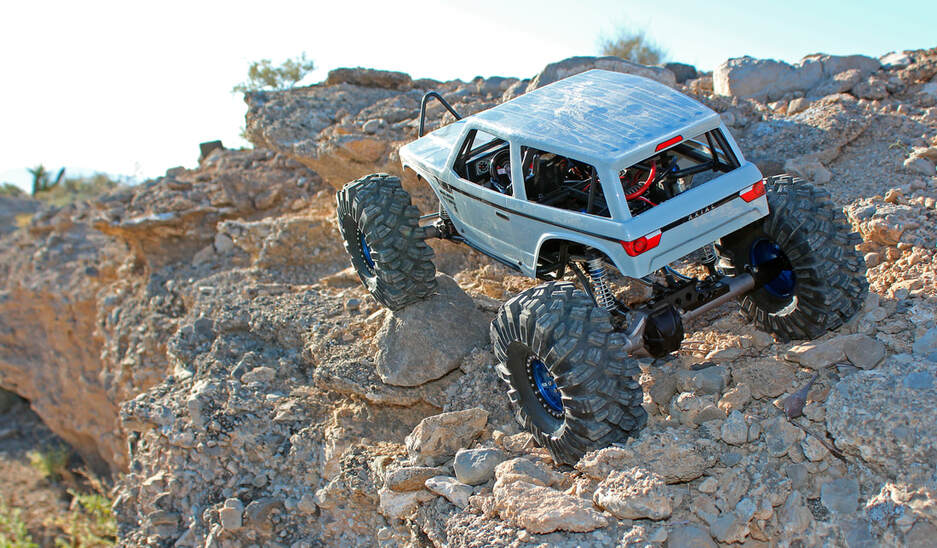 Total control on the edge with the USD Sticky 2.2's
At the top of a ridge located a hundred yards down the wash, there is a challenging area called Franklin’s Shelf.
Sparsely vegetated with scrub brush and a few bits of cactus, this shelf forms the top edge of the wash, and littered with rock fragments and eroding blocks of this desert concrete.
The rocks in this area chew up tires quickly with their sharp edges, and entire sections of the shelf will suddenly collapse with any pressure, sending the truck and a few hundred pounds of rock along with it to the wash bottom, some six to ten feet below.
Franklin’s Shelf is only about 200 yards long, but one of my favorite areas to crawl. Usually I make a few passes up and down the edge of the shelf, starting with a decent towards the east.
With gravity working with me, it’s easier to see which rocks are loose before the truck is totally committed to the rock and if there are any changes since my last visit.
Once I reach the end of the shelf, I flip around and made my way back uphill with the edge now on my right side. This completely changes the characteristics of the trail, and you find that what was easily rolled down becomes a bit trickier working your way back up.
Usually near the top of there are a number of larger rocks still fused in the soil, and these provide for excellent traction. I pressure-tested the rock-sliders from Scaler Fab a number of times, and they did an excellent job in protecting the body and sides of the Wraith.
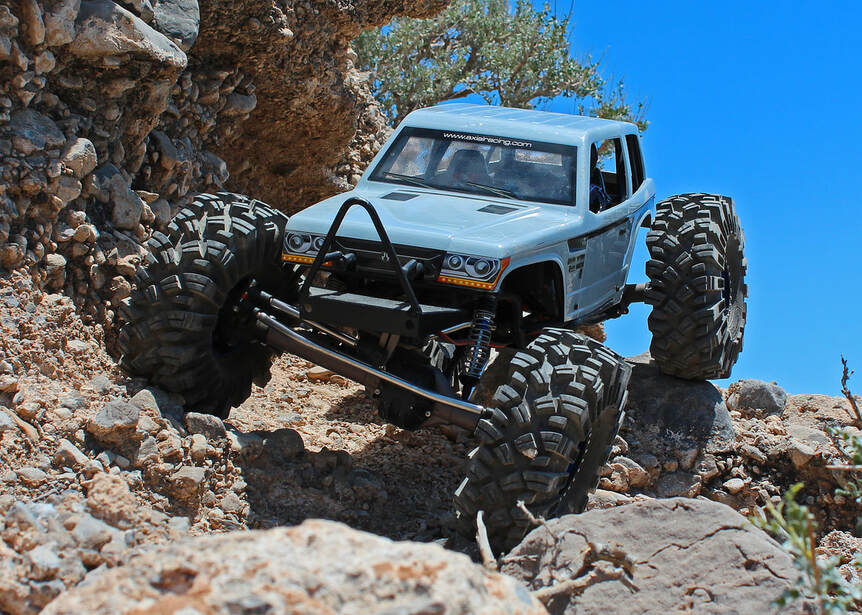 Chunky like Auntie's potato salad.
Heading down hill along the edge, the level of control the USD’s offer was crazy.
The moment I would apply a bit of engine braking to control the decent, the tires would grab immediately.
The hefty 8 lb. weight of the Wraith would drive the USD cleats into the ground like tiny anchors, and they held fast.
On the ridge there is less loose small rock on the top as compared to the slopes, but much more frequently I encountered larger pieces of rock with jagged edges, and these are perfect for grabbing hold of axles and rear differential housings. Often times you need to take a crazy line to keep the axles clear, forcing the Wraith to twist and contort, sometimes hanging a tire’s edge out into open space.
The added height of the USD tires was noticeable compared to some of the other tires, and it did help me through a few tight spots where the axles would drag in the past.
After a series of passes up and down Franklin’s Shelf, there was no question that as a technical rock tire, this tread design works exceedingly well on loose rock. I could run these right up to the edge of the loose shelf and they would hold tight.
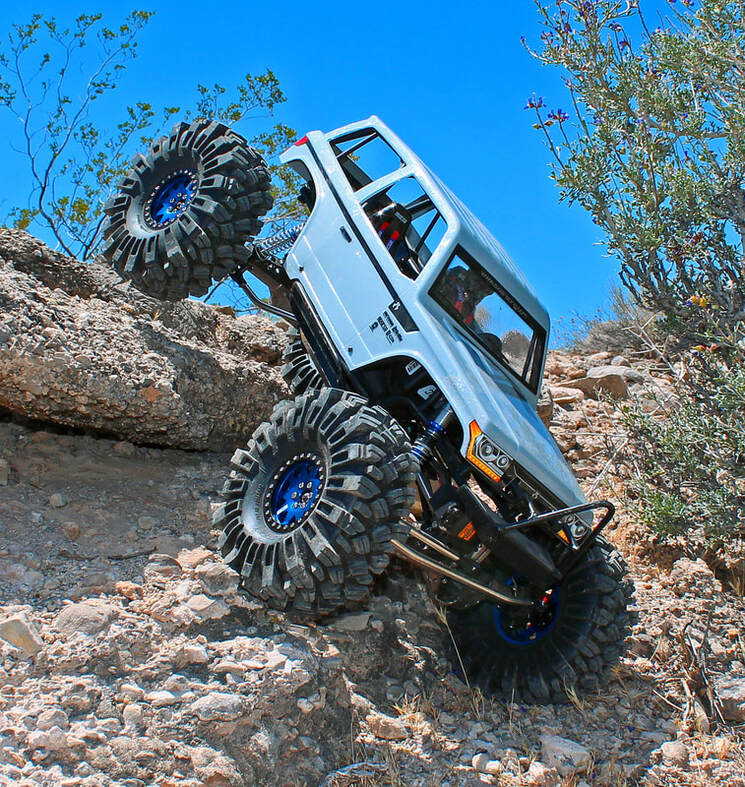 Just another day on the trail.
Near the bottom, I hooked a turn into a series of desert concrete slabs which led to the bottom of the wash.
The slabs stick out like diving boards with the soil eroded away underneath their bases, so the truck drops straight down onto the next rock below; there is no wall to grip.
More than a few times I needed to get on the brakes to slow the decent, but not too much as to flip over.
The USDs would again grab where they could and hold, sometimes floating a rear tire or two in the air.
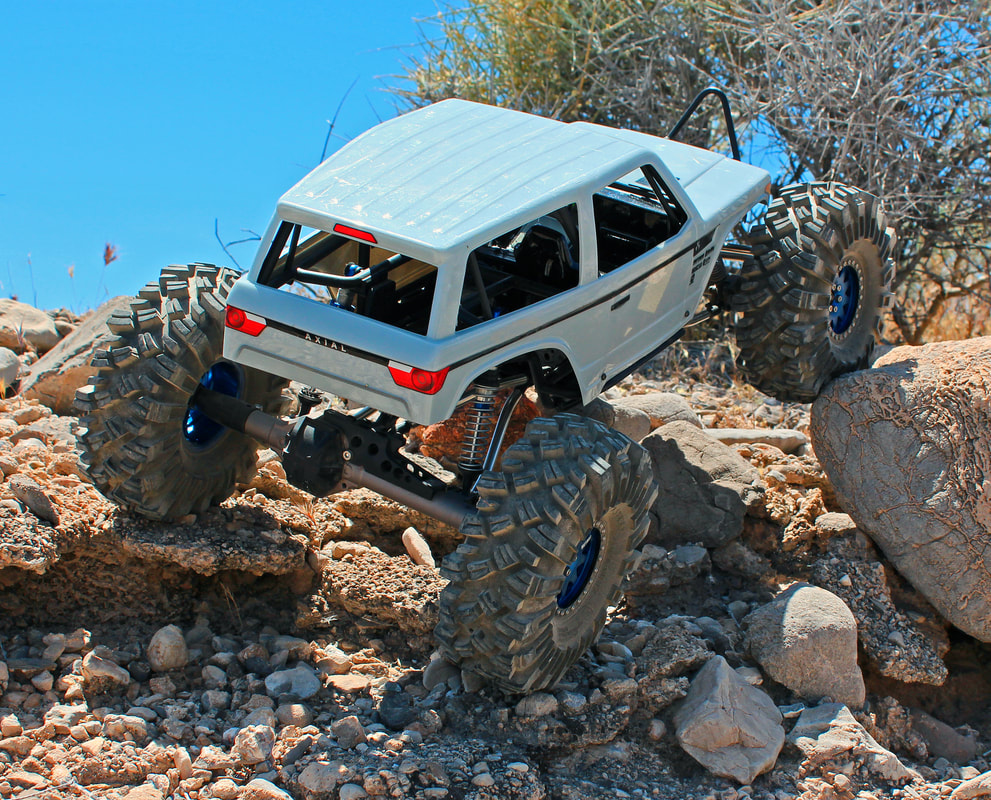 Putting the USD's sidewall cleats to work.
I headed back out to this spot a dozen more times with the USD tires, trying out as many different areas in the wash as possible.
The level of performance was consistent and the tires showed very little wear after many difficult trail sections.
The width of the tire is a big advantage, spreading out the Wraith’s weight evenly over the loose rock and creating a large contact point for traction.
At times the slopes were just too steep and loose to find a path up, and I’m not sure any crawler tire is going to make a difference in these situations.
When I had the chances to attack some of the larger fused sections of rock and soil, the Wraith would claw its way to the top, with the side cleats of the USD’s barking as they pulled against the rock’s surface.
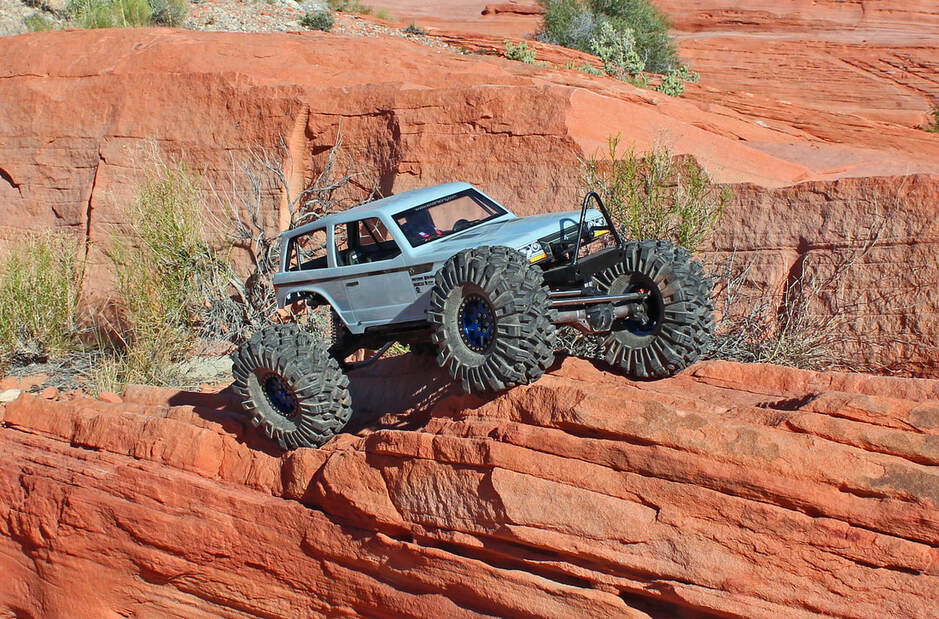 Tight squeeze along this short wall.
Anxious for more testing, I selected a small spot of clean red sandstone outcroppings tucked away on a remote trail for my first look at large, solid rock with the USD’s.
This red sandstone is partially hidden in a deep wash and contains some unusual features.
Unlike the typical rounded, smooth sandstone formations, this area contains a high number of fractures, resulting in defined edges and steps to rock, creating some unusual lines.
Starting at the bottom of the wash, I picked some lines which lead up a choppy incline, allowing me to see how the USD’s would grip the dry sandstone surface. Right away there was less slipping and grinding sounds with the USD’s as with other tires; the Red compound of the USD’s tires were hooking up nicely to the rock’s surface.
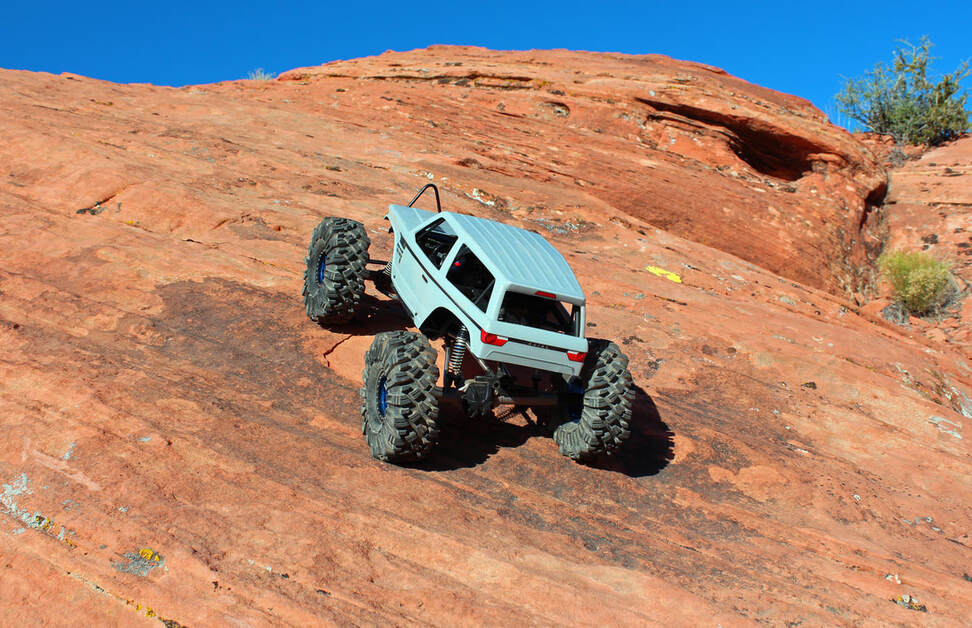 Just made the turn and headed to the top.
I worked a tricky ascent that wrapped around the base of the rock, tilting the Wraith slightly to the right as the climb begins.
Further up, the angle becomes steeper and forces you to continue drifting slightly to the right before you decide when to cut a hard left and attack the major slope of the rock head on.
With the USDs, I was able to stay with the same line as I had before, even pushing a few yards past my previous limit. Even with the extra few yards, I still needed to turn left; the Wraith was leaning hard to the right like a sinking ship, and I could start to see light under the inside tires.
No matter how sticky the tires are, the Wraith has a relatively high CG and I was getting very close to tipping over and sliding all the way back down the rock.
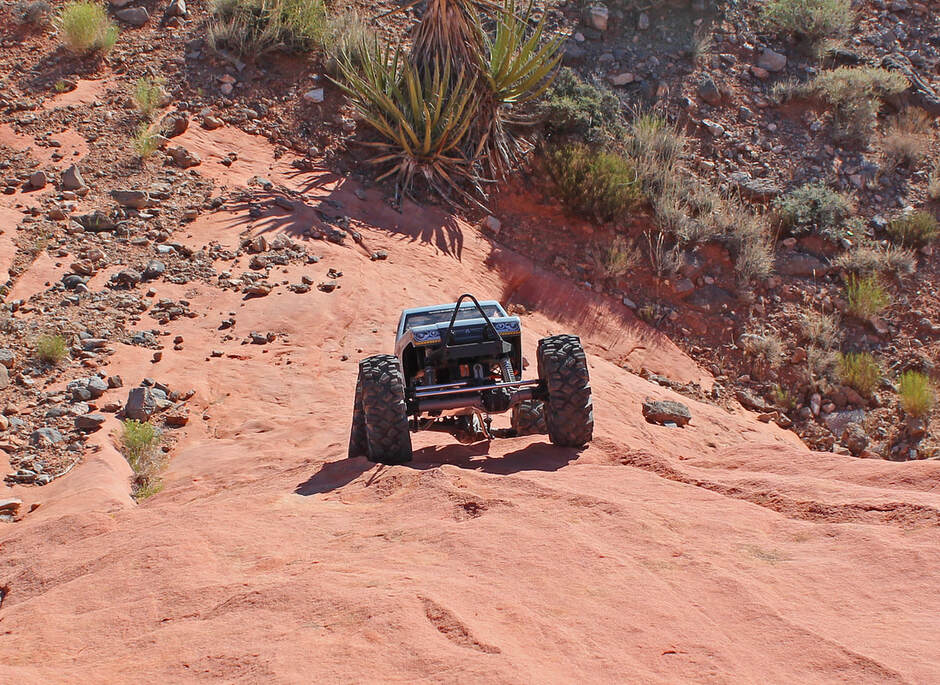 This small step in the middle of the climb makes things interesting. Half a truck's width on the driver's side is a 30' drop to the bottom.
Once I made the hard left into the steep hill, the Wraith settled down and I was able to climb straight to the top.
There were a few moments when the front tires were getting a bit light, but the solid traction of the rear and smooth throttle from the motor maintained control.
While the cleats of the USD are soft and hold tight, the tire and foam combination is still a bit firm for really vertical lines, making me think to swap out to nice two-stage foams and attack this hill again in the future.
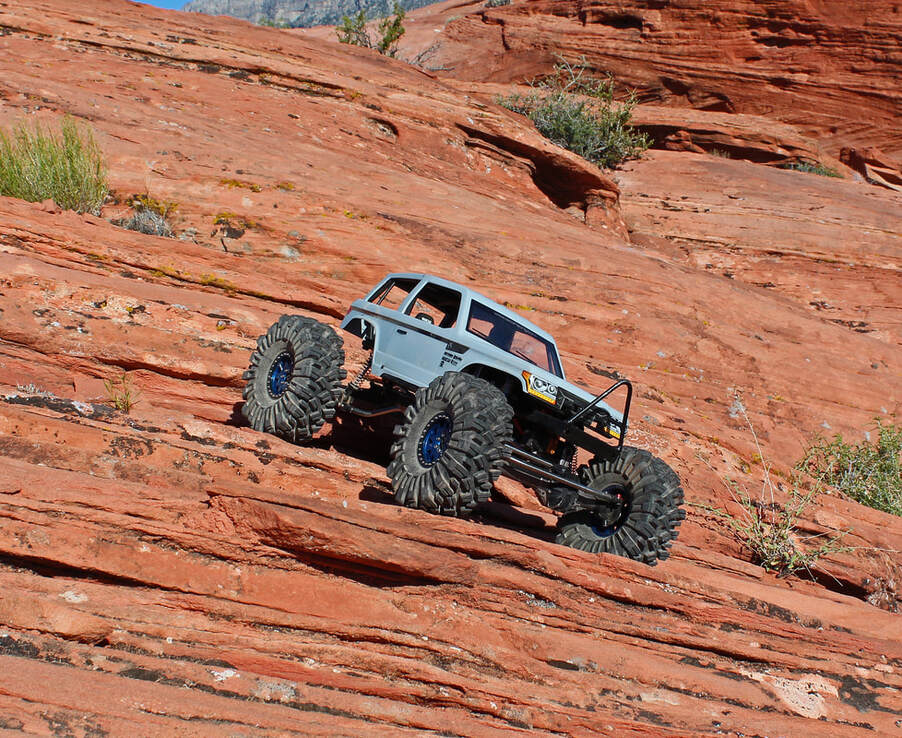 Headed back down for another climb to the top. This is an excellent surface for the USD Sticky.
Moving to a different spot, I worked on a trail which leads the truck up the base of some sharp rock edges, with each step standing about three to seven inches tall each, and twisting upwards and to the left.
With these defined edges to the rock, the USD tires easily grabbed hold and the Wraith climbed these with surprising grace.
The tread design is as close to perfect as it gets for this kind of rock, with the cleats wrapping around the rock’s edges like small hands.
This is different than a very soft sidewall wrapping around a sharp edge; the USD’s cleats are doing the dirty work here and far more resistant to sidewall tears than just a smooth, textured sidewall’s commonly found on crawling tires.
With the large cleats, I felt confident to put power down and force the Wraith up the rocky edges; I had no worry about damaging the USD tires.
Lines that were not possible with the factory Rip Saw tires were of little challenge with the USD’s. I continued to attack steeper and steeper lines until I just drove straight up the steepest part of the trail. When there are edges to the rocks for the USD cleats to grab, success is purely based on the motor torque and driving technique; the tire is not any limitation.
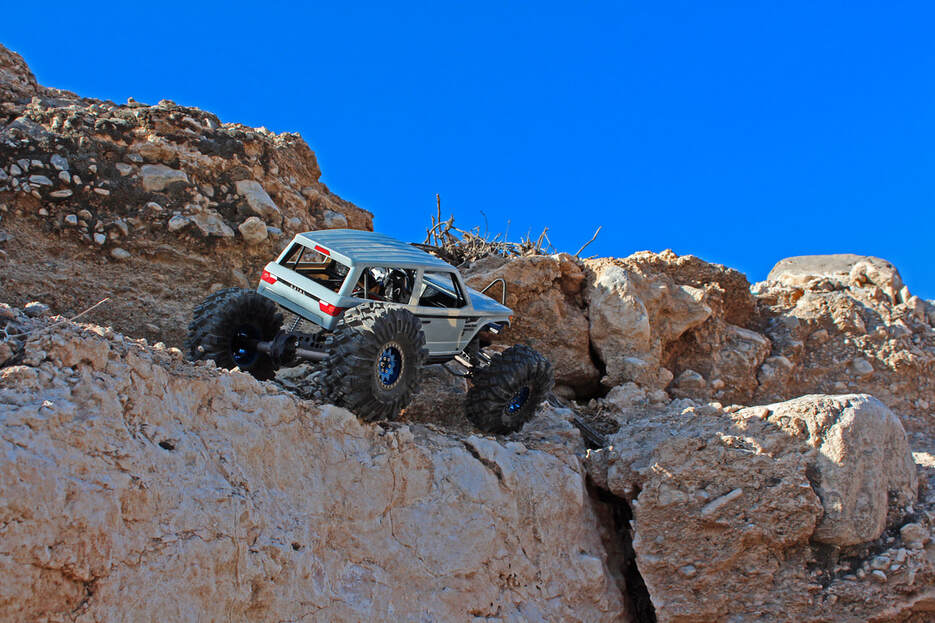 Tight spot on the trail.
Back at the shop, I pulled the USDs off the wheels and gave them a detailed cleaning.
The single-stage foams were in great shape, but I want to give these tires another run on two-stage foam.
With the economy making foam shipments from overseas all but impossible,
I settled on the Rock Beast Dos Piezas foams. These are the most basic version of the modern two-stage foam, built from pretty decent materials, and also one of the few still available for sale.
I trimmed a little foam from the sides of the inserts, stuffed them into the USD tires and mounted them back on the Vanquish beadlock wheels. Again, the excellent tire bead on these USD’s made the process simple and quick.
Heading back out to the same areas as testing before, the USD Sticky continued to perform well. I watched close to see if there was any advantage to the two-stage foam, and indeed I could see more flexing of the side cleats on the rock surface.
I pushed all the way to the edge on Franklin’s Shelf, and the tires held extremely well, giving me the confidence to run the entire shelf edge, talking on some sketchy loose rocks which were poised to tumble down to the wash below.
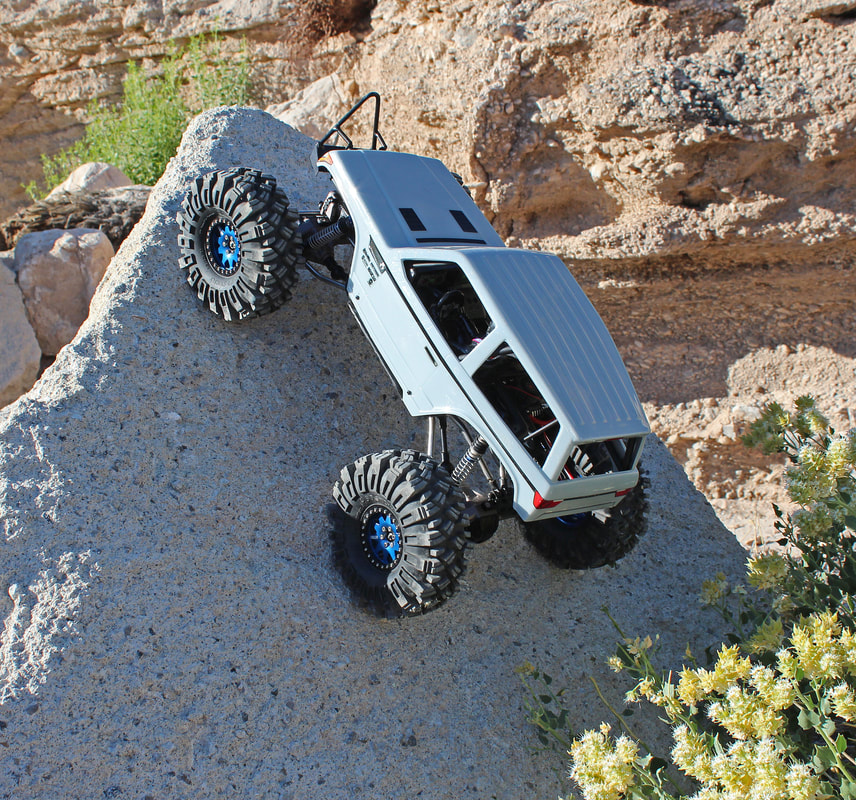 This stunt took the USD tires to their limit.
Once at the bottom of the wash, I cruised along the fine gravel towards a set of large concrete blocks I had noticed a few weeks earlier.
Some of these blocks were quite large with one flat block tilted up at a sharp angle. I was curious as to how steep the slope was, and with a quick measurement I noted a 50 degree slope (119% grade).
Unfortunately there was no way to attack this block from the gravel wash floor; the bottom edge of the block was broken, away leaving a 10” tall vertical undercut before the slope of the concrete began.
Carefully I placed the Wraith on the block, right at the base with the rear tires just above the bottom edge.
A bush growing from underneath the block was also in the way, and I had to push the green leaves aside.
With the Wraith in position, I slowly released the rear of the truck, thinking it would slide right off the slab. To my surprise, the Wraith held its position. Slowly I pressed on the throttle, and with some groaning of the USD tires, the Wraith started to climb up the slab. A few moments later and the Wraith was at the top of the slab with nowhere else to go.
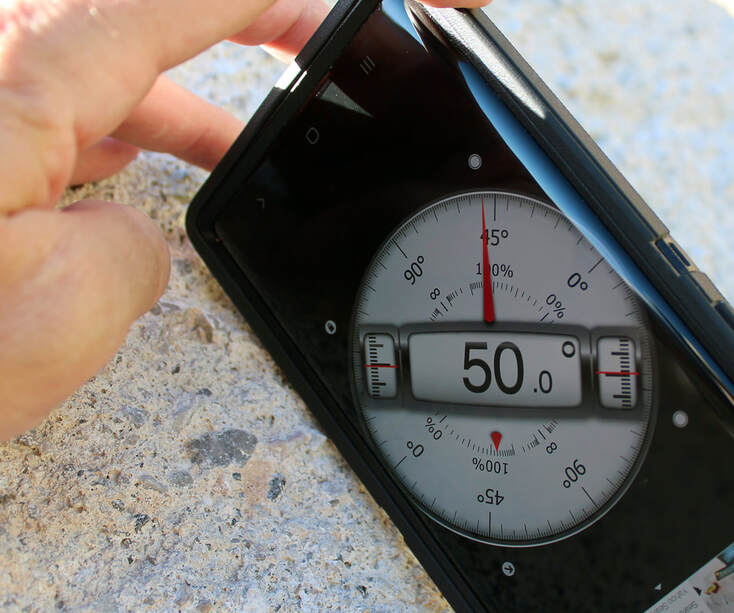 Things getting a little steep.
I repeated this process a few times, and there were a few moments when USDs would lose traction and start to slide back towards the plant.
As long as the UDSs didn’t get any of the plant leaves under the rear tire’s cleats, the tires would catch grip before falling off the slab.
One time the Wraith slid back and the right rear tires became caught up in the plant’s leaves, and just that slight loss of traction sent the Wraith dropping off to the gravel wash below. I needed every bit of traction possible from all four tires to hold onto the slab.
Repositioning at the bottom of the slab, more to the left side and away from the plant, the next five attempts were all successful with the Wraith reaching the top of the slab.
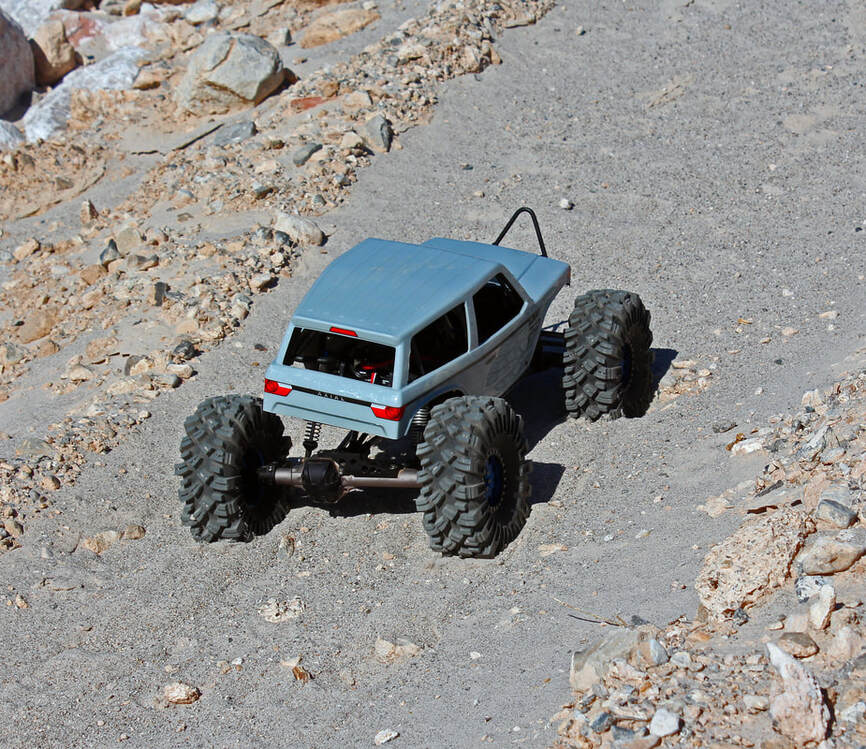 Testing out the USDs on a bit of sand.
Hunting around for another slope to climb, I found an area where a construction project had the bulldozers push extra fill dirt down into a small gully near the end of the wash to widen the road above.
Since then, wind had blown sand down into the area, covering the dirt slope in about two to three inches deep of this fine construction sand.
Looking up from the bottom, the slope looked to be about 20’ tall. The incline started out around 15 degrees (27% grade) and steepened to 25 degrees (47% grade) nearing the top.
Keep in mind that these are general measurements taken from climbing up the side of the hill and checking specific spots; I didn’t want to walk directly on the section which was to be used by the Wraith.
Starting at the bottom of this edge, I found two distinct paths to the top; one on the left working directly though the deep sand, and a path on the right, slightly steeper, which focused more exposed rock and soil.
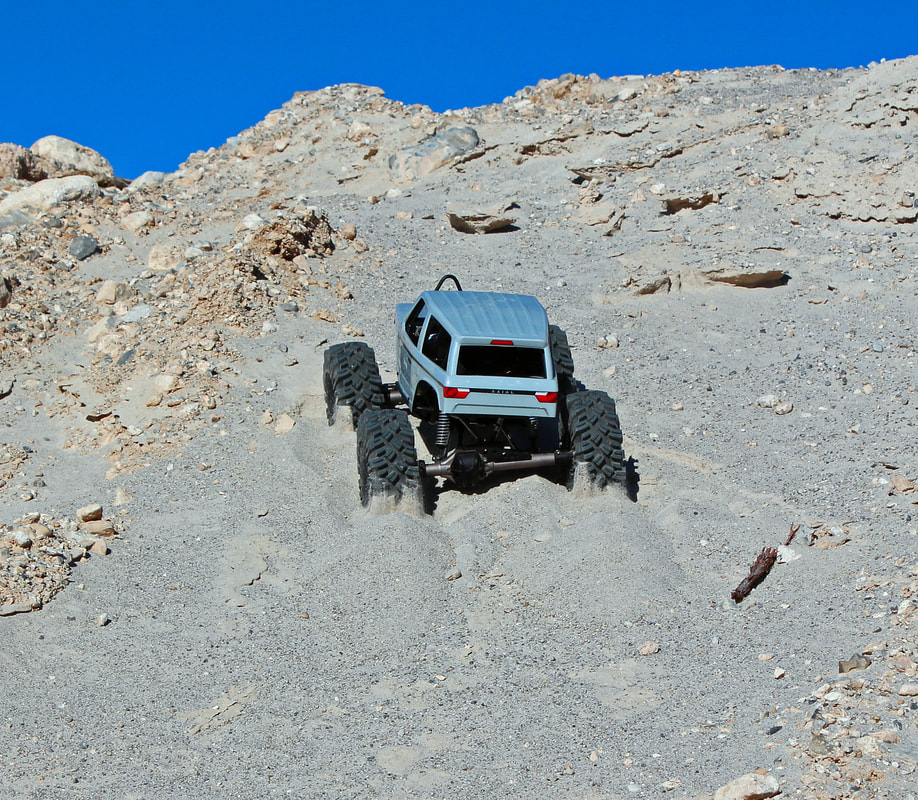 Mo' power, mo' better.
Starting on the left, the Wraith made rapid progress for the first five or six feet, but as things became steep, the truck started to sink in the sand.
I was still keeping a slow crawling pace as before, but it wasn’t quite enough momentum to keep me on top of the sandy slope, so at about fifteen feet up I sank to my axles and stopped. Throwing it in reverse, the Wraith popped right out and I backed down the slope until I was back on top of level ground.
This next attempt I stayed on the throttle a bit more and the USDs started throwing sand as I made my way up the hill.
As things became steep again, I turned a little to my right and then left, drifting only a few inches out from the original path. This was enough to keep the USDs digging through the sand and Wraith moving all the way up to the top of the slope.
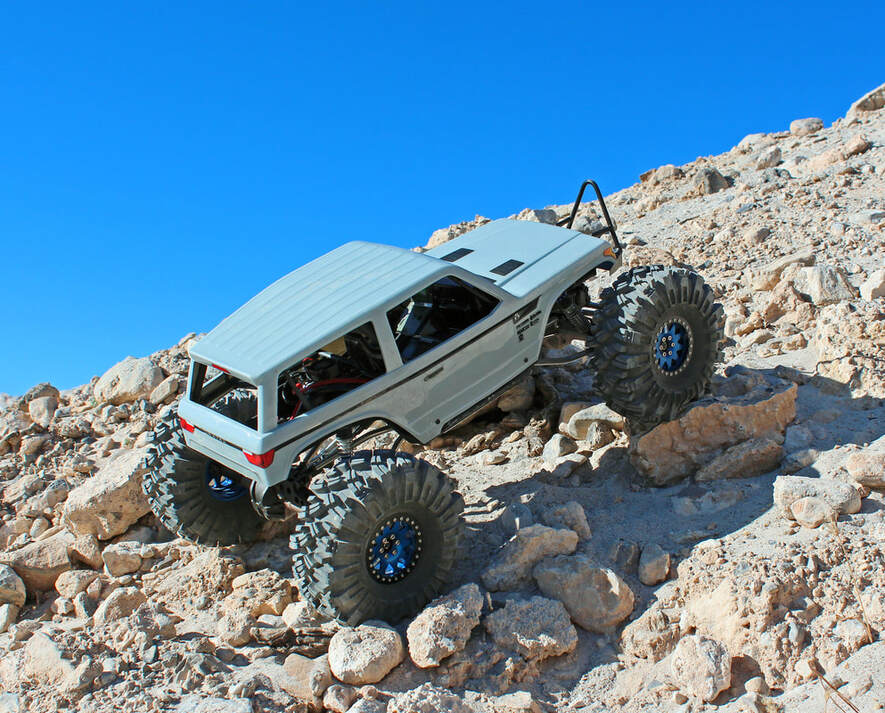 USDs move over this terrain like it's a paved road.
With what I had considered to be the more difficult of the two lines conquered, I switched my focus on the right path, taking the Wraith up a rocky and slightly steeper line.
The improved traction from the rocky soil on this path made up for the slightly steeper angle of the slope, so I felt confident that first attempt would get the Wraith to the top.
Same as with the first attempt, the gentle slope of the lower area allowed for the Wraith to get moving, and as I picked a line which kept the tires engaged in firm rock as much as possible, I was near the top in no time.
The USD’s easily handled the rock and any small pockets of sand or loose dirt.
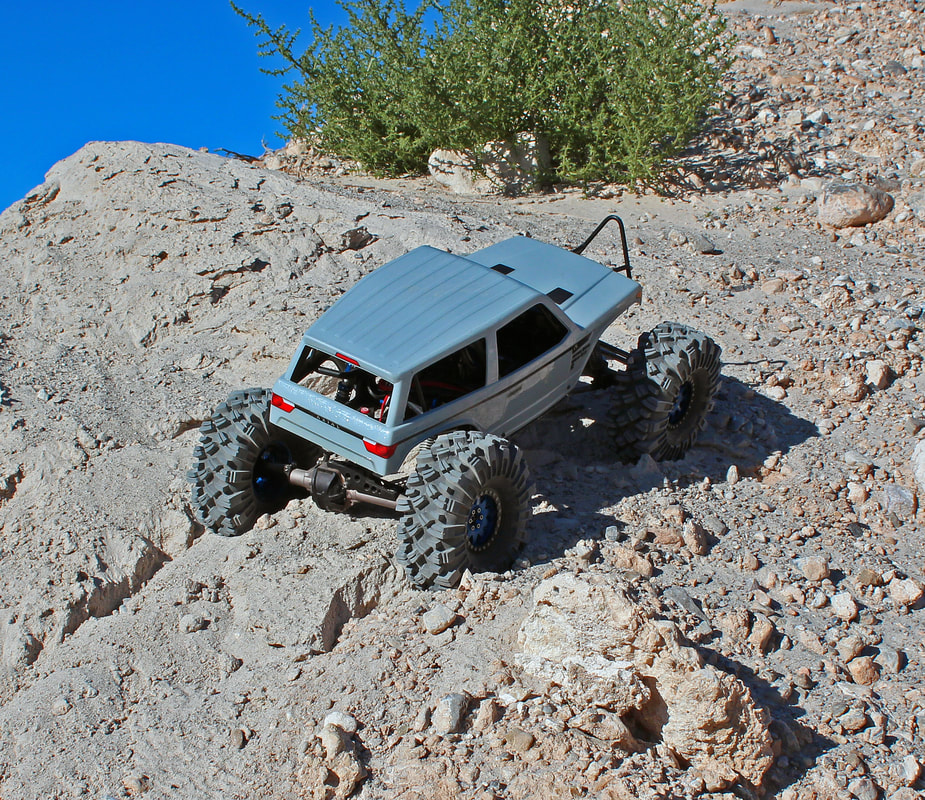 This sand was deeper than I had expected.
Right at the top, there is a peak of mounded sand, and my plan was to follow a line which swept underneath this feature and around to the right, just before making a sharp left turn for the summit.
Attacking the summit in a straight line wasn’t reasonable; the sand was very deep and piled high, so you had to go around the side, and the right side looked pretty good for success.
During this maneuver, the sand became deeper than anticipated just before the turn to the left, and I was quickly sinking to my axles.
Putting more power to the USDs, the side cleats continued to claw their way through the deep sand, making slow but steady progress up the final leg to the summit. A few moments later I was cresting the hill and immensely pleased with the results.
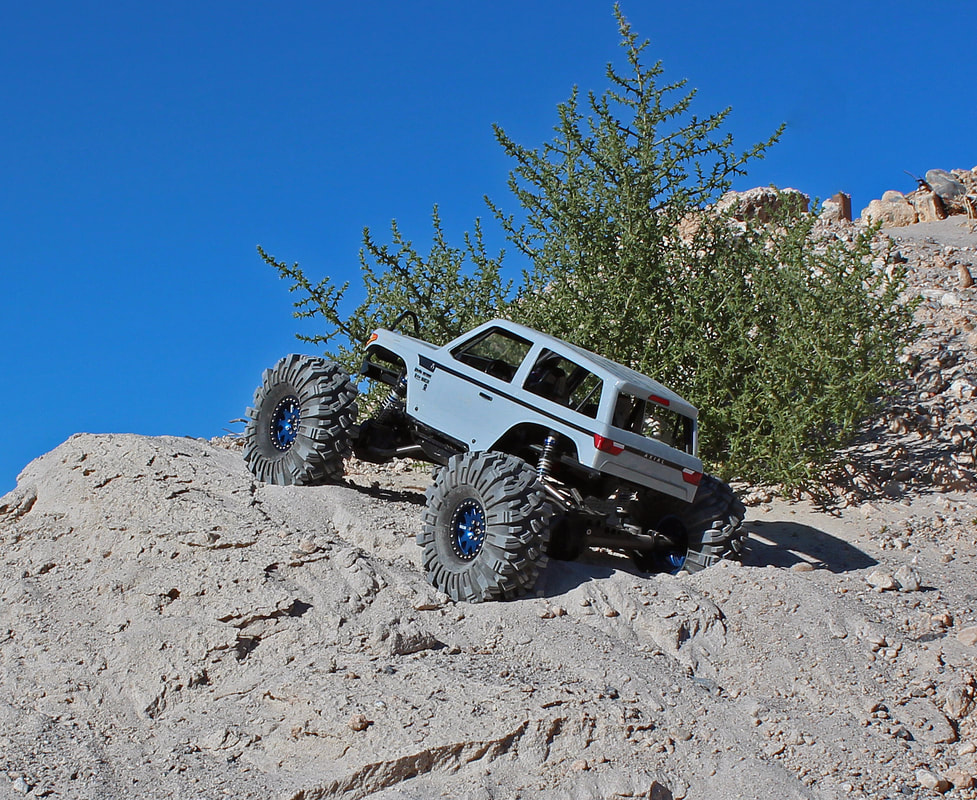 Reached the summit.!
During this maneuver, the sand became deeper than anticipated just before the turn to the left, and I was quickly sinking to my axles.
Putting more power to the USDs, the side cleats continued to claw their way through the deep sand, making slow but steady progress up the final leg to the summit.
A few moments later I was cresting the hill and immensely pleased with the results.
Putting more power to the USDs, the side cleats continued to claw their way through the deep sand, making slow but steady progress up the final leg to the summit.
A few moments later I was cresting the hill and immensely pleased with the results.
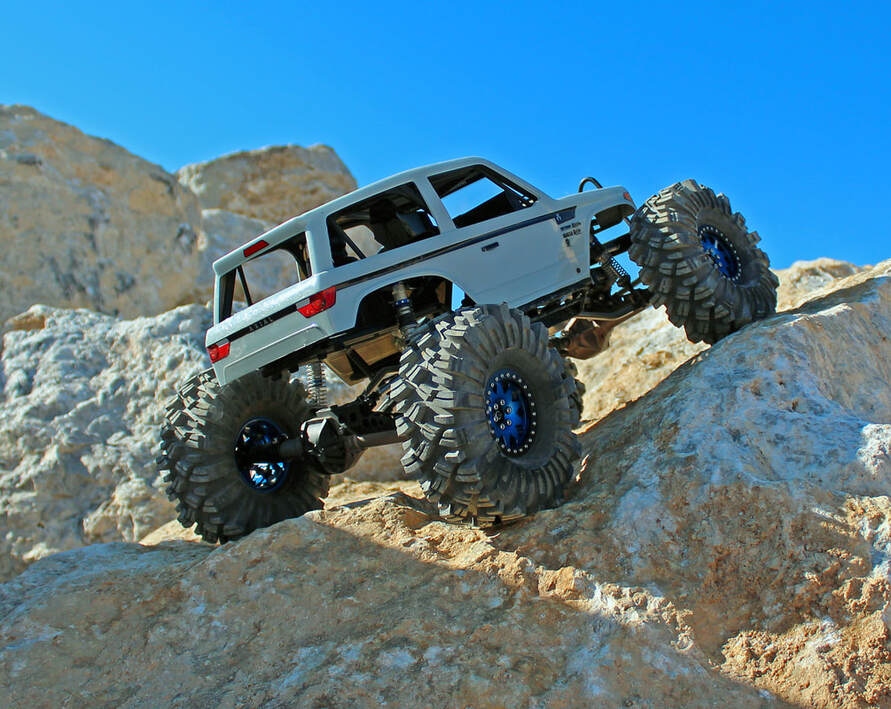 Granite boulders on the menu for today.
For the final day of testing, I had located earlier in the week a massive pile of granite boulders being used for a decorative wall at a construction site.
With the workers away for the weekend, I spent the morning there testing out the USD Sticky tires and two-stage foams on these rocks.
Granite is a fascinating surface with all the subtle details of a tight crystal grain structure, offering up excellent traction on the freshly exposed surfaces, and some tricky spots on the smoother, weather corners.
There were also some spots on the boulders with dried mud in the cracks and a fine light dust covered most of the surfaces.
Starting on some clean boulders with a slope between 25 and 35 degrees (47% to 70% grade), the Wraith easily climbed these rocks with the USD tires. The cleats would stick in the cracks and crevices, firmly holding the tire in position.
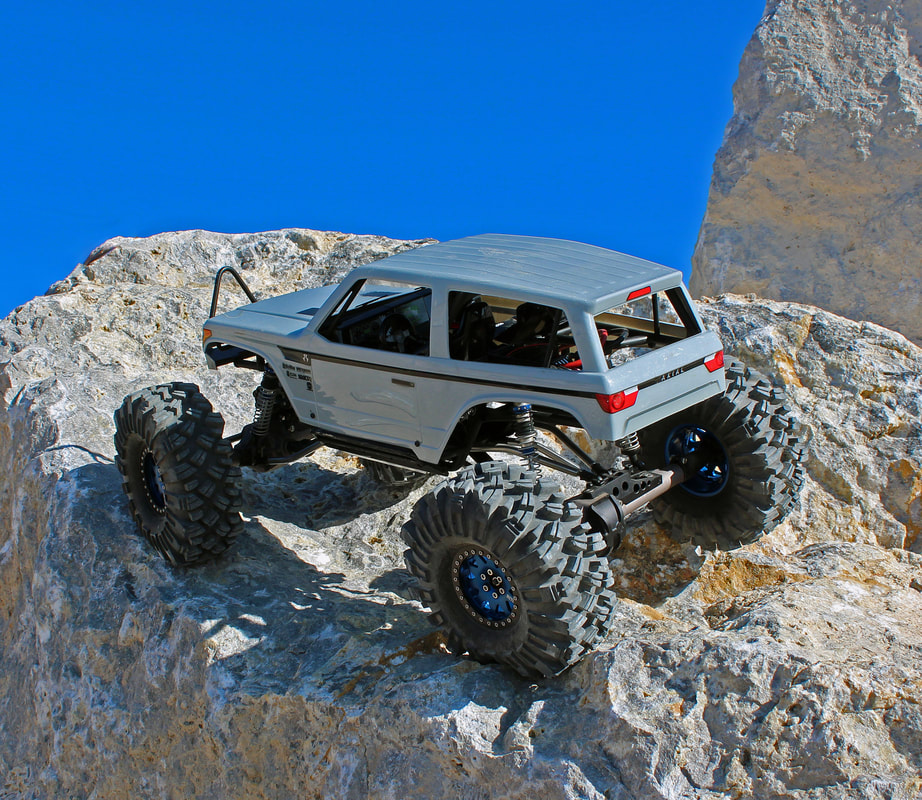 Working the edge on this block.
Working multiple lines up each rock, I was curious how much traction would be lost as the truck leaned from side to side.
Most of the time the suspension would allow the truck to lean a fair amount while keeping the tire planted. With the two-stage foam, I noticed the tire would flex and form to the rock much better on the off-center lines.
The firmer inner foam and thick cleats on the sidewall prevented the tire from folding around the wheel due to the weight and angle.
Moving along the rocks, I started working steeper and steeper rocks, forcing the USD’s to really claw their way up the surface.
In some spots on the boulders, all four tires would spin on the granite surface until they rubbed off enough of the fine white dust covering the rock’s surface.
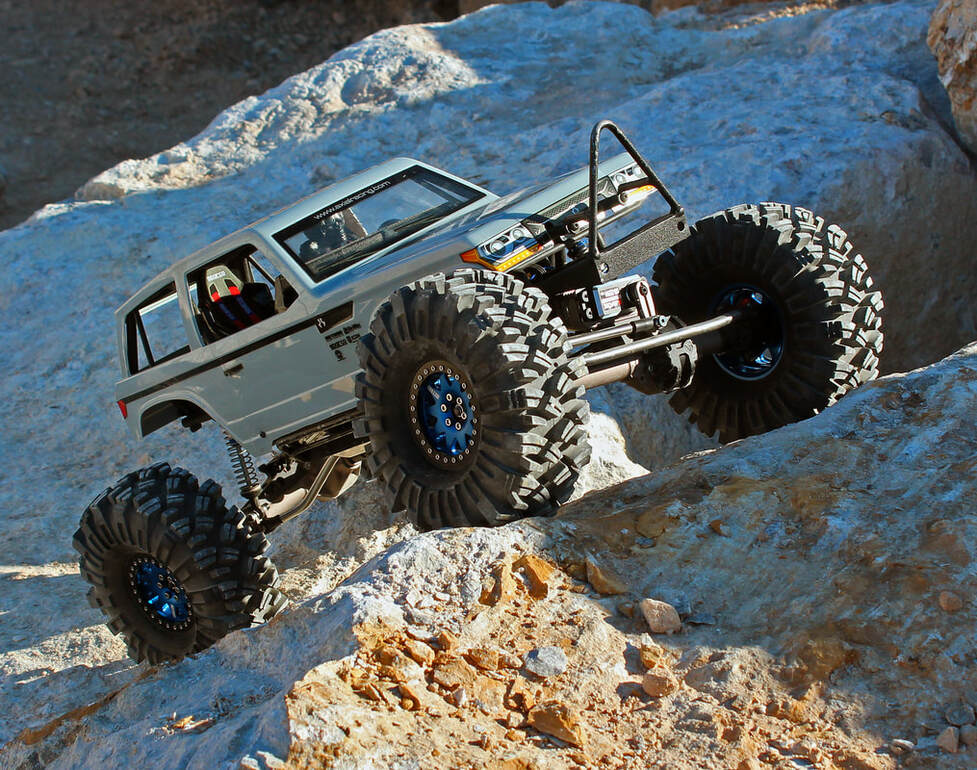 Stepping between a few rocks.
With hundreds of large boulders to pick from, I could find just about any angle to crawl, but unfortunately even the largest of boulders were no more than five feet tall, which really only leaves you about three feet of crawling area where all four tires are engaged.
Helping the Wraith to cope with these radical slope changes were many small divots and bumps on the granite’s surface which provided plenty of “toe holds” for the USD’s cleats to grip.
Paired with the Hobbywing AXE 540 crawler motor, the Wraith would inch its way up most of boulders without any loss of traction or power.
In a few spots I was able to crawl from rock to rock, and the Wraith really impressed me with the Pro Line Racing suspension setup.
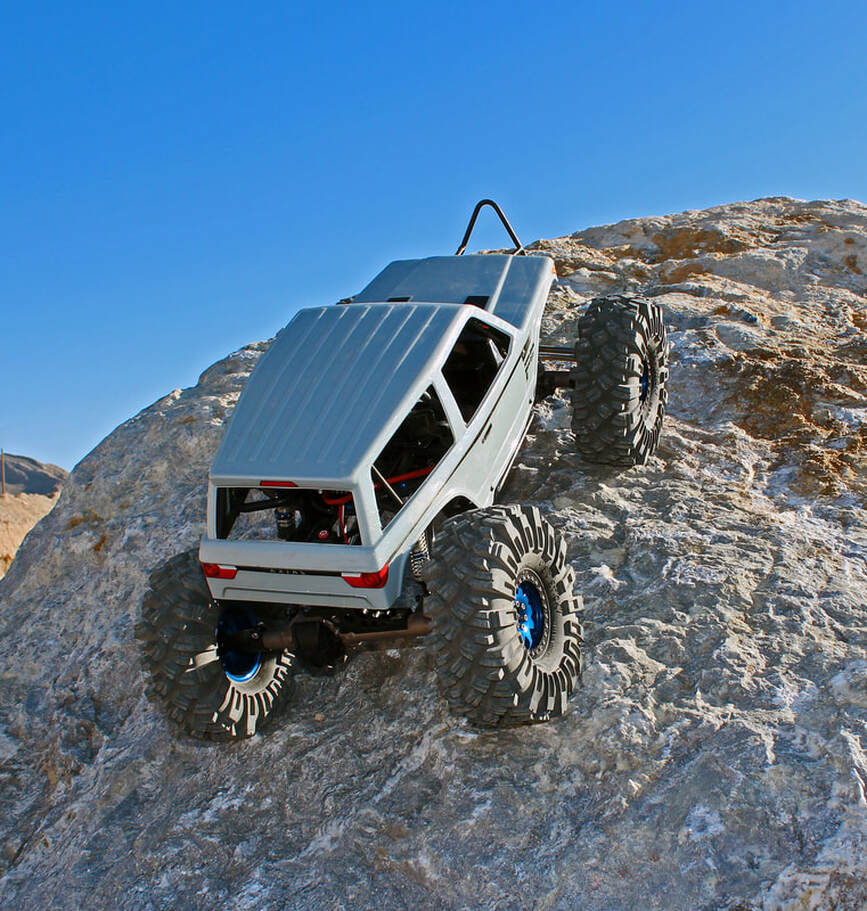 This was a tough climb; steep and dusty.
After a few hours on the granite boulders, I came away rather impressed with their performance.
On the freshly exposed granite surfaces, the tires would really stick, finding traction on slopes with angles approaching 55 degrees (143 grade).
Because the rocks are not perfectly flat, some of the larger boulders would have a slope change from 20 degrees to past 50 degrees (36 to 119 grade) within very short distance.
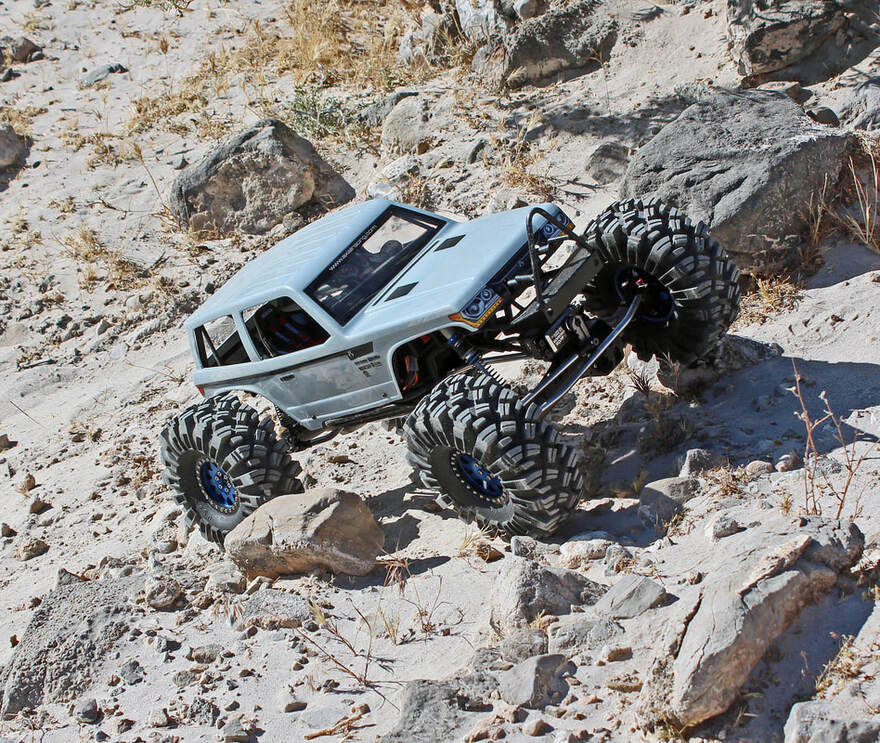 Another great run to the top.
After running the USD Sticky tires over a period of five weeks at a number of different locations and terrain, I couldn’t find anything I didn’t like about these tires.
There was nothing that I encountered where the USD didn’t perform either to my expectations or beyond them.
From fine sand to solid rock, the large cleats provide enormous traction for virtually any trail condition.
Their grip on large technical rock is excellent with the large, soft cleats grabbing hold of the rock edges. In the softer, loose terrain, the USD’s dig in deep and will get you to the top of some very challenging hills. I’m still surprised I made it up a few of the steep stand-covered dirt slopes during testing.
Like many large 2.2” tires, you can achieve very good performance with basic single-stage foams. The heavy sidewalls prevent any excessive folding of the tire when on a hillside or angled slope. That said, I did notice a distinct performance improvement on technical rock with two-stage foams, and I think they are worth considering if you purchase a set of USD’s for your crawler. I will continue to run two-stage foams with these tires on the Wraith.
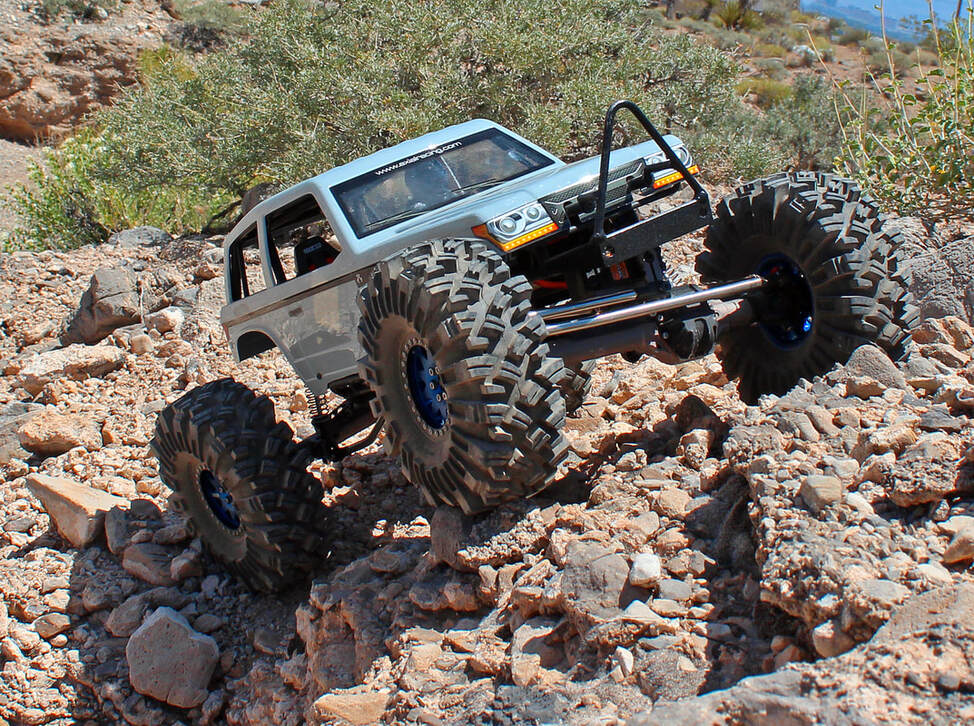 The terrain USD Stickys were made for.
In regards to the shorter inner cleats on the edges, later on I will experiment with shortening these to create a bit more space for the larger cleats to gain traction on loose soil conditions.
There are a good number of small sharp rocks on the trail, so shortening them versus complete removal will still provide some level of protection for the tire’s surface.
I had initially considered siping the sidewall cleats, but with the two-stage foams in the tires, they performed quite well on both the solid rock and loose surfaces, so I will probably skip that for now.
As for the construction of the tire, the quality is excellent with an attention to detail rarely seen in RC tires. The rubber compound of the tire is soft and very flexible, and the tire bead quality is as good as it gets.
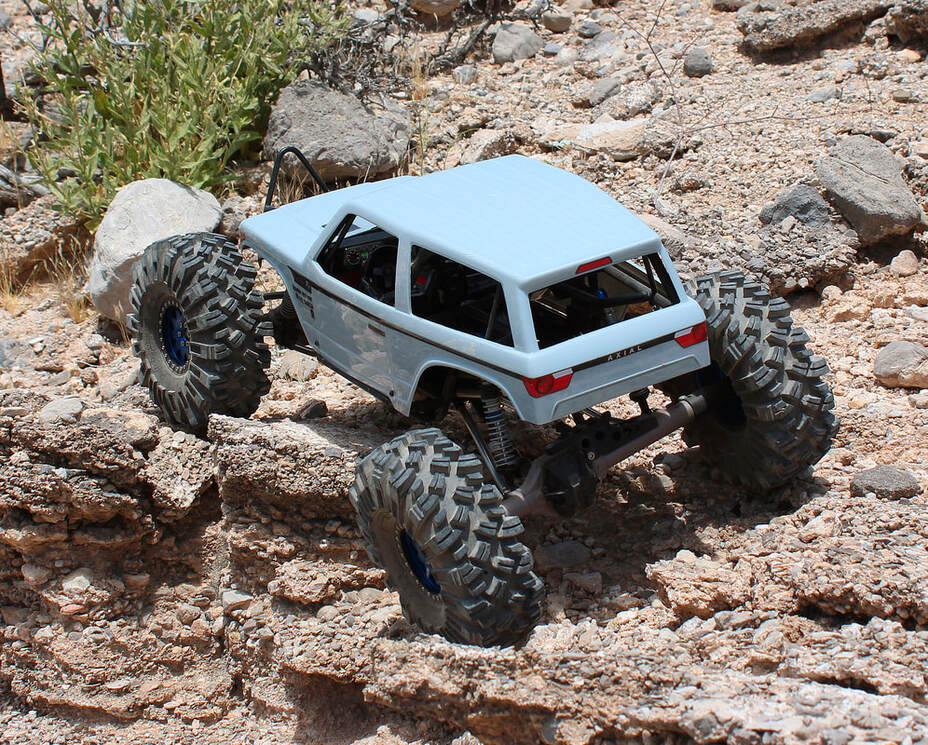 Desert concrete is in a constant state of erosion.
I find the USD tires best suited for loose, rocky terrain and challenging technical rock crawling; basically any kind of terrain to be found in the Mojave Desert.
Their height does raise the CG of the vehicle compared to some other tires, so keep that in mind when you start to round steep corners on the rock.
While I didn’t get a chance to run these in sticky mud, I can’t imagine they would struggle in any way.
The large cleats will function similar to swamp tires and should provide plenty of traction in such conditions.
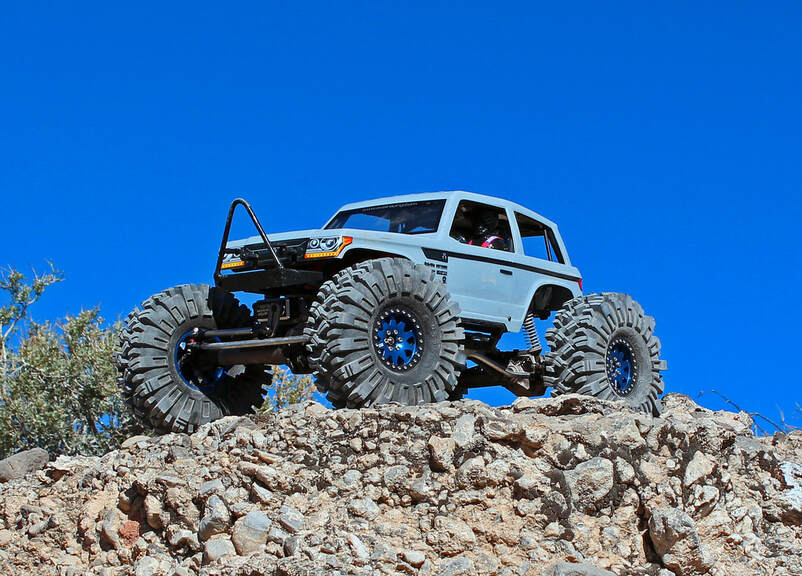 Finishing the day on top.
Tire Specifications
Tire Spec Size: 5.75” / 2.25” / 2.2”
Tire Weight: 220 grams
Directional: Yes
Internal Rib: Yes
Price: $44.00 per set (2 tires)
Tire Compound Options: One for crawling and trail, one for U4 racing.
Testing Setup
Modified Axial Wraith, 8.2 lbs
Motor / ESC: Hobbywing XERUN AXE 540 crawler motor and ESC combo.
Battery: Spektrum 2s 50c / 5000 mah.
Notes
- I have no affiliation with Team Ottsix Racing. I paid full retail for my tires, plus shipping. I communicated with Ottsix on a few technical questions via email, but they did not have any influence or control over the testing conditions or documentation of the results.
- After each testing session, I removed small rocks stuck in the cleats and rinsed off any dust or dirt remaining on the tires.